Rack Mounting
You can mount the security appliance in any standard size,
CAUTION Do not overload the power outlet or circuit when installing multiple devices in a rack.
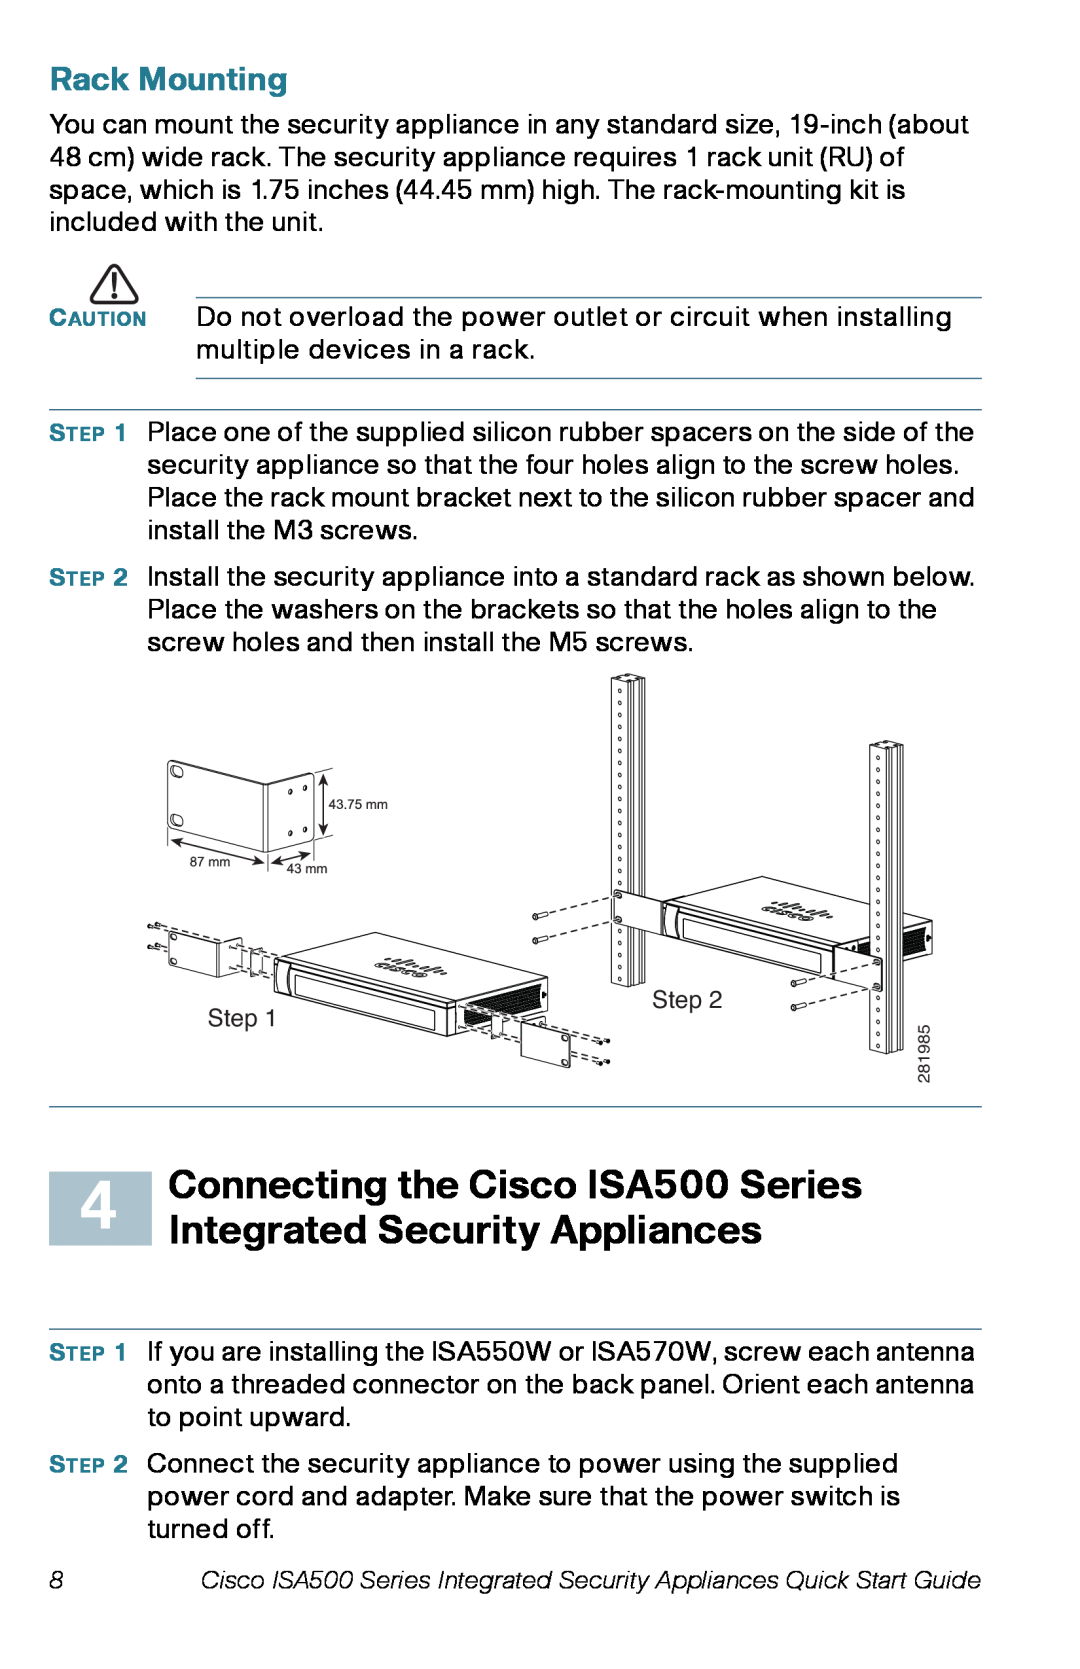
STEP 1 Place one of the supplied silicon rubber spacers on the side of the security appliance so that the four holes align to the screw holes. Place the rack mount bracket next to the silicon rubber spacer and install the M3 screws.
STEP 2 Install the security appliance into a standard rack as shown below. Place the washers on the brackets so that the holes align to the screw holes and then install the M5 screws.
Step 2
Step 1
| Connecting the Cisco ISA500 Series | |
4 | ||
Integrated Security Appliances |
281985
STEP 1 If you are installing the ISA550W or ISA570W, screw each antenna onto a threaded connector on the back panel. Orient each antenna to point upward.
STEP 2 Connect the security appliance to power using the supplied power cord and adapter. Make sure that the power switch is turned off.
8 | Cisco ISA500 Series Integrated Security Appliances Quick Start Guide |