STEP 3 For a DSL or cable modem, or other WAN connectivity devices, connect an Ethernet network cable from the device to the WAN port on the back panel. Cisco strongly recommends using Category 5E or better cable.
STEP 4 (Optional) For network devices, connect an Ethernet network cable from the network device to an available LAN port on the back panel.
STEP 5 Power on the connected devices.
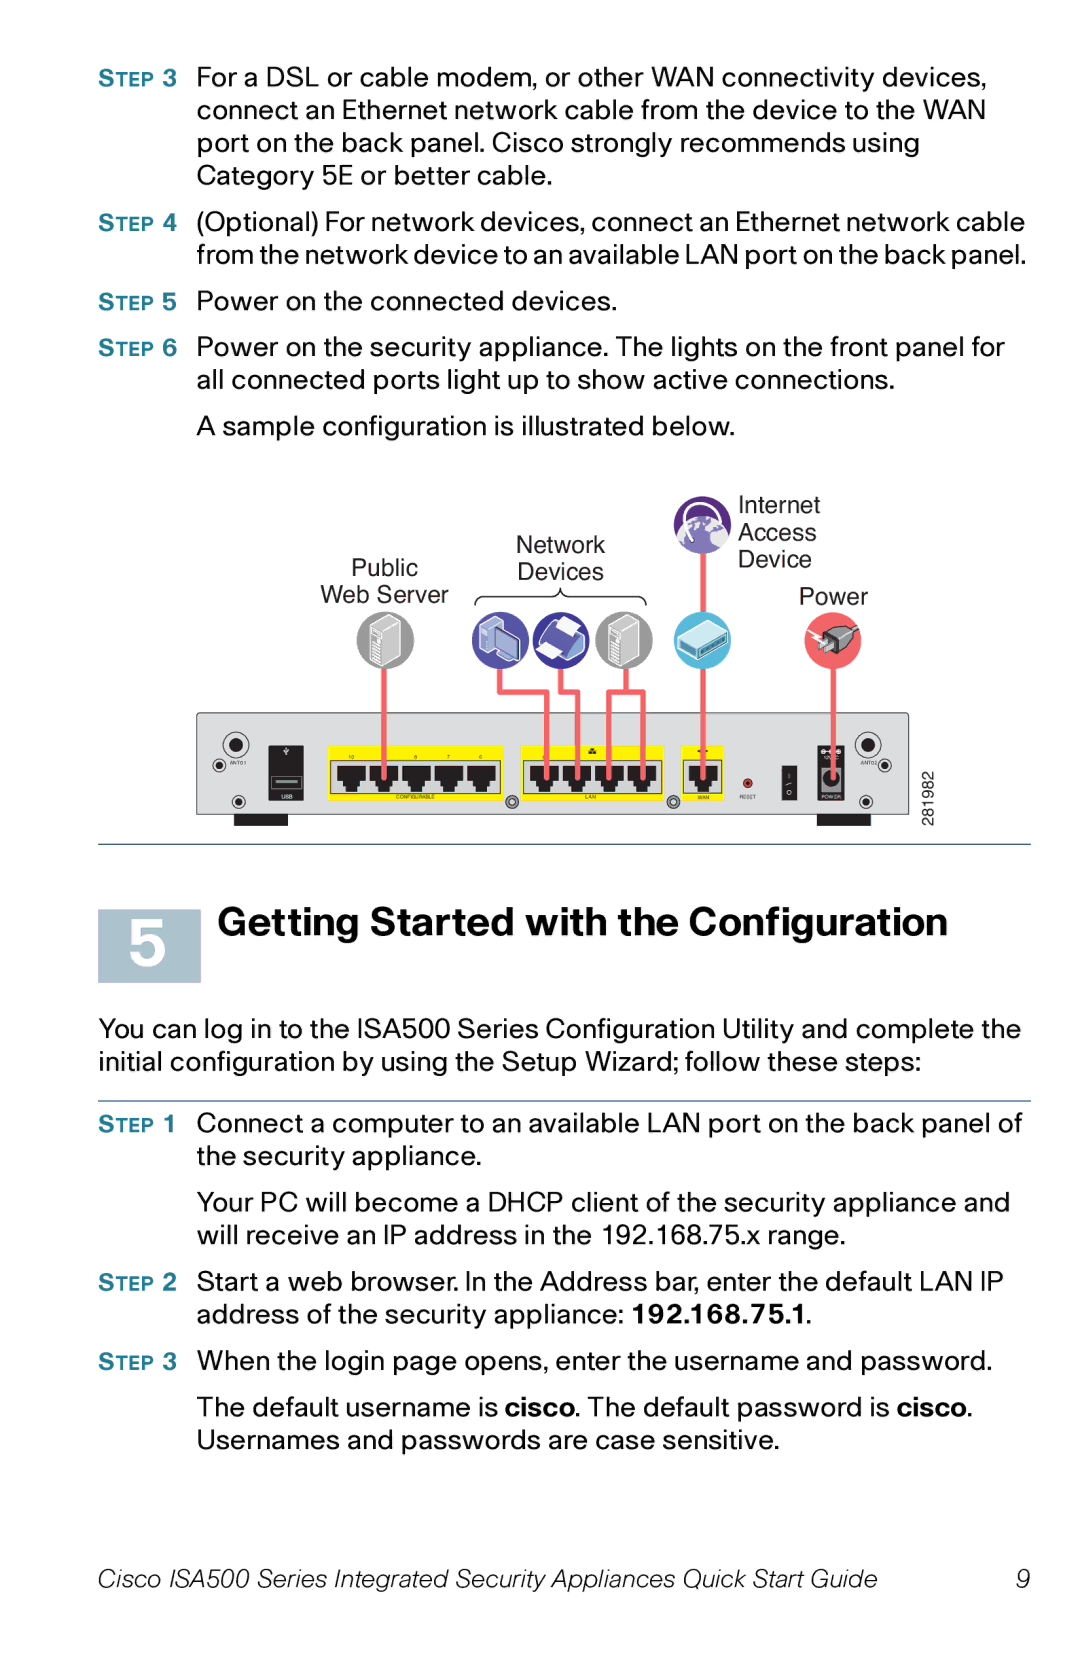
STEP 6 Power on the security appliance. The lights on the front panel for all connected ports light up to show active connections.
A sample configuration is illustrated below.
|
| Internet | |
| Network | Access | |
Public | Device | ||
Devices | |||
| |||
Web Server |
| Power |
ANT01
10 |
| 9 | 8 | 7 | 6 |
|
|
|
|
|
|
|
|
|
|
| |||||
| 5 |
| 4 |
| 3 |
|
| 2 |
| ||||||||||||
|
|
|
|
|
|
|
|
|
|
|
|
|
|
|
|
|
|
|
|
|
|
|
|
|
|
|
|
|
|
|
|
|
|
|
|
|
|
|
|
|
|
|
|
|
|
|
| CONFIGURABLE |
|
|
|
|
|
|
|
| LAN |
|
|
| |||||
1
WANRESET
I
O
12VDC
ANT02
POWER
281982
5 Getting Started with the Configuration
You can log in to the ISA500 Series Configuration Utility and complete the initial configuration by using the Setup Wizard; follow these steps:
STEP 1 Connect a computer to an available LAN port on the back panel of the security appliance.
Your PC will become a DHCP client of the security appliance and will receive an IP address in the 192.168.75.x range.
STEP 2 Start a web browser. In the Address bar, enter the default LAN IP address of the security appliance: 192.168.75.1.
STEP 3 When the login page opens, enter the username and password.
The default username is cisco. The default password is cisco. Usernames and passwords are case sensitive.
Cisco ISA500 Series Integrated Security Appliances Quick Start Guide | 9 |