OWNER’S MANUAL/INSTALLATION GUIDE | |
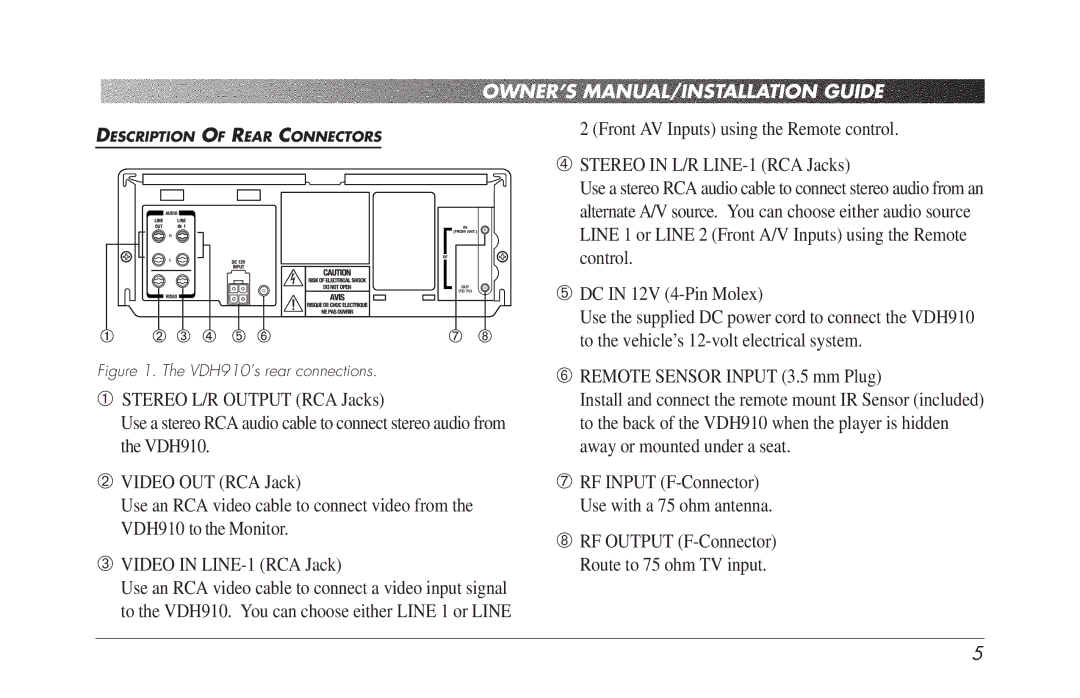
DESCRIPTION OF REAR CONNECTORS | 2 (Front AV Inputs) using the Remote control. |
| 4 STEREO IN L/R |
| Use a stereo RCA audio cable to connect stereo audio from an |
| alternate A/V source. You can choose either audio source |
| LINE 1 or LINE 2 (Front A/V Inputs) using the Remote |
| control. |
| 5 DC IN 12V |
| Use the supplied DC power cord to connect the VDH910 |
| to the vehicle’s |
Figure 1. The VDH910’s rear connections. | 6 REMOTE SENSOR INPUT (3.5 mm Plug) |
1 STEREO L/R OUTPUT (RCA Jacks) | Install and connect the remote mount IR Sensor (included) |
Use a stereo RCA audio cable to connect stereo audio from | to the back of the VDH910 when the player is hidden |
the VDH910. | away or mounted under a seat. |
2 VIDEO OUT (RCA Jack) | 7 RF INPUT |
Use an RCA video cable to connect video from the | Use with a 75 ohm antenna. |
VDH910 to the Monitor. | 8 RF OUTPUT |
| |
3 VIDEO IN | Route to 75 ohm TV input. |
Use an RCA video cable to connect a video input signal |
|
to the VDH910. You can choose either LINE 1 or LINE |
|
5
