KETTLE VENTING
INSTRUCTIONS
|
| 150 | 200 |
| Pressure |
| 100 | 250 |
| ||
|
| 20 |
| Gauge | |
50 | 30 |
| |||
10 | 40 | 300 |
| ||
|
|
| |||
|
|
| Pressure | ||
0 | I |
| 50 |
| |
0 |
|
|
|
| |
| R |
|
| 350 | Relief |
| A |
|
| ||
| E |
|
|
| |
| T |
|
|
|
|
| N |
| 60 |
| Valve |
| V |
| 400 | ||
|
| psi | |||
kPa
The following venting procedure should be followed when the Vacuum/Pressure Gauge needle is in the "VENT AIR" zone:
NOTE: Check for and eliminate leaks prior to venting (See Repairing Leaks in Steam Jacketed Kettle Fittings.
DANGER: PRESSURE RELIEF VALVE WILL EXHAUST HIGH TEMPERATURE STEAM. CONTACT WITH SKIN COULD RESULT IN SERIOUS BURNS. KEEP FACE,
HANDS AND BODY CLEAR OF DISCHARGE.
DANGER: WORKING ON MACHINES
WITH POWER COULD RESULT IN
SEVERE ELECTRICAL SHOCK.
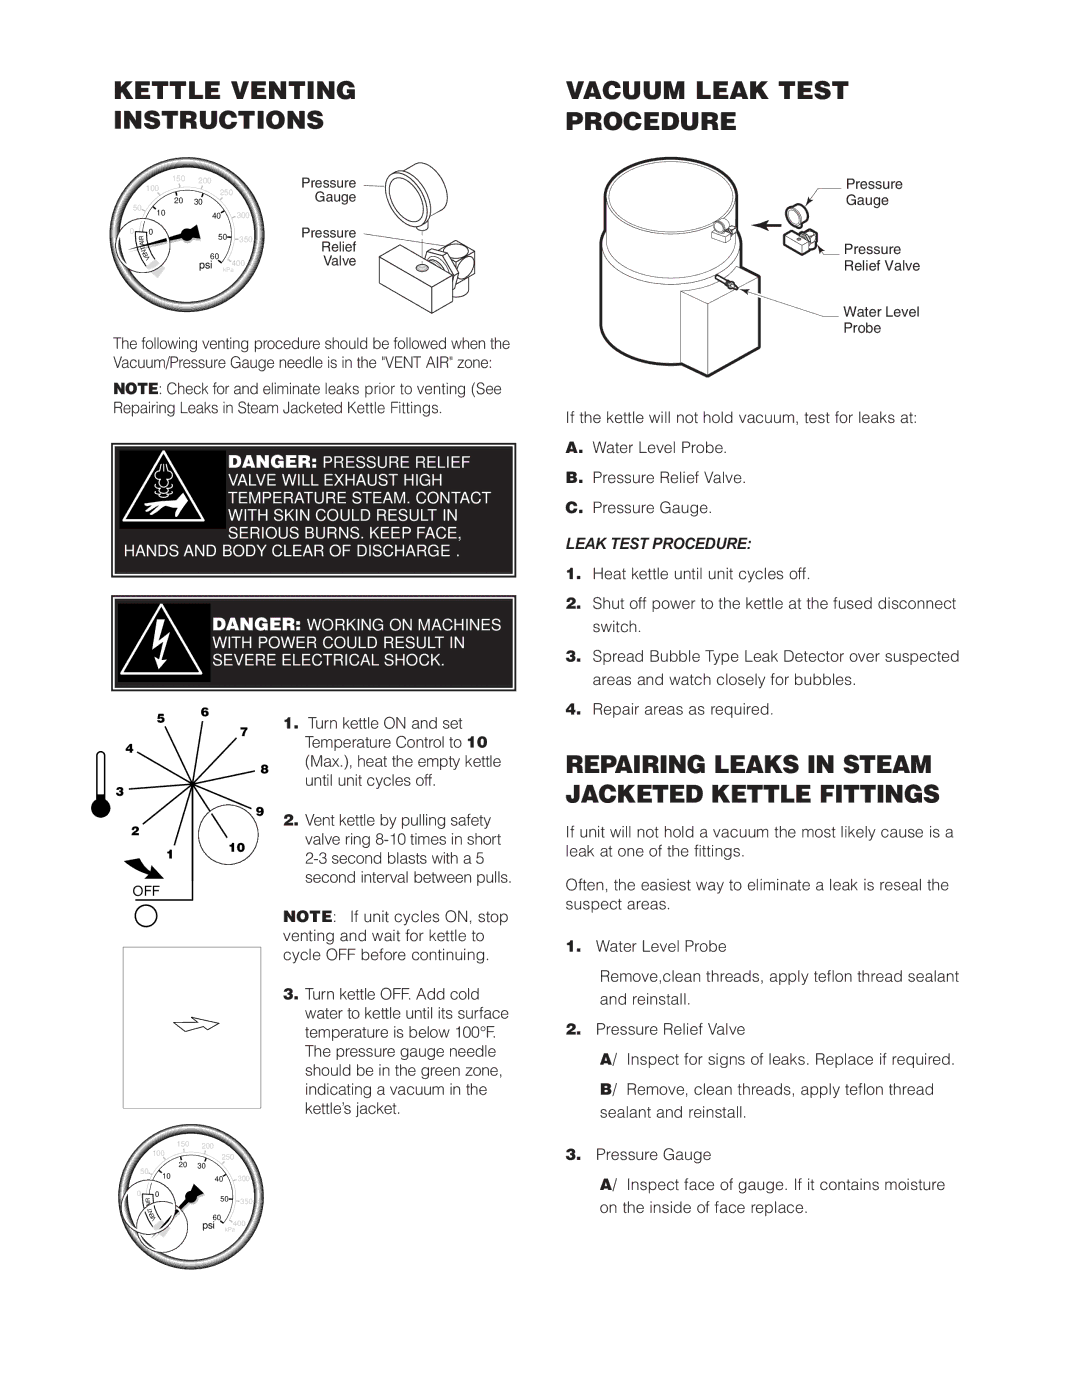
VACUUM LEAK TEST
PROCEDURE
Pressure
![]() Gauge
Gauge
Pressure |
Relief Valve |
![]() Water Level
Water Level
Probe
If the kettle will not hold vacuum, test for leaks at:
A.Water Level Probe.
B.Pressure Relief Valve.
C.Pressure Gauge.
LEAK TEST PROCEDURE:
1. | Heat kettle until unit cycles off. |
2. | Shut off power to the kettle at the fused disconnect |
| switch. |
3. | Spread Bubble Type Leak Detector over suspected |
| areas and watch closely for bubbles. |
5 6
7
4
8
3 |
|
| 9 |
2 |
|
1 | 10 |
| |
OFF |
|
1.Turn kettle ON and set Temperature Control to 10 (Max.), heat the empty kettle until unit cycles off.
2.Vent kettle by pulling safety valve ring
4. Repair areas as required. |
REPAIRING LEAKS IN STEAM JACKETED KETTLE FITTINGS
If unit will not hold a vacuum the most likely cause is a leak at one of the fittings.
Often, the easiest way to eliminate a leak is reseal the suspect areas.
NOTE: If unit cycles ON, stop venting and wait for kettle to cycle OFF before continuing.
3.Turn kettle OFF. Add cold water to kettle until its surface temperature is below 100°F. The pressure gauge needle should be in the green zone, indicating a vacuum in the kettle’s jacket.
| 150 | 200 |
| |
100 | 250 |
| ||
| 20 |
| ||
50 | 30 |
| ||
10 | 40 | 300 | ||
| ||||
|
| |||
0 |
| 50 |
| |
I |
|
| ||
R |
|
| 350 | |
A |
|
| ||
T |
|
|
| |
N |
| 60 |
| |
E |
|
|
| |
V |
|
|
| |
1.Water Level Probe
Remove,clean threads, apply teflon thread sealant
and reinstall.
2.Pressure Relief Valve
A/ Inspect for signs of leaks. Replace if required.
B/ Remove, clean threads, apply teflon thread
sealant and reinstall.
3.Pressure Gauge
A/ Inspect face of gauge. If it contains moisture
on the inside of face replace.
psi 400
kPa