Operating Your Radio | Getting Started |
Getting Started | • |
| |
MR HH325 Radio | Refer to the foldout at the front of this manual to identify the |
| various controls and indicators on your radio. Throughout |
| this manual you will be instructed to “Press” or to “Press |
| and Hold” various buttons (except “Push to Talk”) on the |
| radio. “Press” means a momentary press of approximately |
| one (1) second. “Press and Hold” means to hold the button |
| down for approximately three (3) seconds. |
| Whenever you press any button except the Talk button on |
| your radio, a brief tone (beep) will sound to confirm the |
| button press. With all button presses, the appropriate icon |
| will appear on the LCD and the backlight will turn On. The |
| backlight will stay on for 10 seconds after the button is |
| released. |
| At times, you will hear two (2) other sounds. Two (2) beeps |
| will sound to confirm your setting changes and three (3) |
| beeps will sound to notify you of an error. |
Operating Your Radio
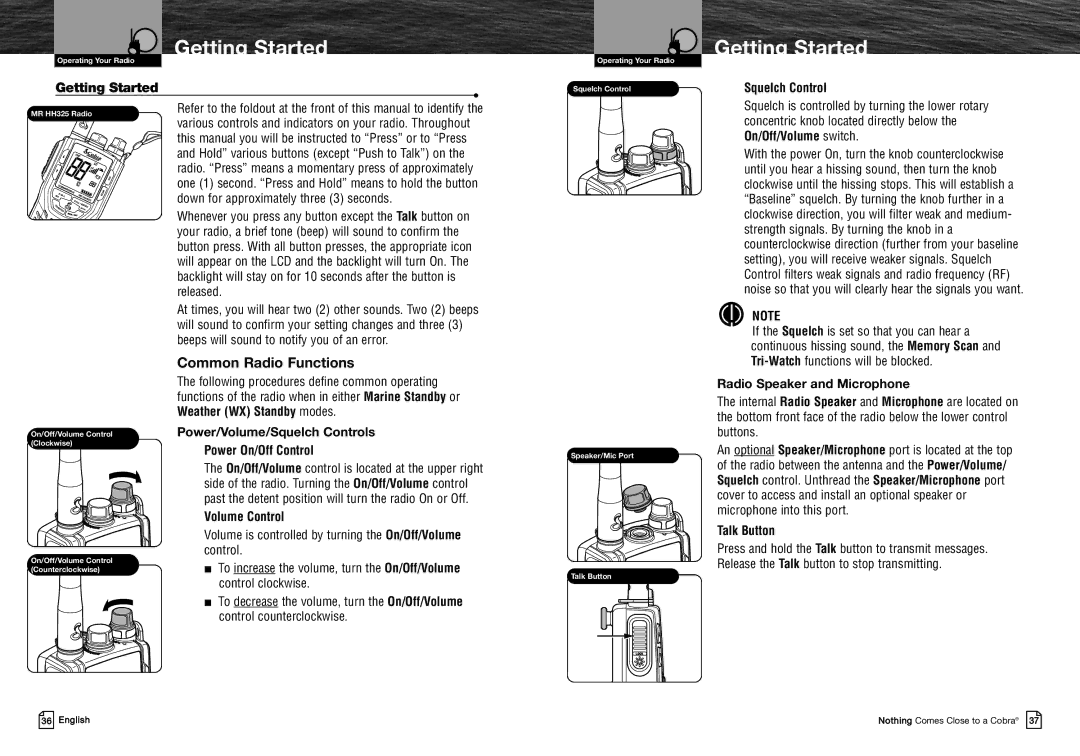
Squelch Control
Getting Started
Squelch Control
Squelch is controlled by turning the lower rotary concentric knob located directly below the On/Off/Volume switch.
With the power On, turn the knob counterclockwise until you hear a hissing sound, then turn the knob clockwise until the hissing stops. This will establish a “Baseline” squelch. By turning the knob further in a clockwise direction, you will filter weak and medium- strength signals. By turning the knob in a counterclockwise direction (further from your baseline setting), you will receive weaker signals. Squelch Control filters weak signals and radio frequency (RF) noise so that you will clearly hear the signals you want.
NOTE
If the Squelch is set so that you can hear a continuous hissing sound, the Memory Scan and
On/Off/Volume Control (Clockwise)
On/Off/Volume Control (Counterclockwise)
Common Radio Functions
The following procedures define common operating functions of the radio when in either Marine Standby or Weather (WX) Standby modes.
Power/Volume/Squelch Controls
Power On/Off Control
The On/Off/Volume control is located at the upper right side of the radio. Turning the On/Off/Volume control past the detent position will turn the radio On or Off.
Volume Control
Volume is controlled by turning the On/Off/Volume control.
■To increase the volume, turn the On/Off/Volume control clockwise.
■To decrease the volume, turn the On/Off/Volume control counterclockwise.
Speaker/Mic Port
Talk Button
Radio Speaker and Microphone
The internal Radio Speaker and Microphone are located on the bottom front face of the radio below the lower control buttons.
An optional Speaker/Microphone port is located at the top of the radio between the antenna and the Power/Volume/ Squelch control. Unthread the Speaker/Microphone port cover to access and install an optional speaker or microphone into this port.
Talk Button
Press and hold the Talk button to transmit messages. Release the Talk button to stop transmitting.
36 English
Nothing Comes Close to a Cobra® 37