S E T U P
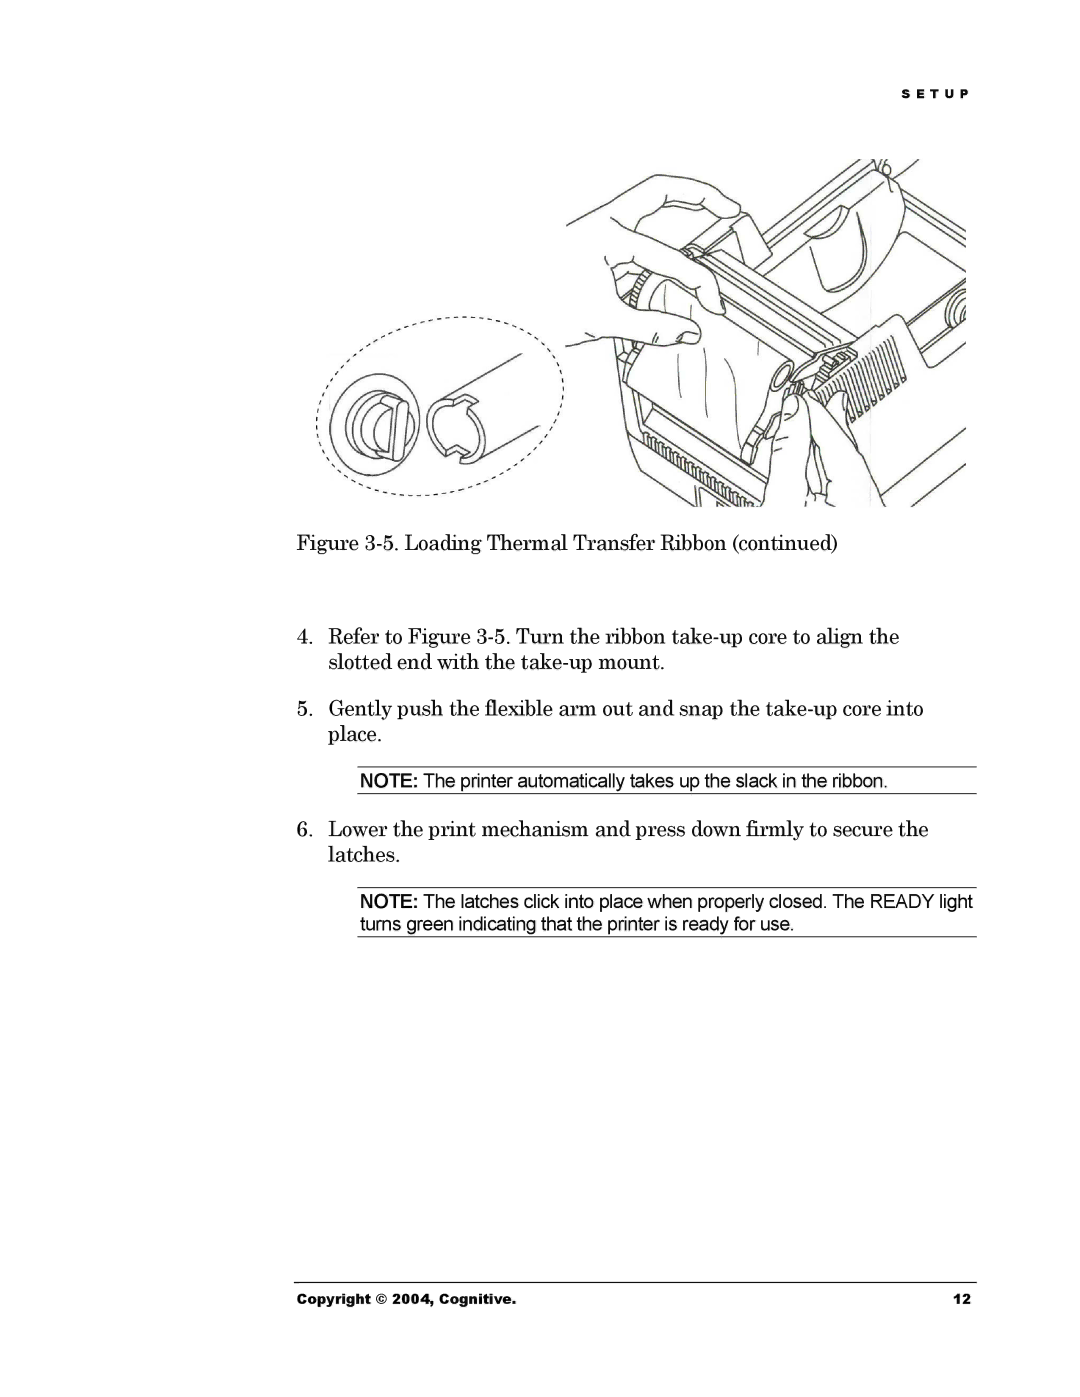
Figure 3-5. Loading Thermal Transfer Ribbon (continued)
4.Refer to Figure 3-5. Turn the ribbon take-up core to align the slotted end with the take-up mount.
5.Gently push the flexible arm out and snap the take-up core into place.
NOTE: The printer automatically takes up the slack in the ribbon.
6.Lower the print mechanism and press down firmly to secure the latches.
NOTE: The latches click into place when properly closed. The READY light turns green indicating that the printer is ready for use.
Copyright © 2004, Cognitive. | 12 |