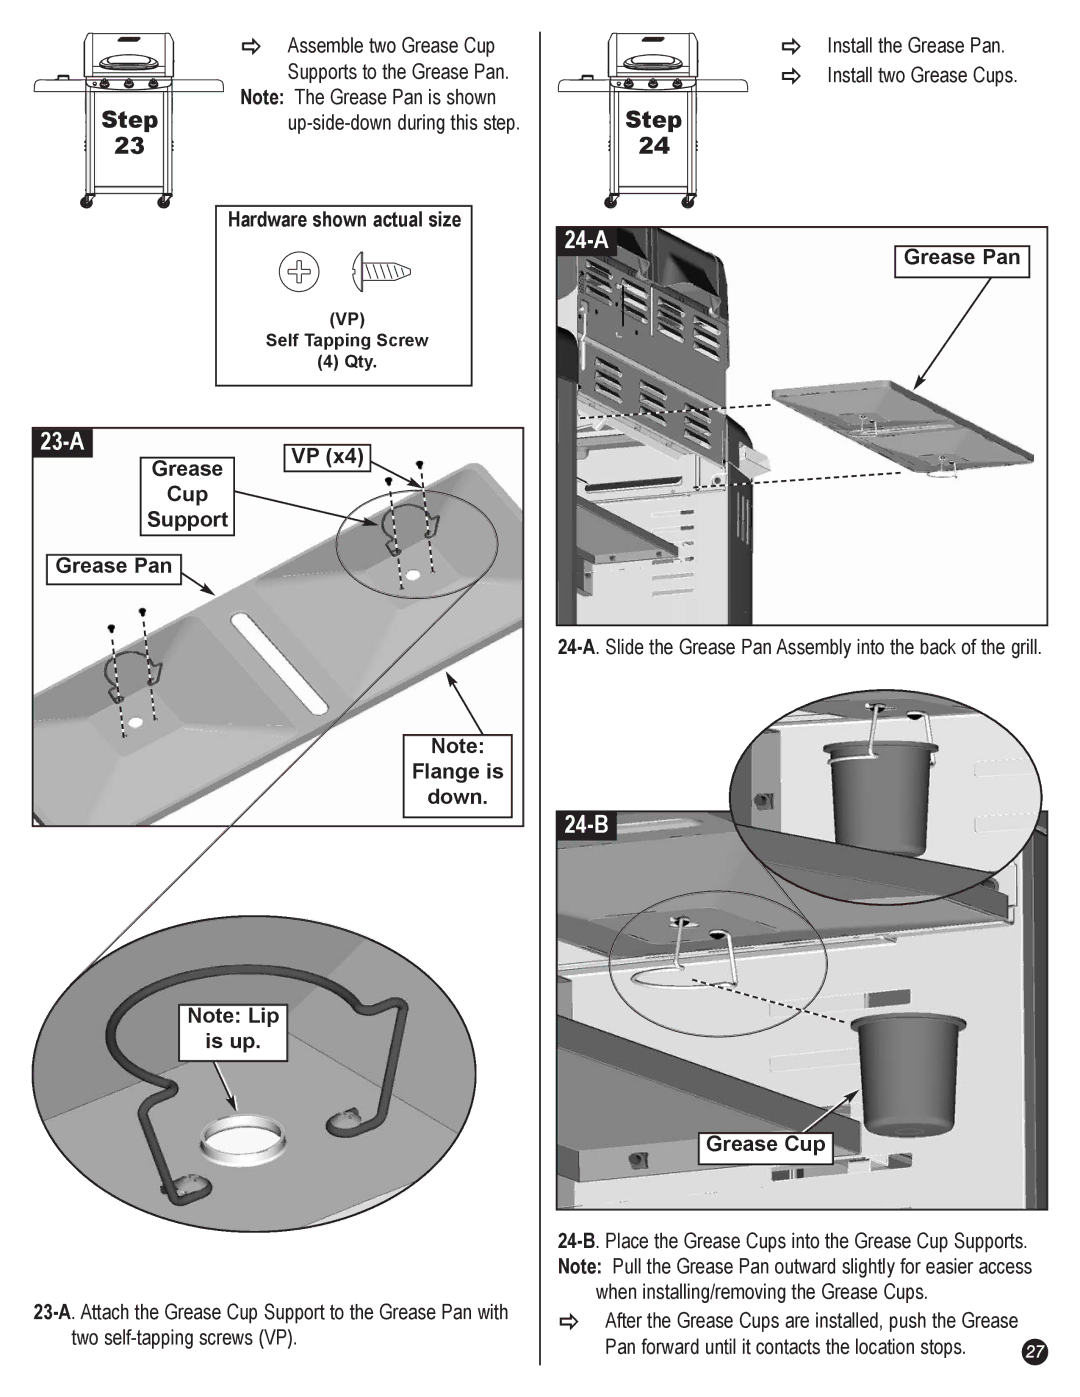
Ö | Assemble two Grease Cup |
| Supports to the Grease Pan. |
Note: The Grease Pan is shown | |
Step | |
23 |
|
Hardware shown actual size
(VP)
Self Tapping Screw
(4) Qty.
| VP (x4) | |
Grease | ||
| ||
Cup |
| |
Support |
| |
Grease Pan |
| |
| Note: | |
| Flange is | |
| down. |
Note: Lip
is up.
Ö | Install the Grease Pan. |
Ö | Install two Grease Cups. |
| Step |
| 24 |
| Grease Pan |
|
24-B
Grease Cup
when installing/removing the Grease Cups.
ÖAfter the Grease Cups are installed, push the Grease
Pan forward until it contacts the location stops. | 27 |
