Coleman 5600 manual 26-A, 26-B, 26-C

Models: 5600

1 44
Download 44 pages 50.45 Kb
Page 30
Image 30

NOTE: Step 26 applies to you only if your grill is set up from the factory to use LP GAS. If your grill is set up from the factory to use NATURAL GAS, skip to Step 27.

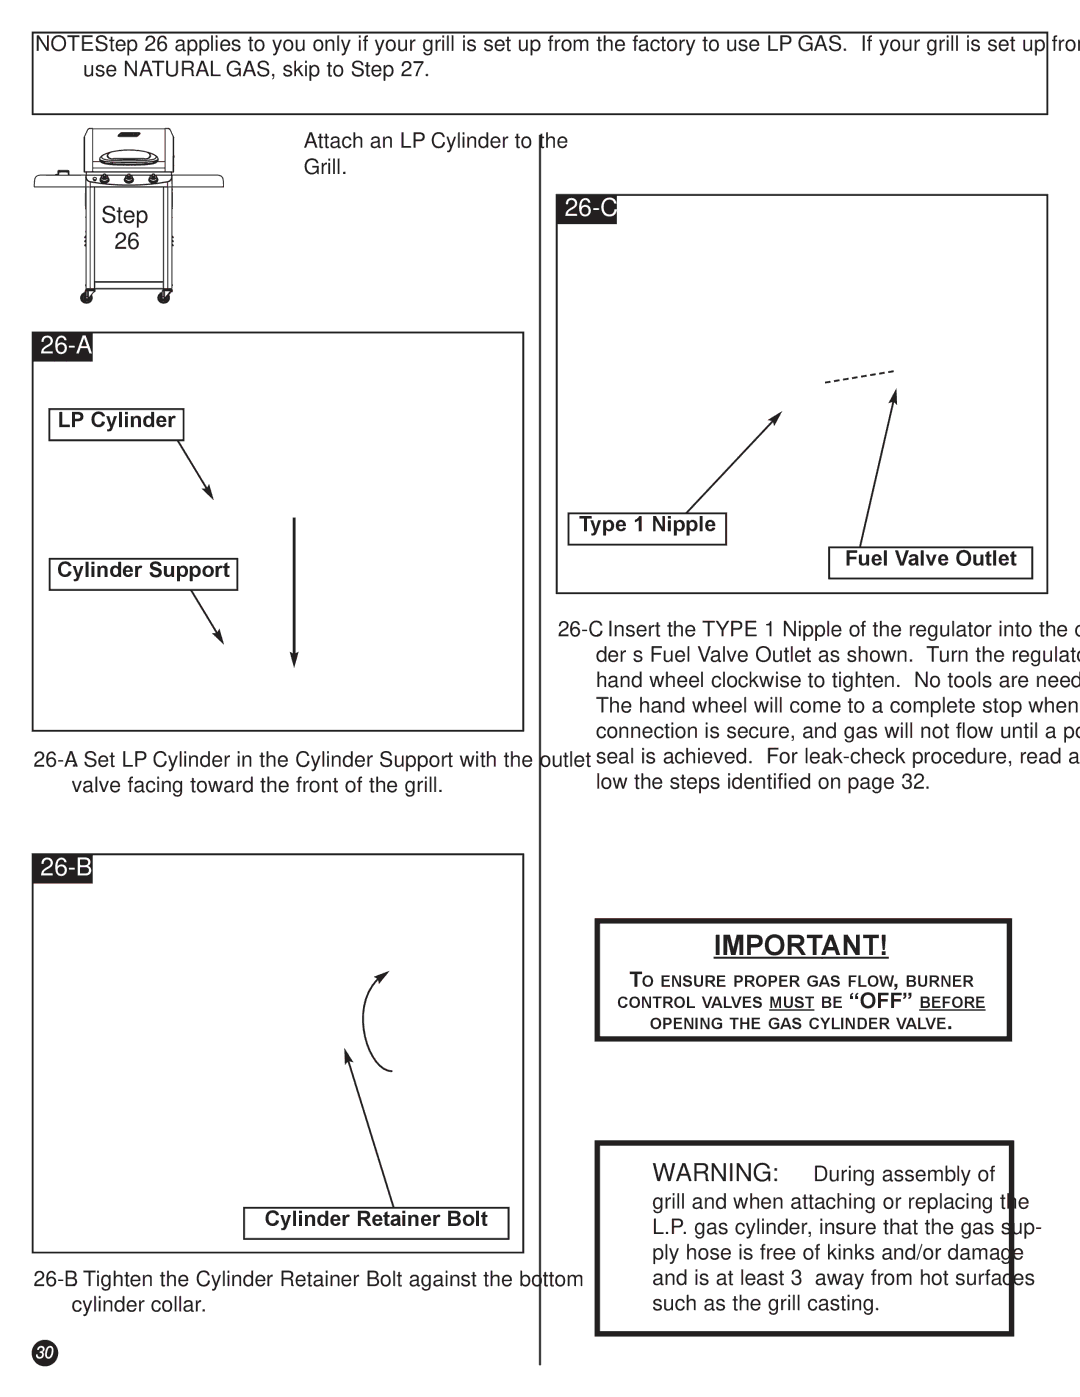
Ö Attach an LP Cylinder to the Grill.

Step

26

26-A

LP Cylinder

Cylinder Support

26-A. Set LP Cylinder in the Cylinder Support with the outlet valve facing toward the front of the grill.

26-B

Cylinder Retainer Bolt

26-B. Tighten the Cylinder Retainer Bolt against the bottom cylinder collar.

26-C

Type 1 Nipple

Fuel Valve Outlet

26-C. Insert the TYPE 1 Nipple of the regulator into the cylin- der’s Fuel Valve Outlet as shown. Turn the regulator hand wheel clockwise to tighten. No tools are needed. The hand wheel will come to a complete stop when the connection is secure, and gas will not flow until a positive seal is achieved. For leak-check procedure, read and fol- low the steps identified on page 32.

IMPORTANT!

TO ENSURE PROPER GAS FLOW, BURNER

CONTROL VALVES MUST BE “OFF” BEFORE

OPENING THE GAS CYLINDER VALVE.

WARNING: During assembly of grill and when attaching or replacing the L.P. gas cylinder, insure that the gas sup- ply hose is free of kinks and/or damage and is at least 3” away from hot surfaces such as the grill casting.

30

Page 30
Image 30
Coleman 5600 manual 26-A, 26-B, 26-C