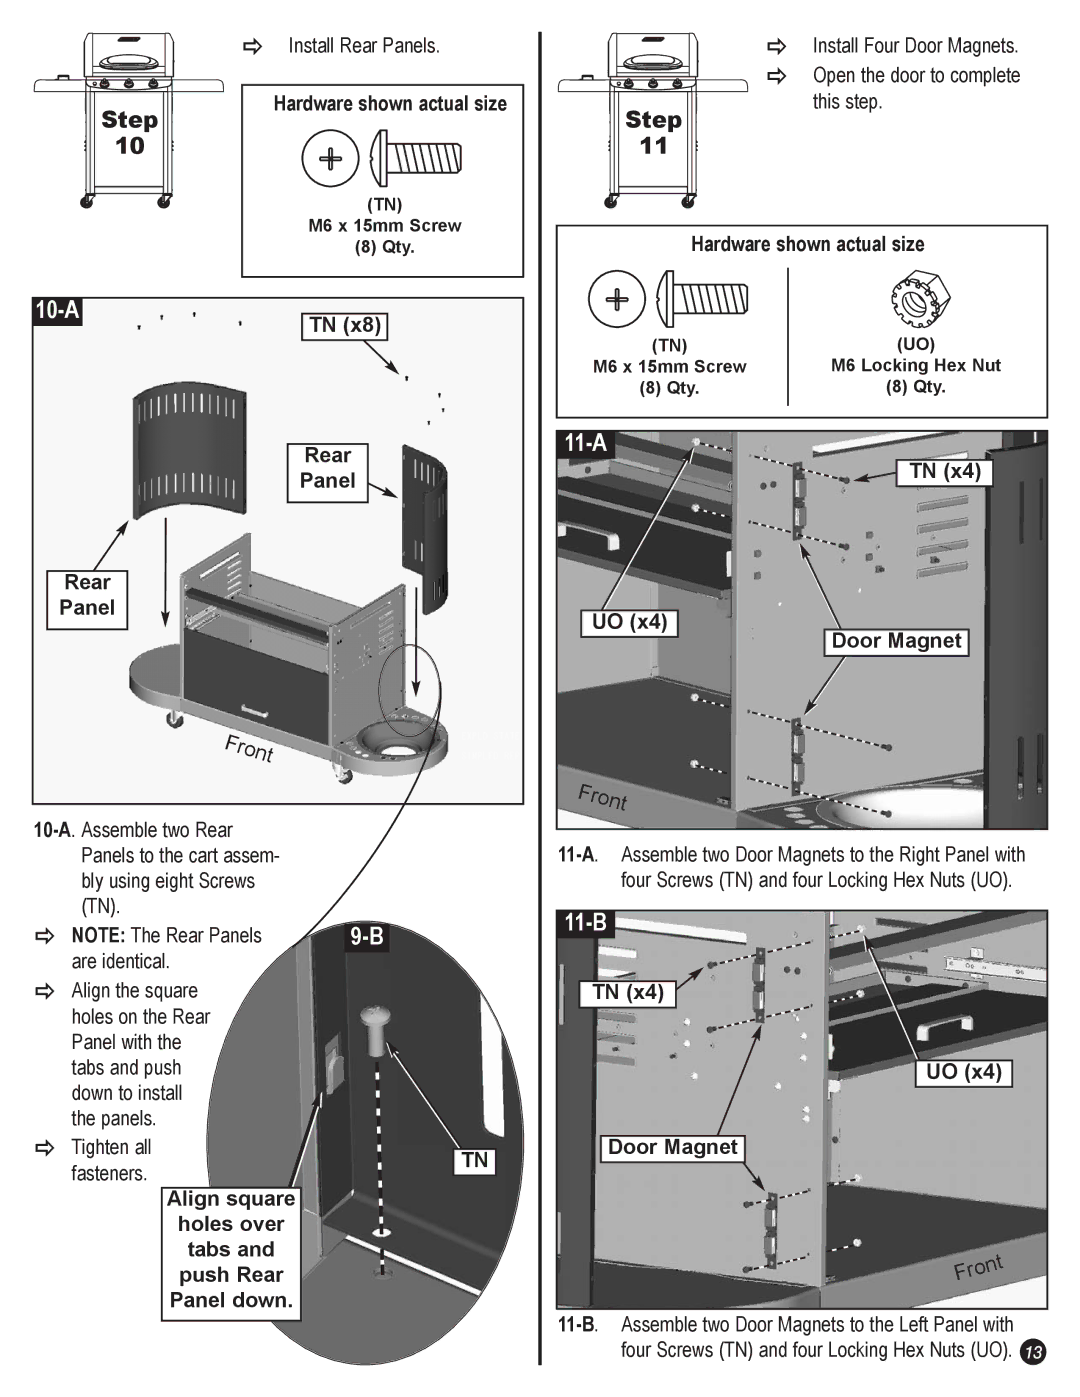
Ö Install Rear Panels.
Step | Hardware shown actual size |
| |
10 |
|
| (TN) |
| M6 x 15mm Screw |
Step
11
Ö Install Four Door Magnets.
Ö Open the door to complete this step.
(8) Qty. |
| TN (x8) |
|
Rear
Panel 
Rear
Panel
Front
Ö NOTE: The Rear Panels |
|
are identical. |
|
ÖAlign the square holes on the Rear Panel with the tabs and push down to install the panels.
Ö | Tighten all | TN |
| fasteners. | |
| Align square | |
|
| |
|
| holes over |
|
| tabs and |
|
| push Rear |
|
| Panel down. |
Hardware shown actual size
(TN) | (UO) |
M6 x 15mm Screw | M6 Locking Hex Nut |
(8) Qty. | (8) Qty. |
|
|
|
TN (x4) |
UO (x4) |
Door Magnet |
Front |
|
TN (x4) |
UO (x4) |
Door Magnet |
Front |
