
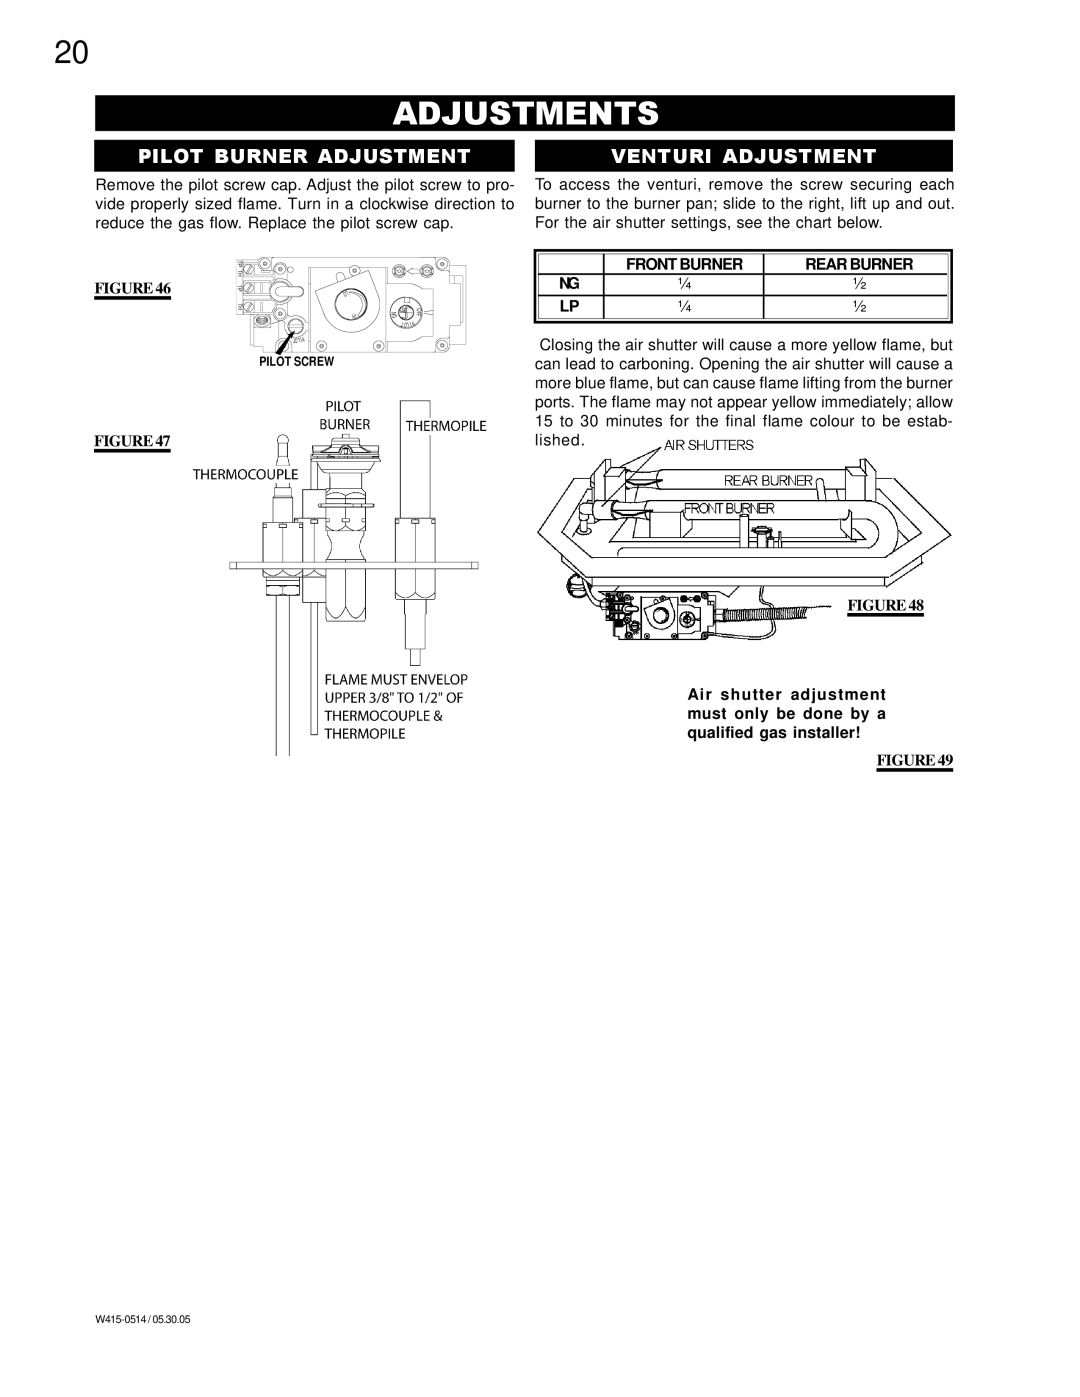
CDVS500-N, CDVS500-P specifications
The Continental CDVS500-P and CDVS500-N are advanced vehicle sensor solutions specifically designed for enhancing driver safety and facilitating automation in modern vehicles. These systems represent cutting-edge technology in the realm of automotive sensors, focusing on improving situational awareness through comprehensive environmental perception.One of the main features of the CDVS500 series is its high-resolution sensor capabilities. Both the CDVS500-P and CDVS500-N utilize sophisticated imaging technologies that enable them to capture a wide field of view with exceptional clarity. This is crucial for applications such as adaptive cruise control, lane-keeping assistance, and collision avoidance systems, where accurate detection of nearby vehicles, pedestrians, and obstacles is a priority.
In addition to high-resolution imaging, these sensors employ advanced algorithms for real-time data processing. The integration of machine learning and artificial intelligence enhances the ability of the CDVS500 systems to interpret dynamic environments. This means that they can effectively differentiate between various objects, predicting their movements and assessing potential risks with remarkable accuracy.
Another notable characteristic is the robust performance of the CDVS500-P and CDVS500-N in diverse weather conditions. They are engineered to function effectively in rain, fog, and glare, ensuring reliable operation regardless of environmental variables. This resilience is vital for maintaining safety standards in vehicular automation, making these sensors a trusted choice for various automotive applications.
The connectivity features of the CDVS500 series also set them apart. They support seamless integration with existing vehicle systems and can communicate with other sensors to create a comprehensive view of the vehicle's surroundings. This interoperability is essential for next-generation driver assistance systems, promoting an ecosystem where multiple inputs are synthesized into cohesive feedback for the driver or autonomous driving system.
Moreover, both models are designed with a focus on energy efficiency and a compact form factor. This design not only saves space within the vehicle but also plays a role in extending the overall lifespan of the sensor by reducing thermal strain.
In summary, the Continental CDVS500-P and CDVS500-N represent a significant leap in automotive sensor technology, characterized by high-resolution imaging, advanced processing algorithms, robust environmental performance, and excellent connectivity. These attributes position them as vital components in the ongoing evolution toward safer and more autonomous driving experiences.