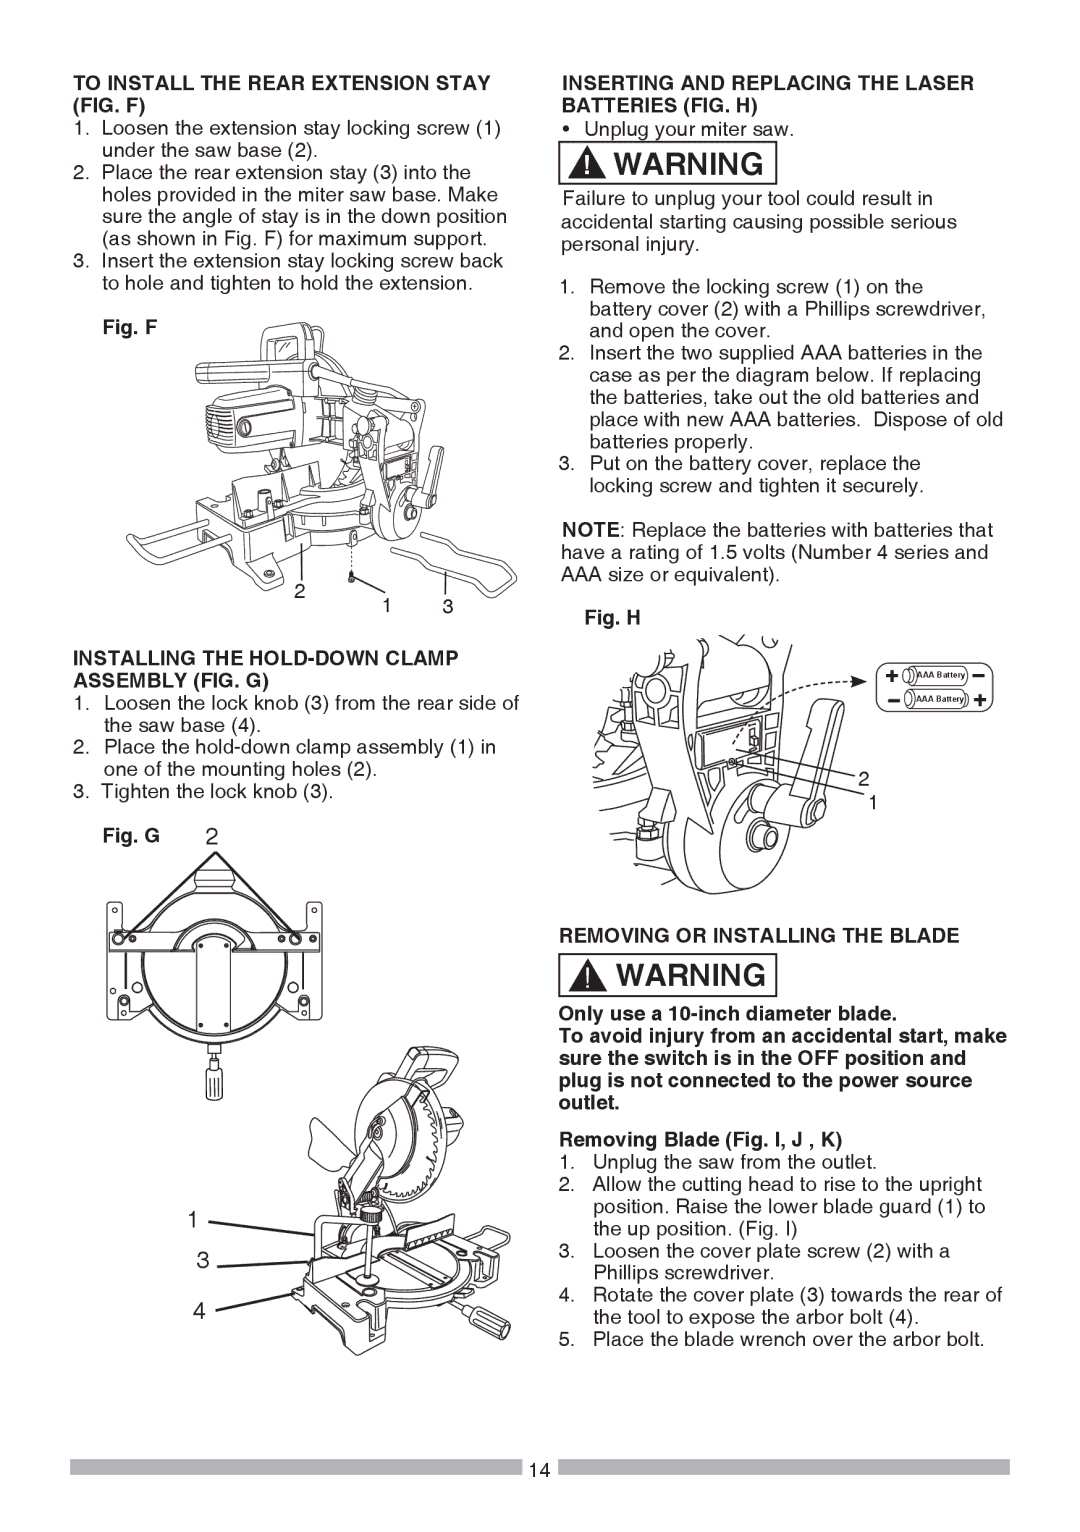
TO INSTALL THE REAR EXTENSION STAY (FIG. F)
1.Loosen the extension stay locking screw (1) under the saw base (2).
2.Place the rear extension stay (3) into the holes provided in the miter saw base. Make sure the angle of stay is in the down position (as shown in Fig. F) for maximum support.
3.Insert the extension stay locking screw back to hole and tighten to hold the extension.
Fig. F
2 | 1 | 3 |
|
INSTALLING THE HOLD-DOWN CLAMP ASSEMBLY (FIG. G)
1.Loosen the lock knob (3) from the rear side of the saw base (4).
2.Place the
3.Tighten the lock knob (3).
Fig. G 2
INSERTING AND REPLACING THE LASER BATTERIES (FIG. H)
• Unplug your miter saw.
!WARNING
Failure to unplug your tool could result in accidental starting causing possible serious personal injury.
1.Remove the locking screw (1) on the battery cover (2) with a Phillips screwdriver, and open the cover.
2.Insert the two supplied AAA batteries in the case as per the diagram below. If replacing the batteries, take out the old batteries and place with new AAA batteries. Dispose of old batteries properly.
3.Put on the battery cover, replace the locking screw and tighten it securely.
NOTE: Replace the batteries with batteries that have a rating of 1.5 volts (Number 4 series and AAA size or equivalent).
Fig. H
![]()
![]()
![]() AAA Battery
AAA Battery
![]() AAA Battery
AAA Battery
![]() 2
2
1
| REMOVING OR INSTALLING THE BLADE | ||
| | WARNING | |
| ! |
| |
| Only use a | ||
| To avoid injury from an accidental start, make | ||
| sure the switch is in the OFF position and | ||
| plug is not connected to the power source | ||
| outlet. | ||
| Removing Blade (Fig. I, J , K) | ||
| 1. | Unplug the saw from the outlet. | |
| 2. | Allow the cutting head to rise to the upright | |
1 |
| position. Raise the lower blade guard (1) to | |
| the up position. (Fig. I) | ||
3 | 3. | Loosen the cover plate screw (2) with a | |
| Phillips screwdriver. | ||
|
| ||
4 | 4. | Rotate the cover plate (3) towards the rear of | |
| the tool to expose the arbor bolt (4). | ||
| 5. | Place the blade wrench over the arbor bolt. | |
![]() 14
14 ![]()