BRUSH
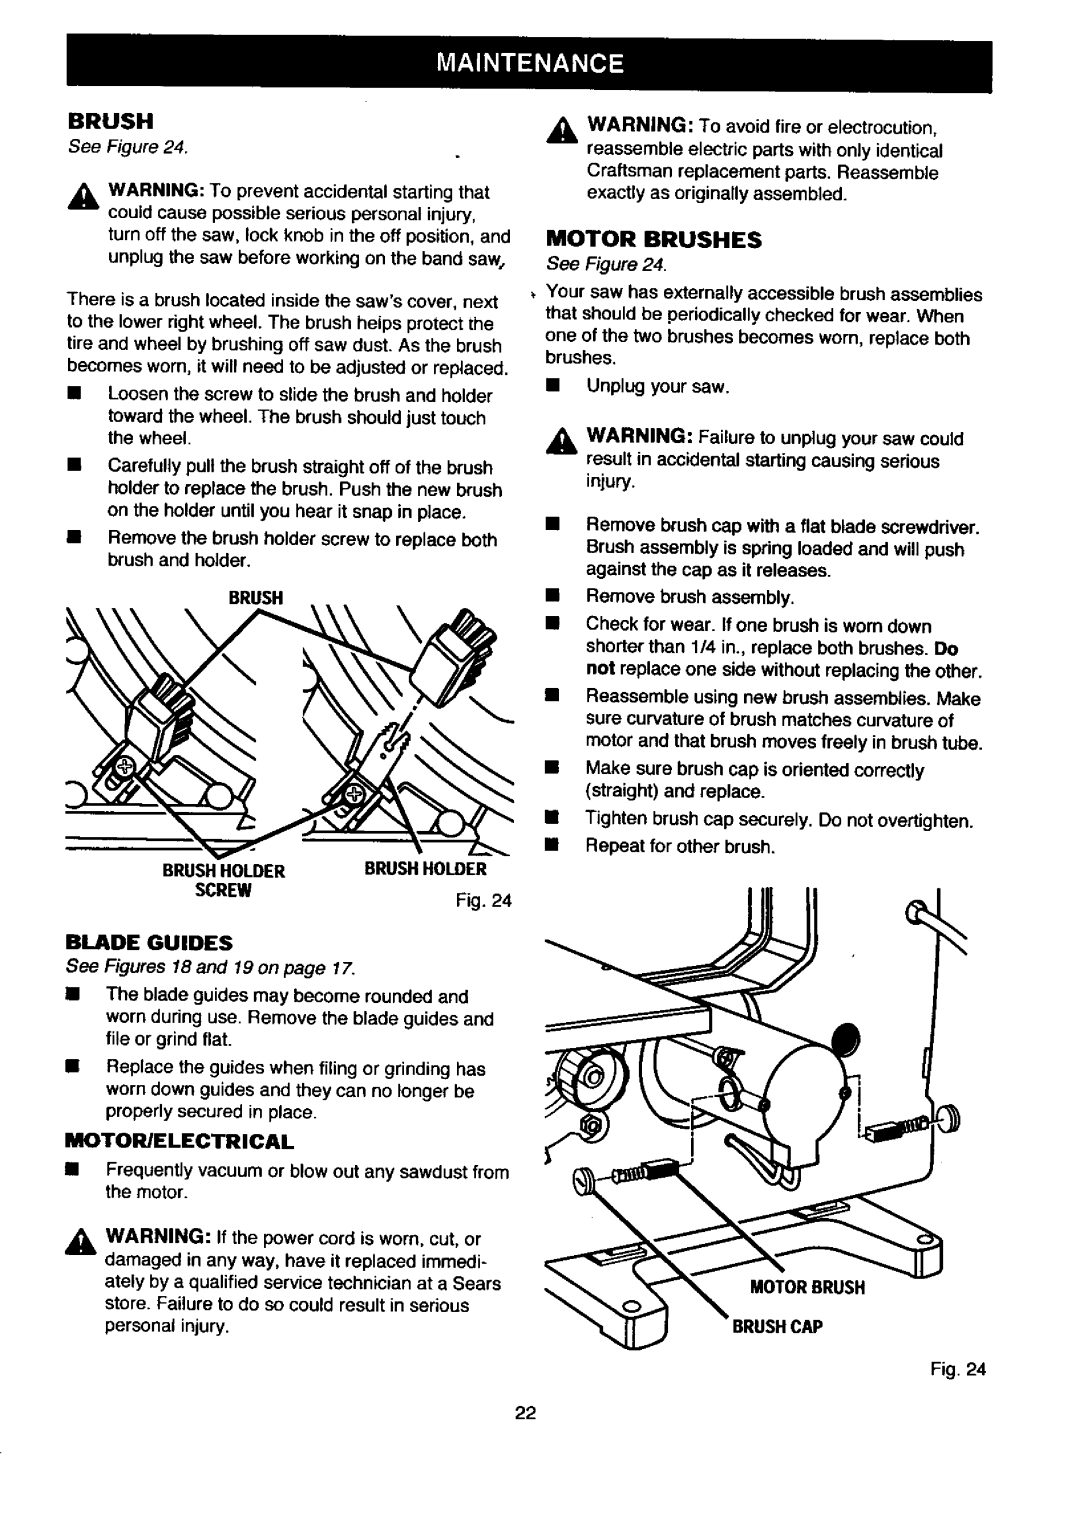
See Figure 24.
_k WARNING: To prevent accidental starting that could cause possible serious personal injury,
turn off the saw, lock knob in the off position, and unplug the saw before working on the band saw,
There is a brush located inside the saw'scover, next to the lower right wheel. The brush helps protect the tire and wheel by brushing off saw dust. As the brush becomes worn, it will need to be adjusted or replaced.
•Loosen the screw to slide the brush and holder
toward the wheel. The brush should just touch the wheel.
•Carefully pull the brush straight off of the brush holder to replace the brush. Push the new brush on the holder until you hear it snap in place.
•Remove the brush holder screw to replace both brush and holder.
BRUSH
BRUSHHOLDER | BRUSHHOLDER |
SCREW | Fig. 24 |
BLADE GUIDES
See Figures 18 and 19 on page 17.
•The blade guides may become rounded and worn during use. Remove the blade guides and file or grind flat.
•Replace the guides when filing or grinding has worn down guides and they can no longer be properly secured in place.
MOTOR/ELECTRICAL
•Frequently vacuum or blow out any sawdust from the motor.
_1, WARNING: If the power cord is worn, cut, or damaged in any way, have it replaced immedi-
ately by a qualified service technician at a Sears store. Failure to do so could result in serious
personal injury.
,_, WARNING: To avoid fire or electrocution, reassemble electric parts with only identical
Craftsman replacement parts. Reassemble exactly as originally assembled.
MOTOR BRUSHES
See Figure 24.
Your saw has externally accessible brush assemblies that should be periodically checked for wear. When
one of the two brushes becomes worn, replace both brushes.
•Unplug your saw.
,_ WARNING: Failure to unplug your saw could result in accidental starting causing serious injury.
•Remove brush cap with a flat blade screwdriver. Brush assembly is spring loaded and will push against the cap as it releases.
•Remove brush assembly.
•Check for wear. If one brush is worn down shorter than 1/4 in., replace both brushes. Do not replace one side without replacing the other.
•Reassemble using new brush assemblies. Make sure curvature of brush matches curvature of motor and that brush moves freely in brush tube.
•Make sure brush cap is oriented correctly (straight) and replace.
•Tighten brush cap securely. Do not overtighten.
•Repeat for other brush.
Fig. 24
22
