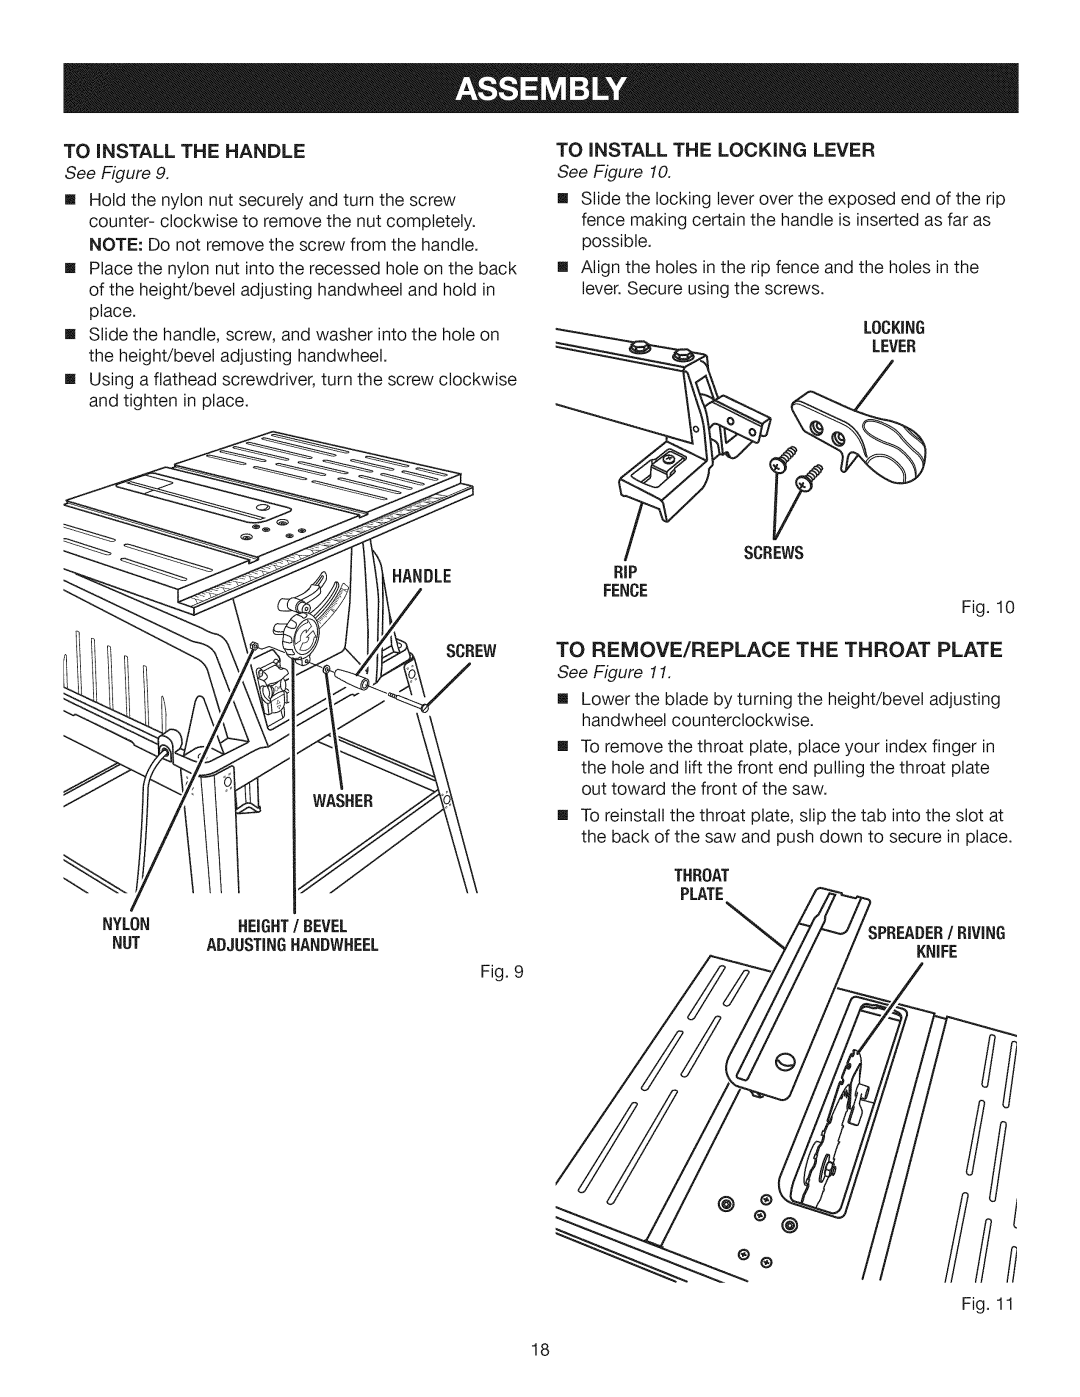
TO INSTALL THE HANDLE
See Figure 9.
[] Hold the nylon nut securely and turn the screw counter- clockwise to remove the nut completely. NOTE: Do not remove the screw from the handle.
[] Place the nylon nut into the recessed hole on the back of the height/bevel adjusting handwheel and hold in place.
[] Slide the handle, screw, and washer into the hole on the height/bevel adjusting handwheel.
[] Using a flathead screwdriver, turn the screw clockwise and tighten in place.
HANDLE
SCREW
NYLON | HEIGHT/ BEVEL |
NUT | ADJUSTINGHANDWHEEL |
Fig. 9
TO INSTALL THE LOCKING LEVER
See Figure 10.
[] Slide the locking lever over the exposed end of the rip fence making certain the handle is inserted as far as possible.
[] Align the holes in the rip fence and the holes in the lever. Secure using the screws.
LOCKING
LEVER
SCREWS
RiP
FENCE
Fig. 10
TO REMOVE/REPLACE THE THROAT PLATE
See Figure 11.
[] Lower the blade by turning the height/bevel adjusting handwheel counterclockwise.
[] To remove the throat plate, place your index finger in
the hole and lift the front end pulling the throat plate out toward the front of the saw.
[] To reinstall the throat plate, slip the tab into the slot at the back of the saw and push down to secure in place.
THROAT
PLATE
SPREADER/ RiViNG
KNIFE
®
®@
®
18