HOW TO REMOVE THE TOP COVER
There are no adjustments under the top cover. If removal is required, follow the steps below.
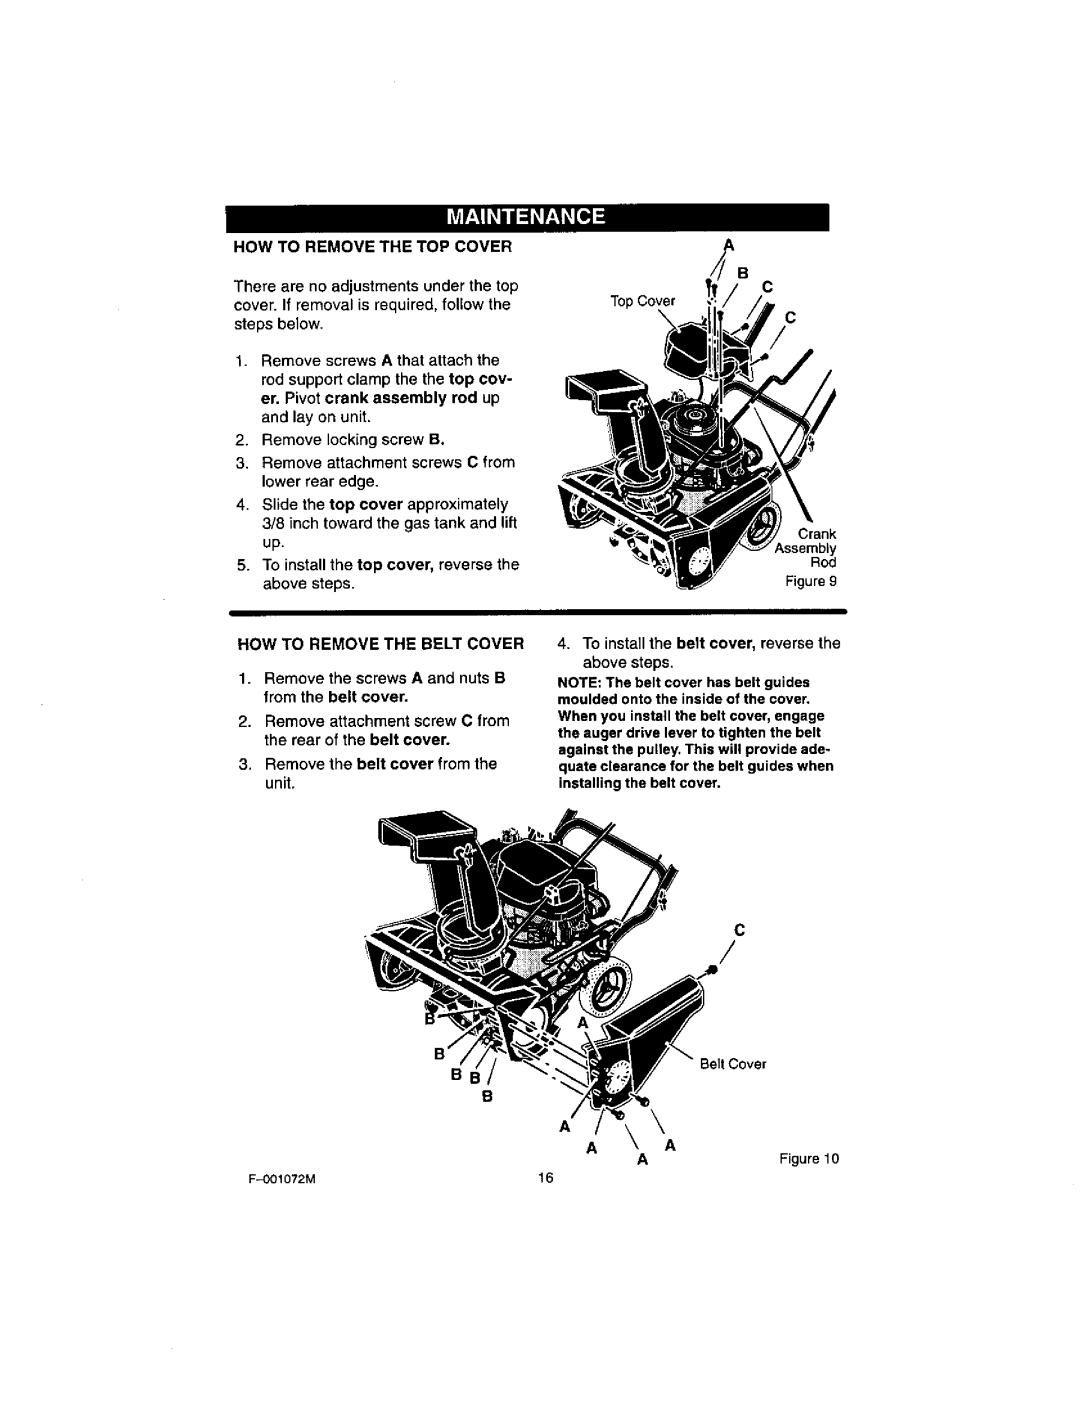
1.Remove screws A that attach the md support clamp the the top cov- er. Pivot crank assembly rod up and lay on unit.
2.Remove locking screw B.
3.Remove attachment screws C from lower rear edge.
4.Slide the top cover approximately 3/8 inch toward the gas tank and lift up.
5.To install the top cover, reverse the above steps.
HOW TO REMOVE THE BELT COVER
1.Remove the screws A and nuts B from the belt cover.
2.Remove attachment screw C from the rear of the belt cover.
3.Remove the belt cover from the unit.
BI
B
A
B
C
Top Cover
C
Crank _ssembly
Rod
Figure 9
4.To install the belt cover, reverse the above steps.
NOTE: The belt cover has belt guides moulded onto the inside of the cover.
When you install the belt cover, engage the auger drive lever to tighten the belt against the pulley. This will provide ade- quate clearance for the belt guides when installing the belt cover.
C
/
Belt Cover
A\
AA
AFigure10
F_)01072M16