ASSEMBLY
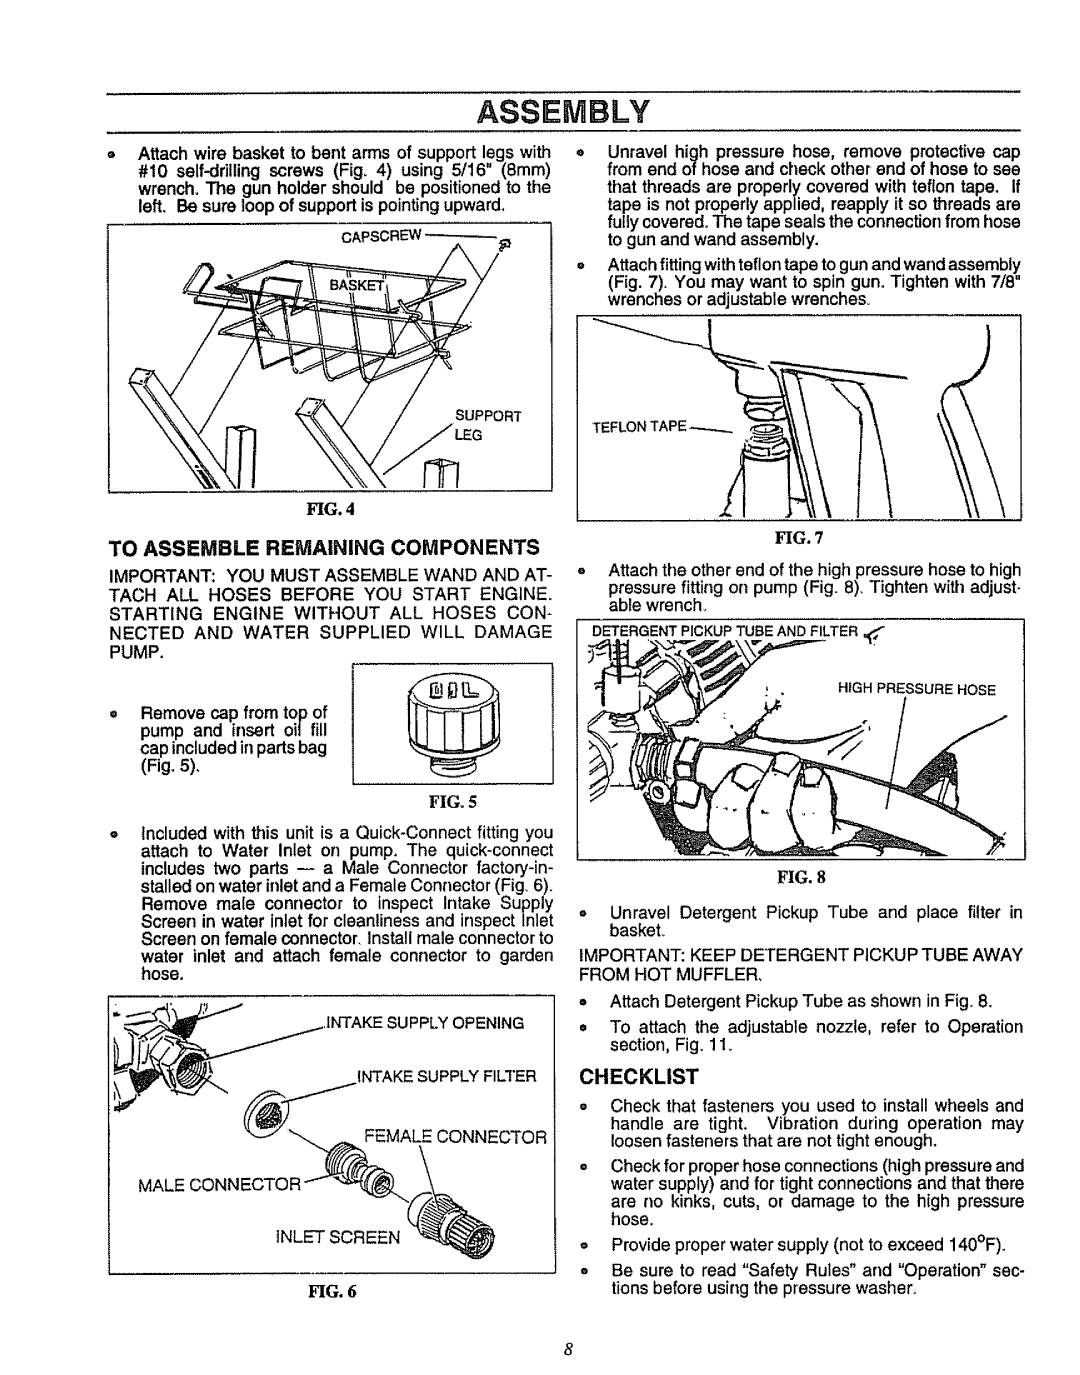
,,Attach wire basket to bent arms of support legs with #10
eUnravel high pressure hose, remove protective cap from end of hose and check other end of hose to see that threads are properly covered with teflon tape. If tape is not properly applied, reapply it so threads are fully covered. The tape seals the connection from hose to gun and wand assembly.
Attach fitting with teflon tape to gun and wand assembly (Fig. 7). You may want to spin gun_ Tighten with 7/8" wrenches or adjustable wrenches.
SUPPORT
FIG. 4
TO ASSEMBLE REMAINING COMPONENTS
IMPORTANT: YOU MUST ASSEMBLE WAND AND AT- TACH ALL HOSES BEFORE YOU START ENGiNE,
STARTING ENGINE WITHOUT ALL HOSES CON- NECTED AND WATER SUPPLIED WILL DAMAGE
PUMP.
,,Remove cap from top of pump and insert oi/fill cap included in parts bag
(Fig. 5).
FIGo5
Included with this unit is a
INTAKE SUPPLY OPENING
INTAKE SUPPLY FILTER
_ | FEMALE CONNECTOR |
MALE CONNE
INLET SCREEN
FIG. 6
HG. 7
Attach the other end of the high pressure hose to high pressure fitting on pump (Fig. 8) Tighten with adjust- able wrench,
DETERGENT PICKUP TUBE AND FILTER
!, | HIGH PRESSURE HOSE |
FIG. 8
*Unravel Detergent Pickup Tube and place filter in basket°
IMPORTANT: KEEP DETERGENT PICKUP TUBE AWAY FROM HOT MUFFLER,
,= Attach Detergent Pickup Tube as shown in Fig. 8_
,,To attach the adjustable nozzle, refer to Operation section, Fig. 11.
CHECKLIST
oCheck that fasteners you used to install wheels and handle are tight. Vibration dudng operation may loosen fasteners that are not tight enough.
•Check for proper hose connections (high pressure and water supply) and for tight connections and that there are no kinks, cuts, or damage to the high pressure hose.
=Provide proper water supply (not to exceed 140°F).
oBe sure to read "Safety Rules" and "Operation" sec- tions before using the pressure washen
8