
247.77638, 77638, 1450 Series specifications
The Craftsman 1450 Series Model 77638, also known as the 247.77638, is a powerful addition to the Craftsman lineup, showcasing the brand's dedication to quality and innovation in outdoor power equipment. This model is designed to provide reliable performance for both residential and commercial users, ensuring efficiency and ease of use in various applications.One of the standout features of the Craftsman 1450 Series is its robust engine. Equipped with a strong 1450W motor, this model delivers ample power for tackling tough tasks. The motor is designed to be efficient, minimizing energy consumption while maximizing output, making it an eco-friendly choice for users conscious of their environmental footprint.
The 77638 also incorporates a user-friendly interface, making it accessible for both seasoned professionals and novices alike. Its ergonomic design includes comfortable handles and control mechanisms that ensure ease of operation, reducing operator fatigue during extended use. Coupled with its lightweight construction, maneuverability becomes a significant advantage, allowing users to navigate challenging terrains without hassle.
Durability is another key characteristic of the Craftsman 1450 Series. Constructed with high-quality materials, the model is built to withstand the rigors of frequent use. This ruggedness ensures longevity, making the investment worthwhile for anyone needing reliable outdoor equipment. The corrosion-resistant finish enhances its lifespan, protecting it against the elements.
In terms of technology, the Craftsman 1450 Series incorporates advanced safety features. An automatic shut-off mechanism prevents overheating, while the protective casing shields users from potential hazards. These safety measures ensure that users can operate the equipment confidently, knowing that they are protected.
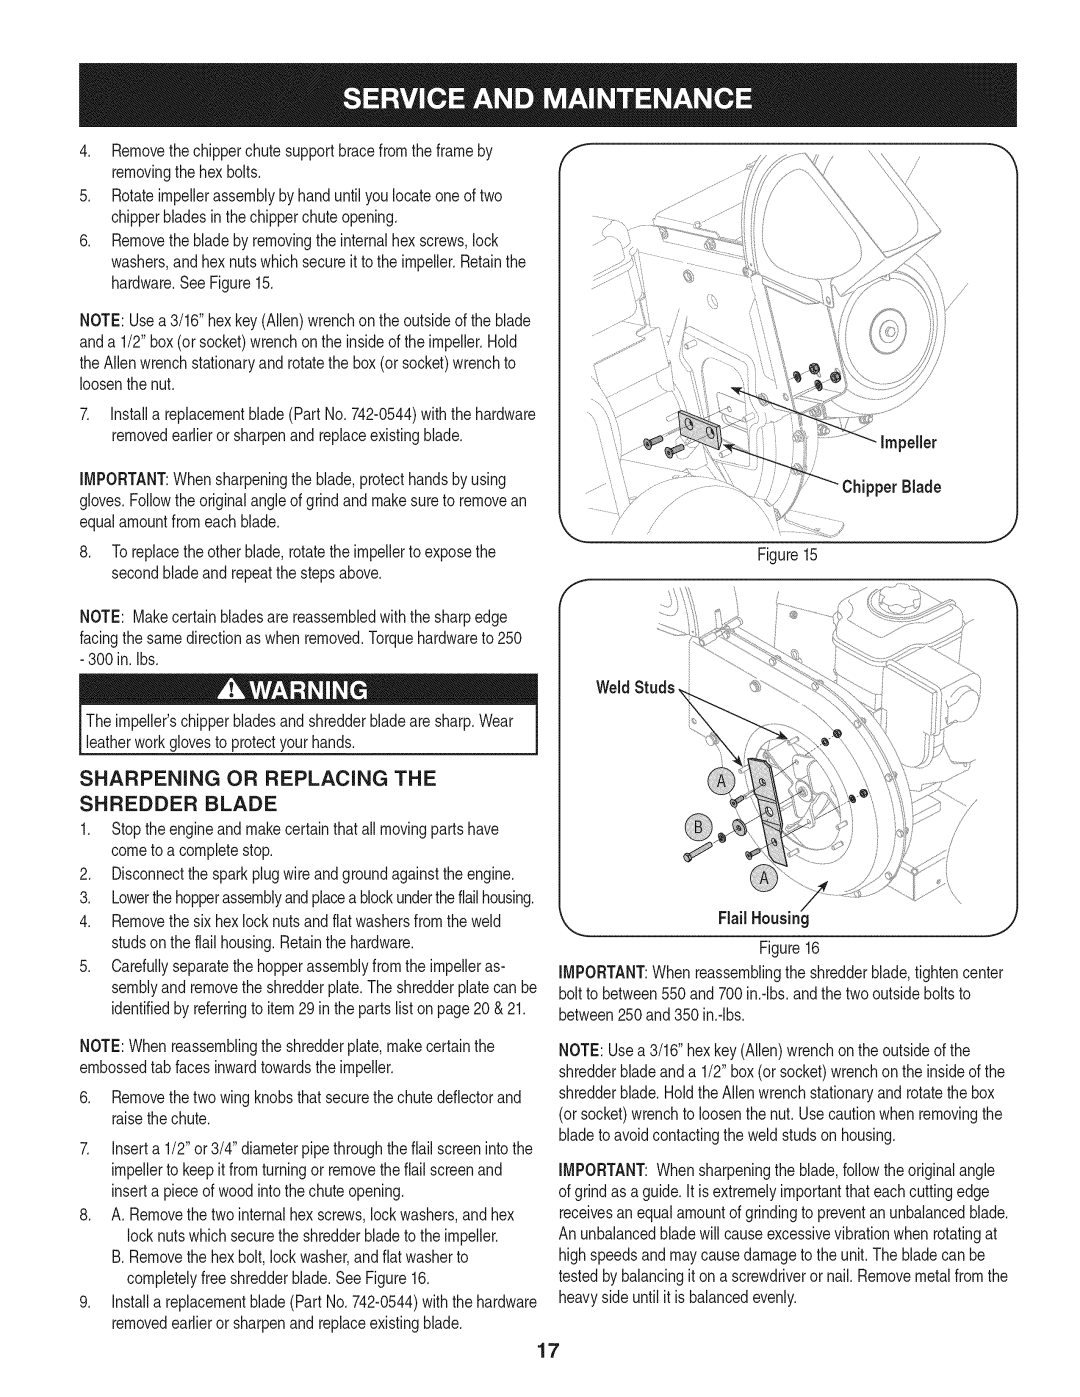
Moreover, maintenance is simple with this model, as it is designed for easy access to internal components. Regular upkeep can be performed without the need for specialized tools, making it convenient for users to ensure their equipment remains in optimal condition.
In summary, the Craftsman 1450 Series Model 77638, 247.77638 stands out with its powerful motor, user-friendly design, durability, and innovative safety features. Ideal for a wide range of outdoor tasks, this model exemplifies Craftsman's commitment to delivering quality and performance. Whether for home maintenance or professional landscaping, the 77638 is a significant asset for any toolkit, reflecting the brand's renowned reputation for excellence in craftsmanship.