CHECKTIREPRESSURE Thetiresonyourtractorwereovednflated atthefactoryforshippingpurposes. Correcttirepressureisimportantforbest cuttingperformance.
• ReducetirepressuretoPSIshownin
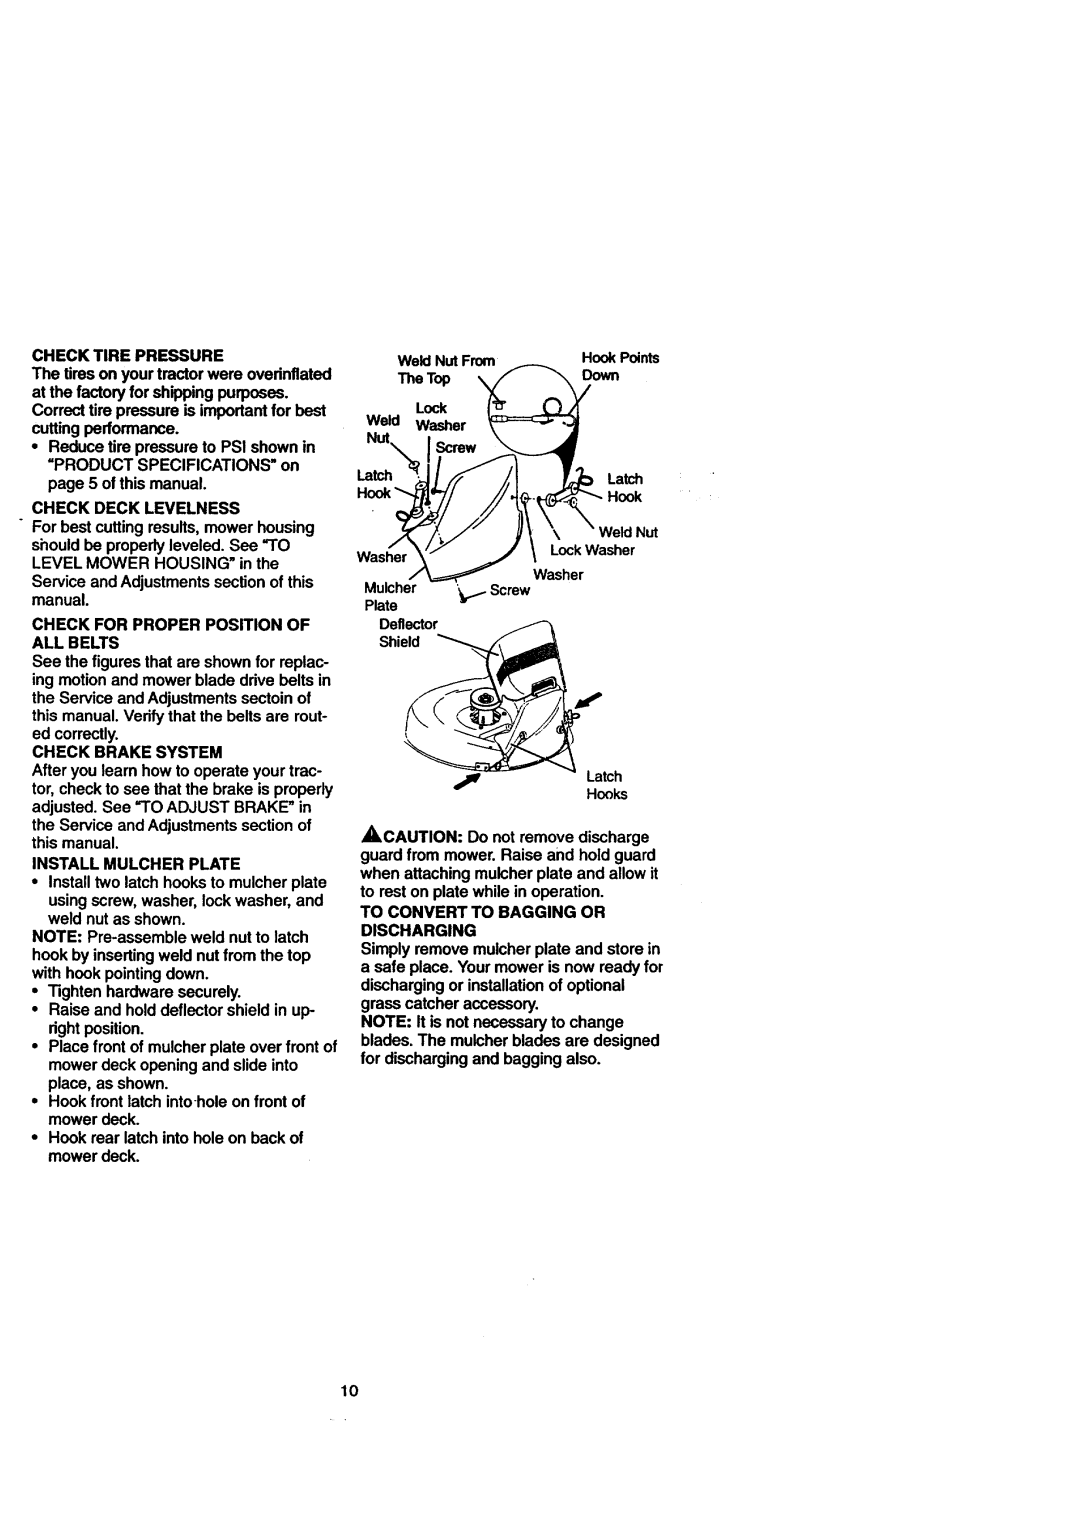
Weld NutFrom | Hook Points |
The Top | Down |
|
Lock
Weld Washer
Nut
"PRODUCT SPECIFICATIONS" on
page 5 of this manual.
CHECK DECK LEVELNESS
For best cutting results, mower housing
should be properly leveled. See "TO LEVEL MOWER HOUSING" in the
Service and Adjustments section of this manual.
CHECK FOR PROPER POSITION OF ALL BELTS
See thefiguresthat are shownfor replac- ingmotionand mowerblade drivebelts in the Serviceand Adjustmentssectoinof this manual.Verifythat the beltsare mut-
ed correctly.
CHECK BRAKE SYSTEM
Afteryou learnhowto operateyourtrac- tor,checkto see that the brake is properly adjusted.See "TO ADJUST BRAKE"in
the Service andAdjustmentssectionof this manual.
INSTALL MULCHER PLATE
•Installtwolatch hooksto mulcherplate
usingscrew,washer,lockwasher,and weld nut as shown.
NOTE:
hookby insertingweld nutfrom the top with hookpointingdown.
•Tightenhardwaresecurely.
•Raise and holddeflectorshieldin up- rightposition.
•Placefront of mulcherplate over frontof mowerdeck openingand slideinto place, as shown.
•Hookfront
•Hookrear latchintoholeon backof mowerdeck.
Latch | Latch | |
| Hook | |
Washer | Lock Washer | |
| ||
Mulcher | Washer | |
Screw | ||
Plate | ||
| ||
Deflector |
| |
Shield |
|
Latch
Hooks
_CAUTION: Do not removedischarge guard from mower.Raise and holdguard when attachingmulcherplate and allowit to reston plate whilein operation.
TO CONVERT TO BAGGING OR DISCHARGING Simplyremovemulcherplate and store in
asafe place. Yourmower is now readyfor dischargingor installationof optional grass catcheraccessory.
NOTE: It is notnecessaryto change blades.The mulcherbladesare designed for dischargingand baggingalso.
10