Belt Replacement
Forward Drive Belt
1.Remove reverse drive belt as instructed in the previous section.
2.Remove the return spring. See Figure
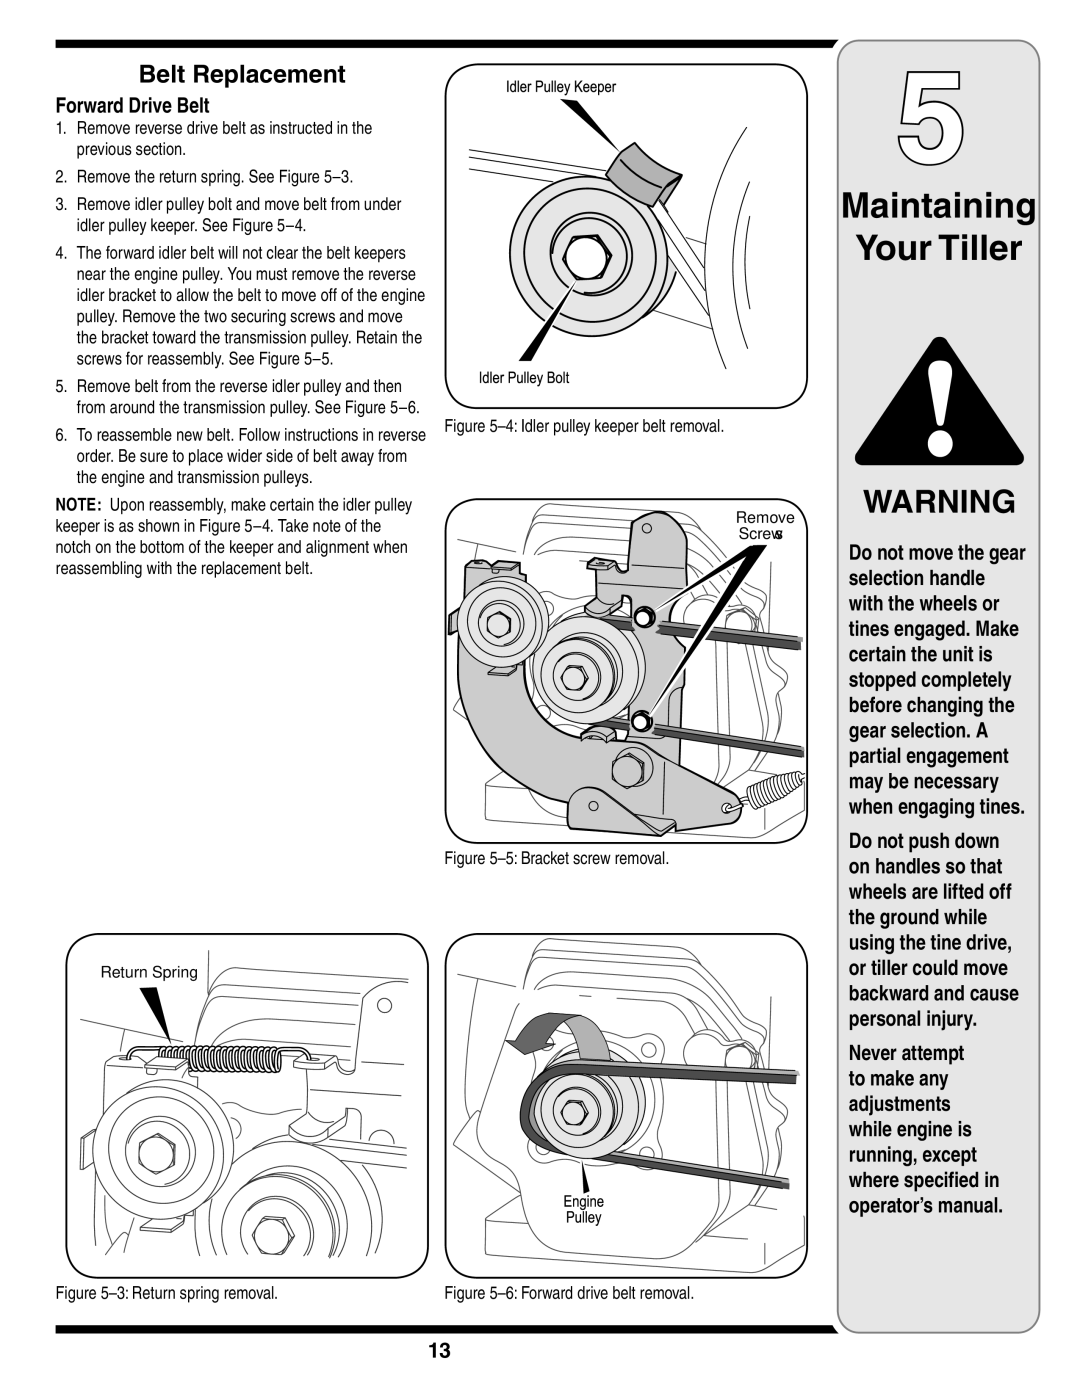
3.Remove idler pulley bolt and move belt from under idler pulley keeper. See Figure
4.The forward idler belt will not clear the belt keepers near the engine pulley. You must remove the reverse idler bracket to allow the belt to move off of the engine pulley. Remove the two securing screws and move the bracket toward the transmission pulley. Retain the screws for reassembly. See Figure
5.Remove belt from the reverse idler pulley and then from around the transmission pulley. See Figure
6.To reassemble new belt. Follow instructions in reverse order. Be sure to place wider side of belt away from the engine and transmission pulleys.
NOTE: Upon reassembly, make certain the idler pulley keeper is as shown in Figure
Figure 5–4: Idler pulley keeper belt removal.
Remove
Screws
Figure 5–5: Bracket screw removal.
5
Maintaining
Your Tiller
WARNING
Do not move the gear selection handle with the wheels or tines engaged. Make certain the unit is stopped completely before changing the gear selection. A partial engagement may be necessary when engaging tines.
Do not push down on handles so that wheels are lifted off the ground while using the tine drive,
Return Spring
Figure | Figure |
or tiller could move backward and cause personal injury.
Never attempt to make any adjustments while engine is running, except where specified in operator’s manual.
13