CASSETTE CARE
Two common causes of trouble experienced when using cassettes are:—
(a)Tape jamming — Leading to uneven speed in playback, and
(b)Tape tangling — Where the tape wraps itself around vital parts of the mechanism.
To reduce the likelihood of these problems occurring, the following precautions should be observed.
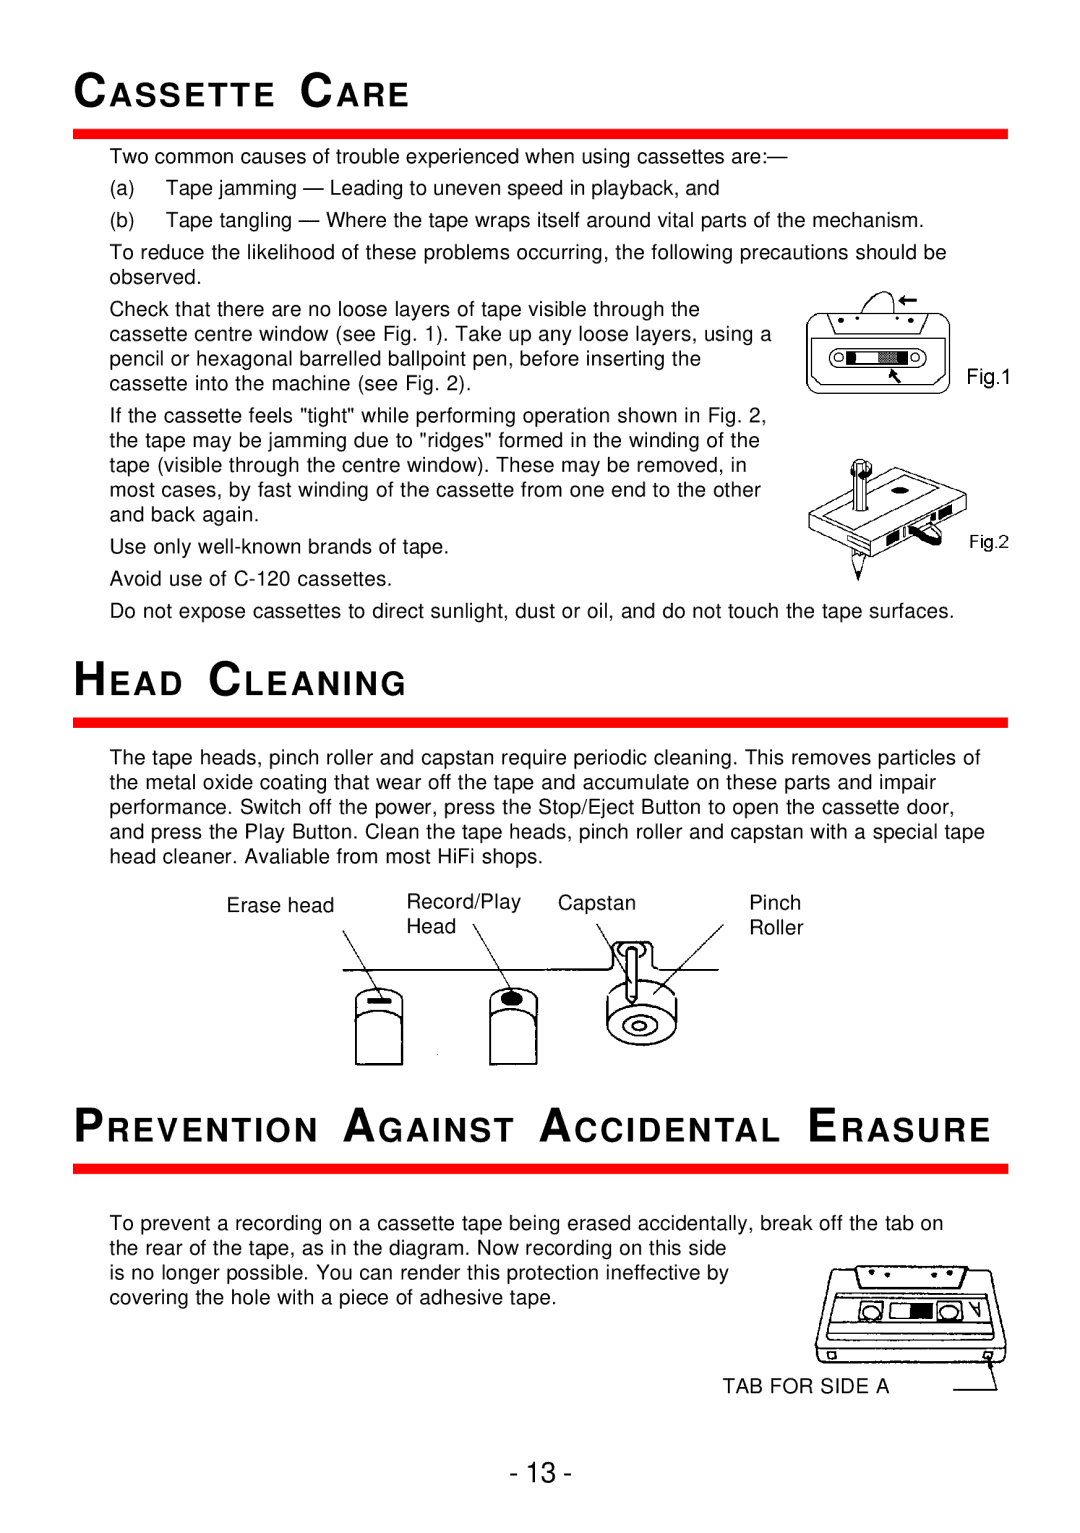
Check that there are no loose layers of tape visible through the cassette centre window (see Fig. 1). Take up any loose layers, using a pencil or hexagonal barrelled ballpoint pen, before inserting the cassette into the machine (see Fig. 2).
If the cassette feels "tight" while performing operation shown in Fig. 2, the tape may be jamming due to "ridges" formed in the winding of the tape (visible through the centre window). These may be removed, in most cases, by fast winding of the cassette from one end to the other and back again.
Use only
Do not expose cassettes to direct sunlight, dust or oil, and do not touch the tape surfaces.
HEAD CLEANING
The tape heads, pinch roller and capstan require periodic cleaning. This removes particles of the metal oxide coating that wear off the tape and accumulate on these parts and impair performance. Switch off the power, press the Stop/Eject Button to open the cassette door, and press the Play Button. Clean the tape heads, pinch roller and capstan with a special tape head cleaner. Avaliable from most HiFi shops.
Erase head | Record/Play | Capstan | Pinch |
| Head |
| Roller |
PREVENTION AGAINST ACCIDENTAL ERASURE
To prevent a recording on a cassette tape being erased accidentally, break off the tab on the rear of the tape, as in the diagram. Now recording on this side
is no longer possible. You can render this protection ineffective by covering the hole with a piece of adhesive tape.
TAB FOR SIDE A
- 13 -
