Cyclone360 Overview
This maunal covers both
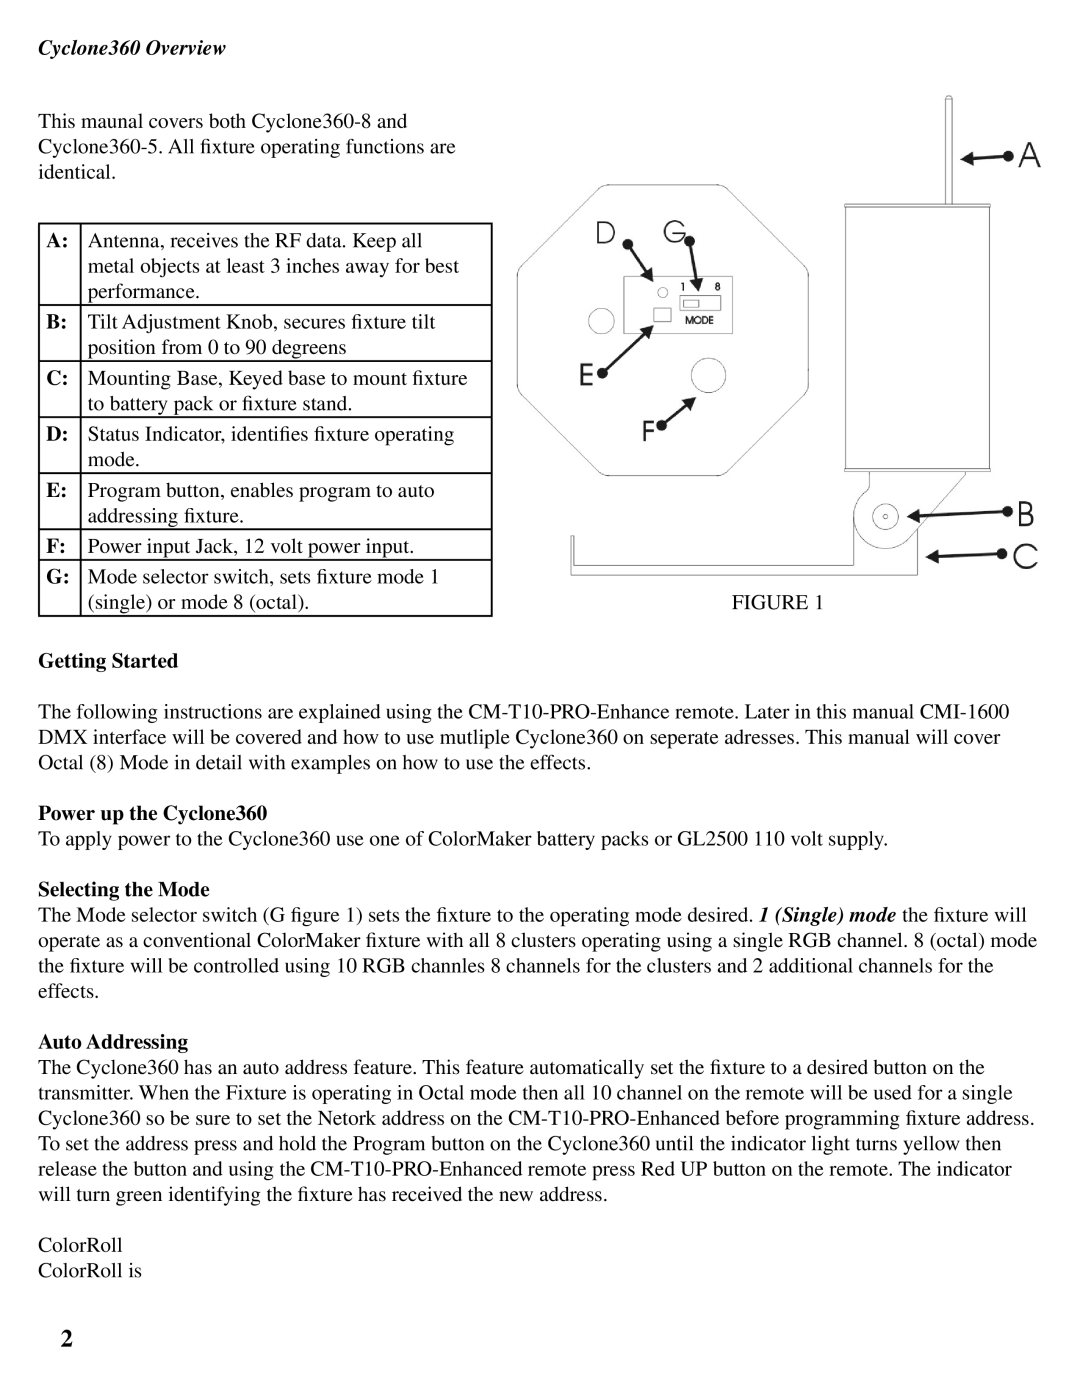
A: | Antenna, receives the RF data. Keep all |
|
| metal objects at least 3 inches away for best |
|
| performance. |
|
B: | Tilt Adjustment Knob, secures fixture tilt |
|
| position from 0 to 90 degreens |
|
C: | Mounting Base, Keyed base to mount fixture |
|
| to battery pack or fixture stand. |
|
D: | Status Indicator, identifies fixture operating |
|
| mode. |
|
E: | Program button, enables program to auto |
|
| addressing fixture. |
|
F: | Power input Jack, 12 volt power input. |
|
G: | Mode selector switch, sets fixture mode 1 |
|
| (single) or mode 8 (octal). | FIGURE 1 |
Getting Started
The following instructions are explained using the
Power up the Cyclone360
To apply power to the Cyclone360 use one of ColorMaker battery packs or GL2500 110 volt supply.
Selecting the Mode
The Mode selector switch (G figure 1) sets the fixture to the operating mode desired. 1 (Single) mode the fixture will operate as a conventional ColorMaker fixture with all 8 clusters operating using a single RGB channel. 8 (octal) mode the fixture will be controlled using 10 RGB channles 8 channels for the clusters and 2 additional channels for the effects.
Auto Addressing
The Cyclone360 has an auto address feature. This feature automatically set the fixture to a desired button on the transmitter. When the Fixture is operating in Octal mode then all 10 channel on the remote will be used for a single Cyclone360 so be sure to set the Netork address on the
ColorRoll
ColorRoll is
2
