
DI-524UP specifications
The D-Link DI-524UP is a versatile wireless router designed to enhance connectivity and accessibility for home and small office users. It was developed to provide reliable network performance while ensuring ease of use and robust security features.One of the standout features of the DI-524UP is its wireless capability. Supporting the 802.11g standard, it enables wireless transmission speeds of up to 54 Mbps, making it suitable for most internet activities, including web browsing, streaming videos, and online gaming. Its backward compatibility with 802.11b devices ensures that older technology can still connect seamlessly.
Equipped with four 10/100 Mbps LAN ports, the DI-524UP supports wired connections as well, allowing users to connect multiple devices directly for enhanced stability. This dual-mode functionality makes the router ideal for environments where both wired and wireless connections are necessary, delivering flexibility to user setups.
Another prominent feature of the DI-524UP is its built-in print server. This capability allows users to connect a USB printer directly to the router, enabling multiple devices on the network to print wirelessly without the need for a dedicated PC. This functionality greatly enhances efficiency and convenience, especially in small office settings.
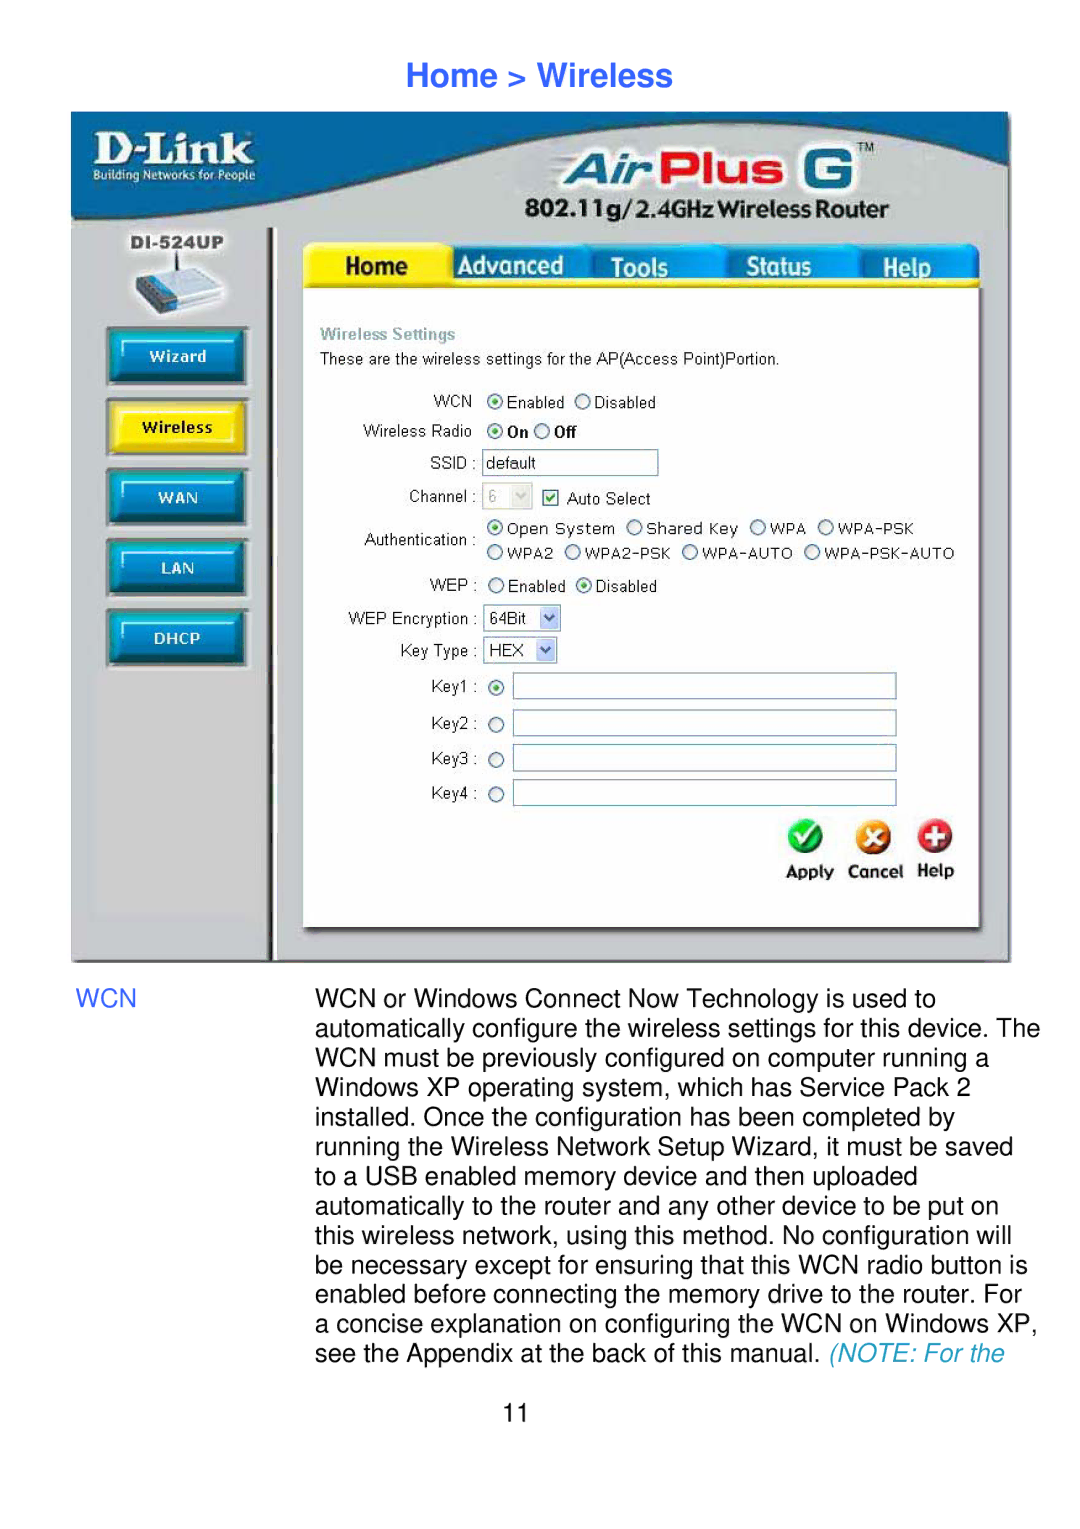
In terms of security, the D-Link DI-524UP comes with a range of protective measures. Support for Wi-Fi Protected Access (WPA/WPA2) and 64/128-bit WEP encryption ensures that data transmitted over the network remains secure from unauthorized access. Additionally, the router includes a firewall and network address translation (NAT) features, enhancing security against external attacks.
Setting up the DI-524UP is straightforward, thanks to its user-friendly web-based interface, which offers step-by-step guidance through the installation process. For those seeking to customize their settings, the router provides advanced features like port forwarding and virtual server capabilities.
In summary, the D-Link DI-524UP is an excellent choice for users seeking a reliable wireless router that combines speed, security, and ease of use. Its practical features, including a built-in print server and strong security measures, make it well-suited for both home and small office environments, providing seamless connectivity for all your devices.