Refrigerator Operation
Refrigerator Compartment (Contiued) | Crisper Drawers | |||
Shelves | The crisper drawers provide a higher humidity environment for | |||
fresh fruit and vegetable storage. | ||||
Important information to know about glass shelves and | Controls | |||
covers: | ||||
The crisper controls regulate the amount of humidity in the crisper | ||||
Do not clean glass shelves or covers with warm water when | ||||
drawer. Slide the control toward the FRUIT setting for produce | ||||
they are cold. Shelves and covers may break if exposed to | ||||
with outer skins. Slide the control toward the VEGETABLES | ||||
sudden temperature changes or impact, such as bumping. | ||||
setting for leafy produce. | ||||
Tempered glass is designed to shatter into many small, pebble- | ||||
|
| |||
size pieces. This is normal. Glass shelves and covers are |
|
| ||
heavy. Use both hands when removing them to avoid dropping. |
|
| ||
Your refrigerator has | To remove: | |||
shelves have a spill retainer edge which allows for easier clean up | ||||
and are equipped with a slide out feature. To slide out, grasp the | | Pull the drawer out to full extension. Tilt up the front of the | ||
front of the shelf and pull forward. Push in the shelf to return to | ||||
| drawer and pull it straight out. | |||
the original position. |
| |||
To install: | ||||
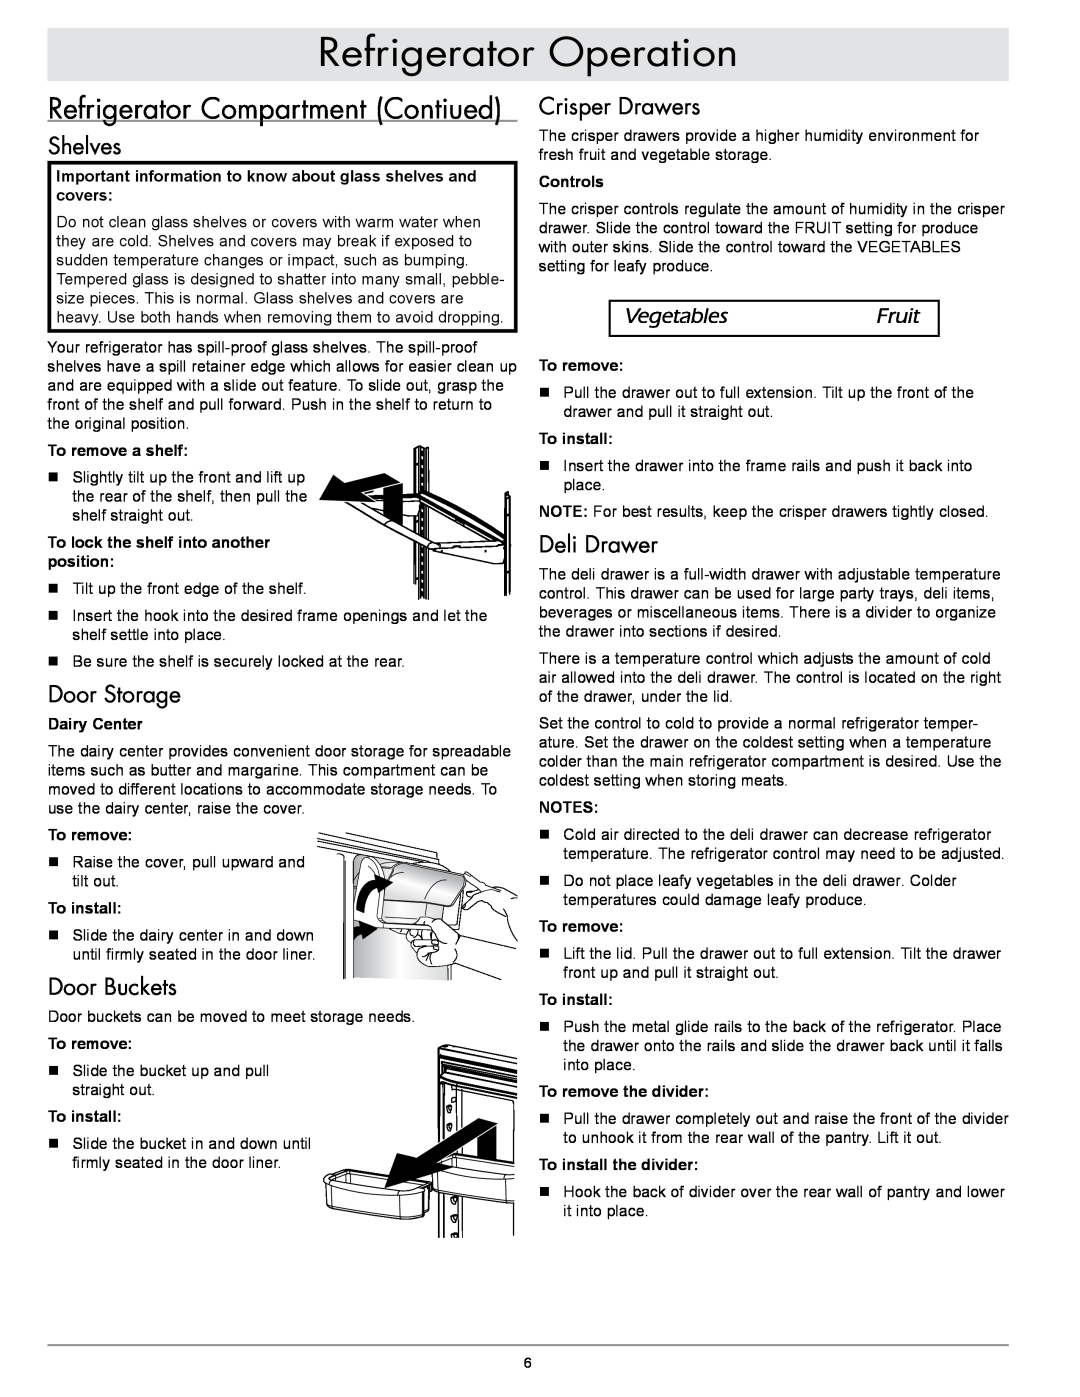
To remove a shelf: | ||||
| Insert the drawer into the frame rails and push it back into | |||
| Slightly tilt up the front and lift up | |||
| place. | |||
| the rear of the shelf, then pull the |
| ||
| NOTE: For best results, keep the crisper drawers tightly closed. | |||
| shelf straight out. | |||
To lock the shelf into another | Deli Drawer | |||
position: | The deli drawer is a | |||
| Tilt up the front edge of the shelf. | |||
control. This drawer can be used for large party trays, deli items, | ||||
| Insert the hook into the desired frame openings and let the | beverages or miscellaneous items. There is a divider to organize | ||
| shelf settle into place. | the drawer into sections if desired. | ||
| Be sure the shelf is securely locked at the rear. | There is a temperature control which adjusts the amount of cold | ||
Door Storage | air allowed into the deli drawer. The control is located on the right | |||
of the drawer, under the lid. | ||||
Dairy Center | Set the control to cold to provide a normal refrigerator temper- | |||
The dairy center provides convenient door storage for spreadable | ature. Set the drawer on the coldest setting when a temperature | |||
colder than the main refrigerator compartment is desired. Use the | ||||
items such as butter and margarine. This compartment can be | ||||
coldest setting when storing meats. | ||||
moved to different locations to accommodate storage needs. To | ||||
NOTES: | ||||
use the dairy center, raise the cover. | ||||
To remove: | | Cold air directed to the deli drawer can decrease refrigerator | ||
| Raise the cover, pull upward and |
| temperature. The refrigerator control may need to be adjusted. | |
| Do not place leafy vegetables in the deli drawer. Colder | |||
| tilt out. | |||
To install: |
| temperatures could damage leafy produce. | ||
To remove: | ||||
| Slide the dairy center in and down | |||
| Lift the lid. Pull the drawer out to full extension. Tilt the drawer | |||
| until firmly seated in the door liner. | |||
Door Buckets |
| front up and pull it straight out. | ||
To install: | ||||
Door buckets can be moved to meet storage needs. | ||||
| Push the metal glide rails to the back of the refrigerator. Place | |||
To remove: | ||||
| the drawer onto the rails and slide the drawer back until it falls | |||
| Slide the bucket up and pull |
| into place. | |
| straight out. | To remove the divider: | ||
To install: | | Pull the drawer completely out and raise the front of the divider | ||
| Slide the bucket in and down until |
| to unhook it from the rear wall of the pantry. Lift it out. | |
| firmly seated in the door liner. | To install the divider: | ||
|
| | Hook the back of divider over the rear wall of pantry and lower | |
|
|
| it into place. | |
6