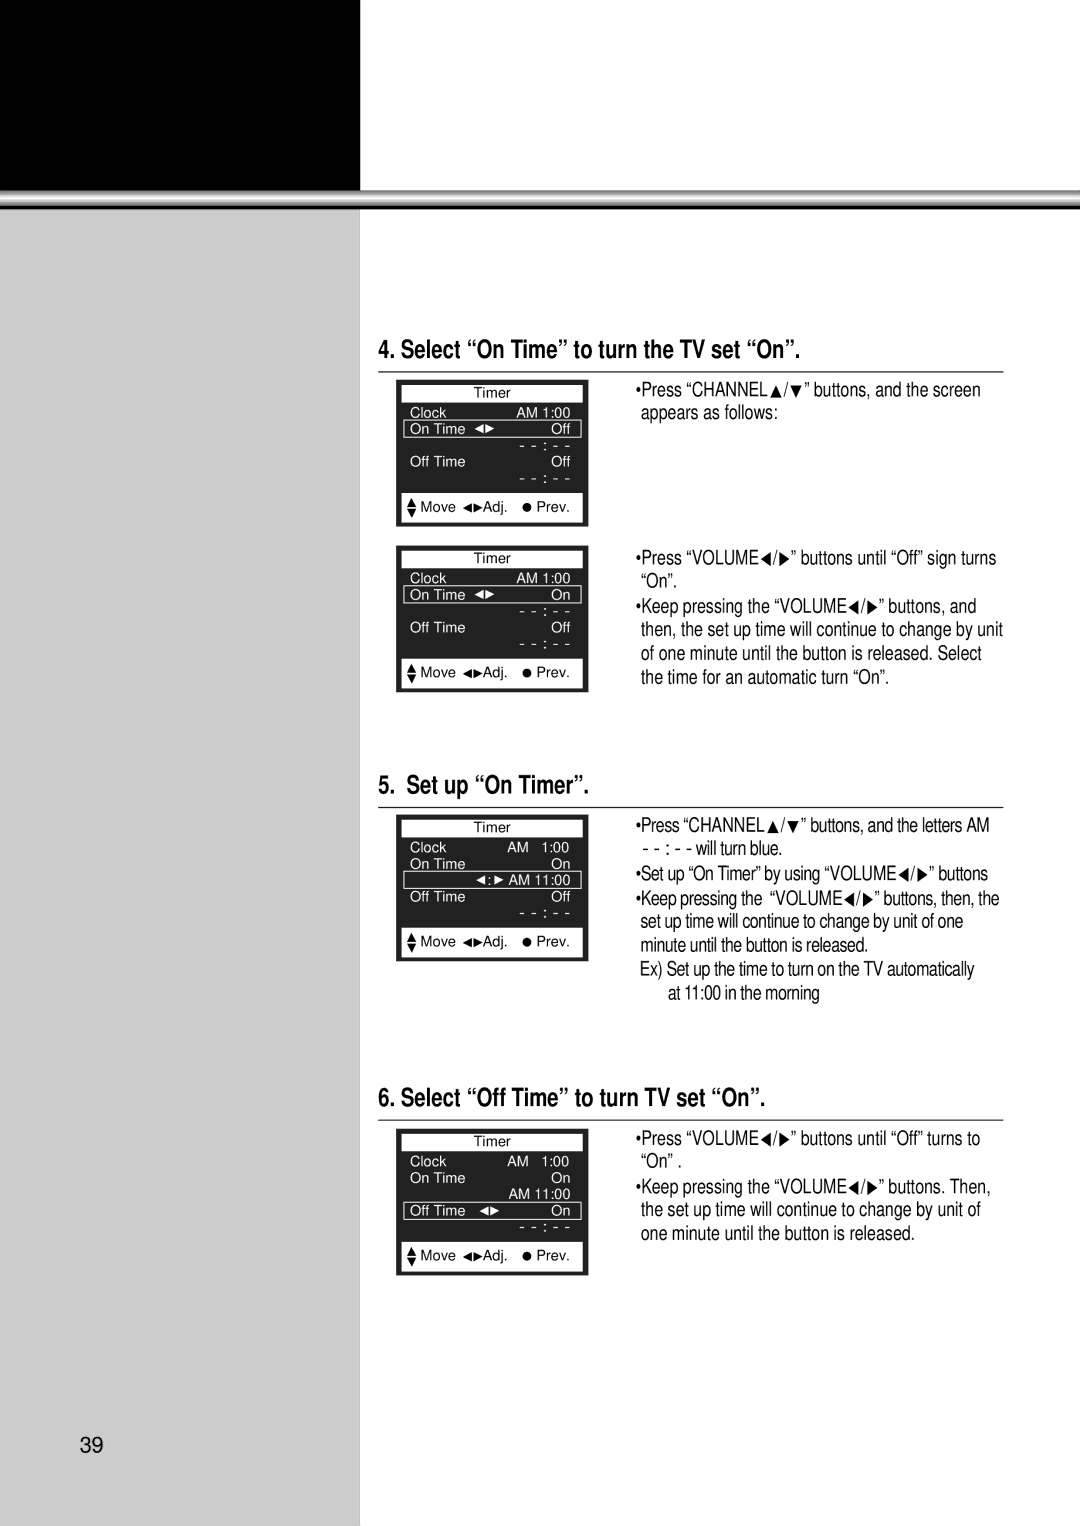
4. Select “On Time” to turn the TV set “On”.
| Timer |
|
|
Clock |
| AM 1:00 | |
On Time |
| Off | |
|
| - |
|
Off Time |
| Off | |
|
| - |
|
|
|
| |
Move | Adj. | Prev. |
|
|
|
|
|
|
|
|
|
| Timer |
|
|
Clock |
| AM 1:00 | |
On Time |
| On | |
|
| - |
|
Off Time |
| Off | |
|
| - |
|
|
|
| |
Move | Adj. | Prev. |
|
|
|
|
|
•Press “CHANNELx/y” buttons, and the screen appears as follows:
•Press “VOLUMEC/B” buttons until “Off” sign turns “On”.
•Keep pressing the “VOLUMEC/B” buttons, and then, the set up time will continue to change by unit of one minute until the button is released. Select the time for an automatic turn “On”.
5. Set up “On Timer”.
| Timer |
|
|
Clock | AM | 1:00 |
|
On Time |
| On | |
| : AM 11:00 | ||
Off Time |
| Off | |
| - |
| |
|
|
| |
Move | Adj. | Prev. |
|
|
|
|
|
•Press “CHANNELx/y” buttons, and the letters AM -
•Set up “On Timer” by using “VOLUMEC/B” buttons •Keep pressing the “VOLUMEC/B” buttons, then, the set up time will continue to change by unit of one minute until the button is released.
Ex) Set up the time to turn on the TV automatically at 11:00 in the morning
6. Select “Off Time” to turn TV set “On”.
| Timer |
|
|
Clock | AM | 1:00 |
|
On Time |
| On | |
| AM 11:00 | ||
Off Time |
| On | |
| - |
| |
|
|
| |
Move | Adj. | Prev. |
|
|
|
|
|
•Press “VOLUMEC/B” buttons until “Off” turns to “On” .
•Keep pressing the “VOLUMEC/B” buttons. Then, the set up time will continue to change by unit of one minute until the button is released.
39
