BUILT–IN GRILL CLEARANCES
6" | 26-3/4" |
(to left and | (lid) |
right side of | |
grill to non- | |
combustible | |
construction) | |
12" (to | |
combustible | |
construction) | |
 26-3/8"
(cutout)
24"
grill
exhaust
3" (to non- combustible construction / minimum lid clearance)
12" (to combustible construction)
 20-3/4"
23"
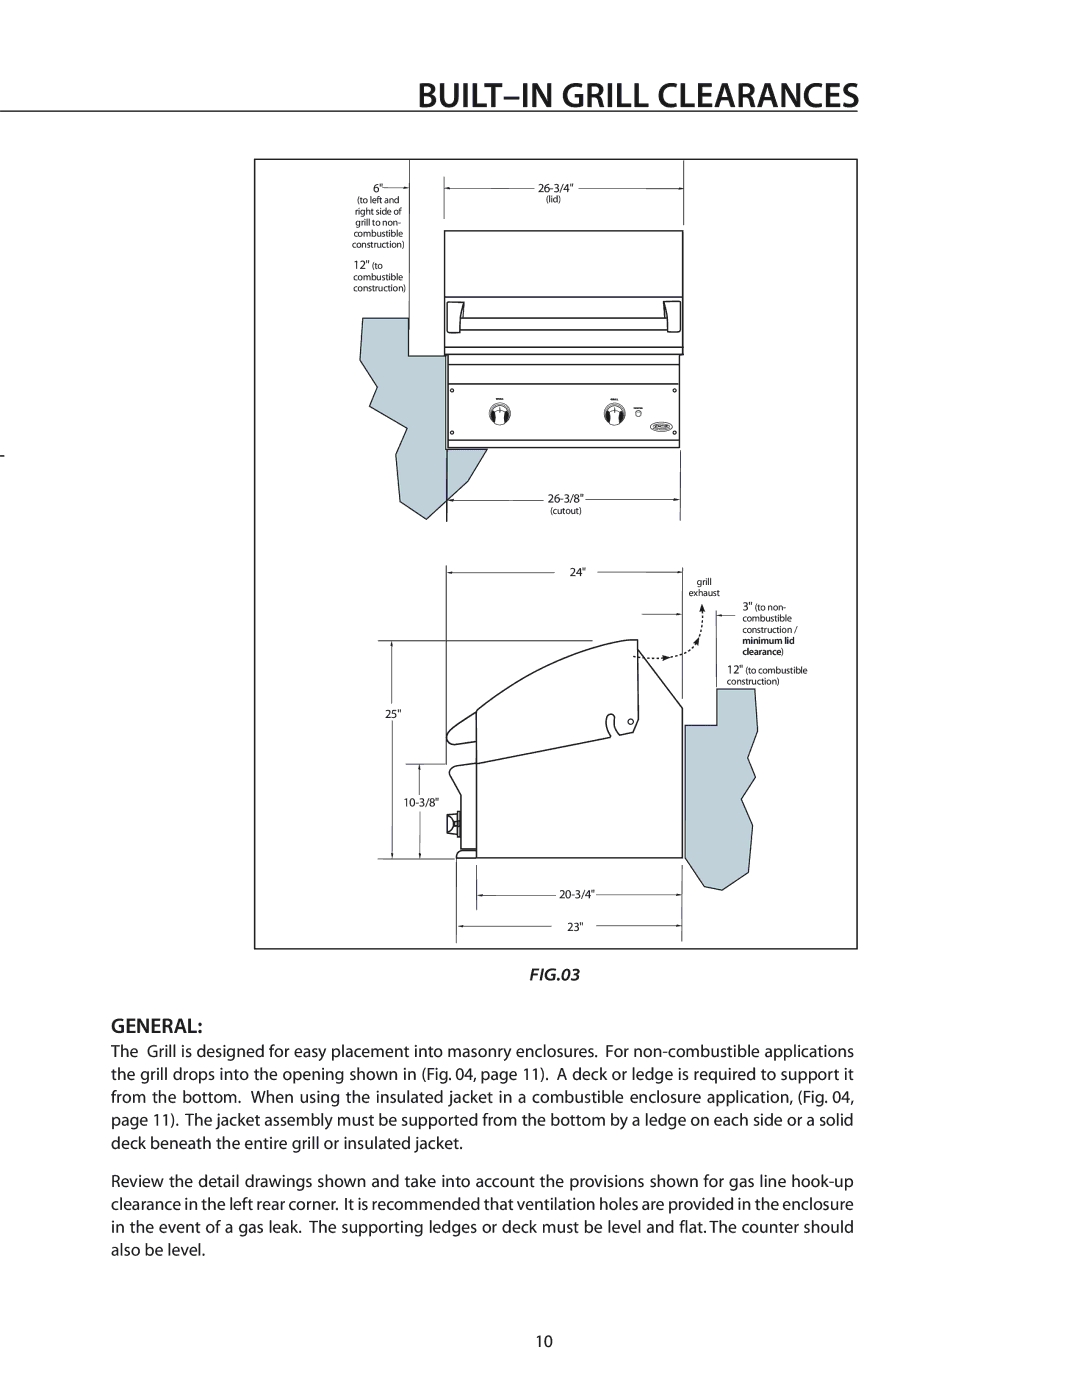
FIG.03
GENERAL:
The Grill is designed for easy placement into masonry enclosures. For non-combustible applications the grill drops into the opening shown in (Fig. 04, page 11). A deck or ledge is required to support it from the bottom. When using the insulated jacket in a combustible enclosure application, (Fig. 04, page 11). The jacket assembly must be supported from the bottom by a ledge on each side or a solid deck beneath the entire grill or insulated jacket.
Review the detail drawings shown and take into account the provisions shown for gas line hook-up clearance in the left rear corner. It is recommended that ventilation holes are provided in the enclosure in the event of a gas leak. The supporting ledges or deck must be level and flat. The counter should also be level.