Display Bezel
CAUTION: Before performing the following procedures, read the safety instructions in your Owner's Manual.
NOTICE: To avoid electrostatic discharge, ground yourself by using a wrist grounding strap or by periodically touching an unpainted metal surface (such as the back panel) on the computer.
1.Follow the instructions in "Preparing to Work Inside the Computer."
2.Remove the keyboard.
3.Remove the display assembly.
4.Use a plastic scribe to pry the six display bumpers out of the screw holes located on the front of the bezel.
5.Remove the six M2 x
NOTICE: Carefully separate the bezel from the top cover to avoid damage to the bezel.
6.Starting at the bottom of the display panel (by the Dell™ logo), use your fingers to separate the bezel from the top cover by lifting the inside edge of the bezel away from the top cover.
Display Panel
CAUTION: Before performing the following procedures, read the safety instructions in your Owner's Manual.
NOTICE: To avoid electrostatic discharge, ground yourself by using a wrist grounding strap or by touching an unpainted metal surface on the computer.
1.Follow the instructions in "Preparing to Work Inside the Computer."
2.Remove the keyboard.
3.Remove the display bezel.
4.Remove the two M2 x
5.Unsnap the cable from the top cover hook, and lift the bracket out of the display assembly.
6.Lift the display panel, and rotate the display panel out of the top cover.
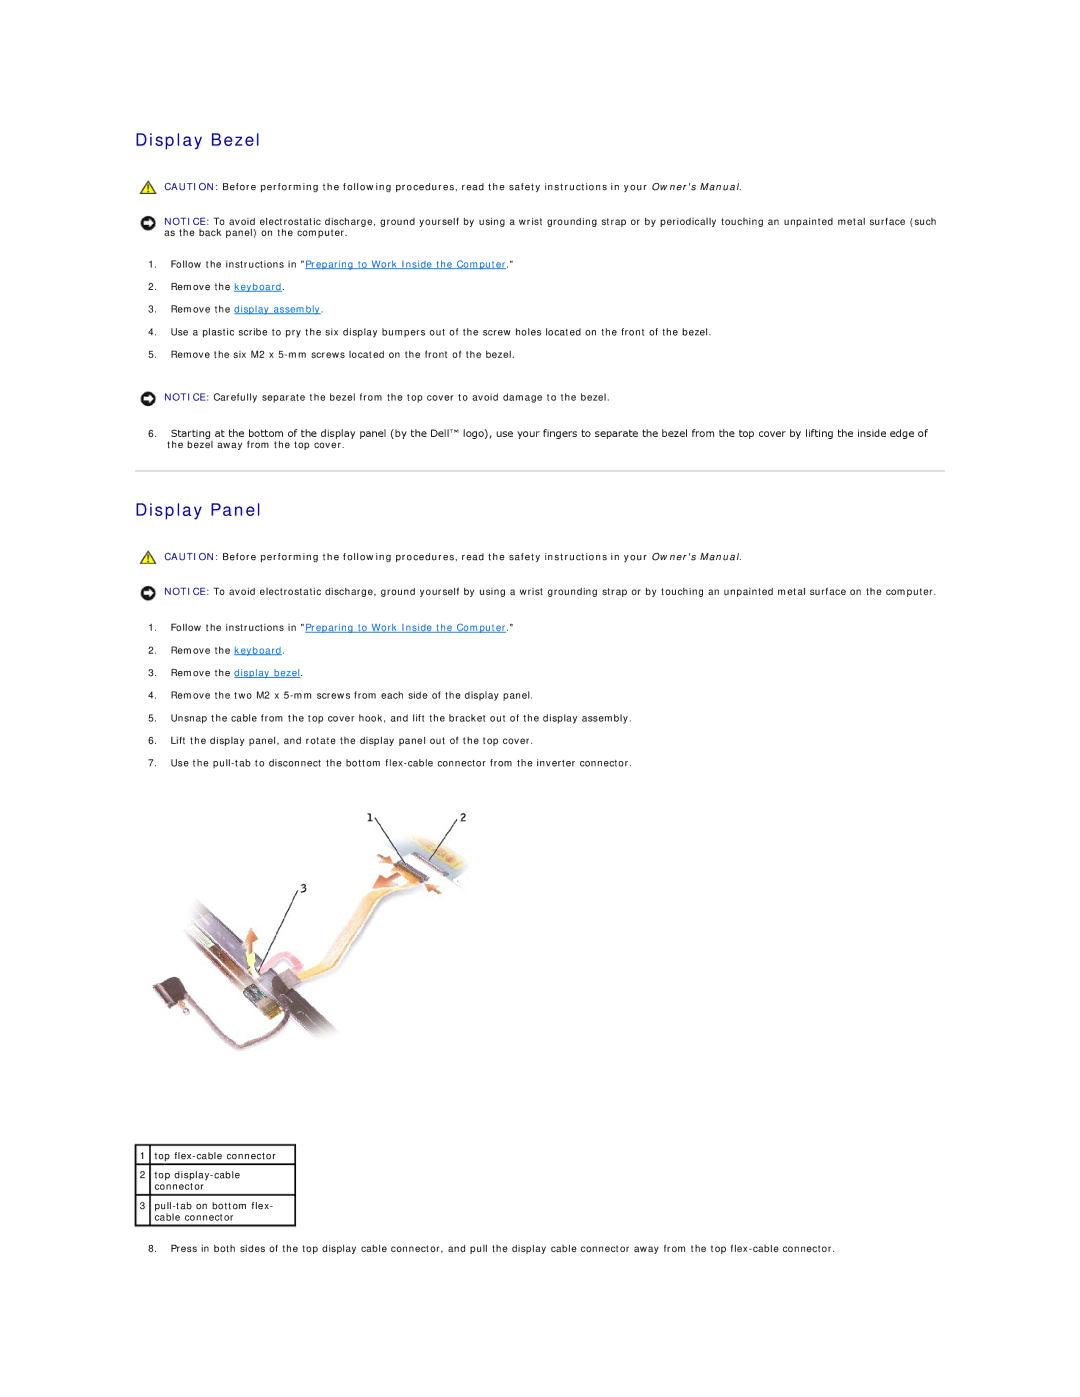
7.Use the
1top
2top
3
8.Press in both sides of the top display cable connector, and pull the display cable connector away from the top