See the documentation for your operating system for instructions.
15. Test the hard drive by running the Dell Diagnostics.
If the drive you just installed is the primary drive, install your operating system on the hard drive.
Floppy Drive
CAUTION: Before you begin any of the procedures in this section, follow the safety instructions located in the Product Information Guide.
CAUTION: To guard against electrical shock, always unplug your computer from the electrical outlet before opening the cover.
1.Follow the procedures in Before You Begin.
2.Release and remove the front panel (see page 46).
NOTE: If you are adding a floppy drive, see Installing a Floppy Drive.
Removing a Floppy Drive
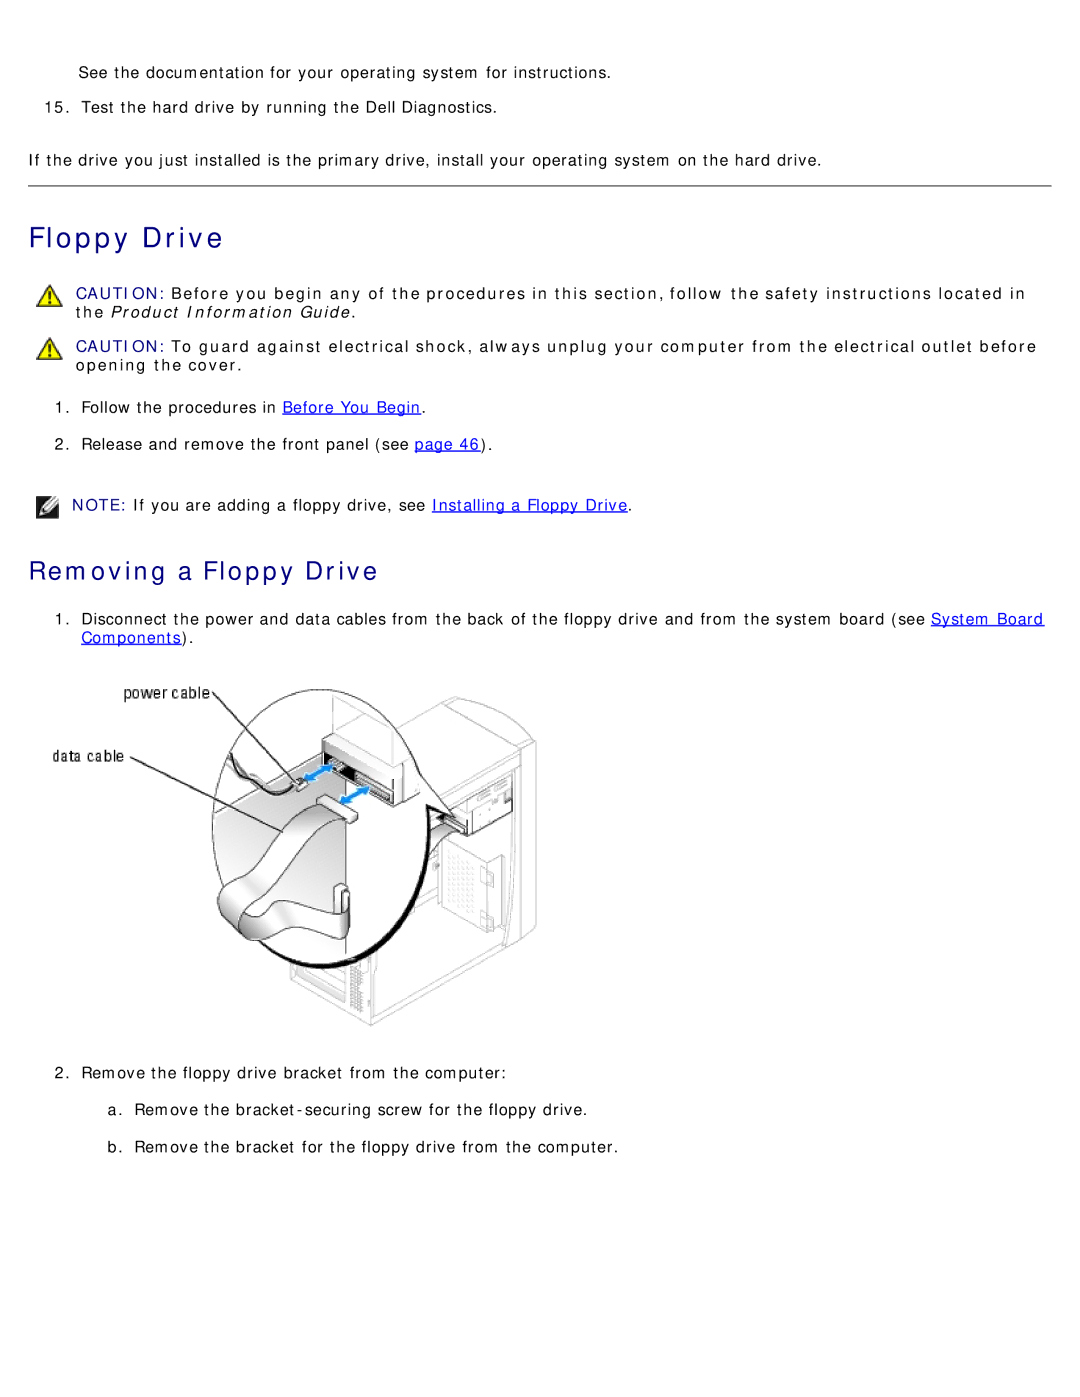
1.Disconnect the power and data cables from the back of the floppy drive and from the system board (see System Board Components).
2.Remove the floppy drive bracket from the computer:
a.Remove the
b.Remove the bracket for the floppy drive from the computer.