
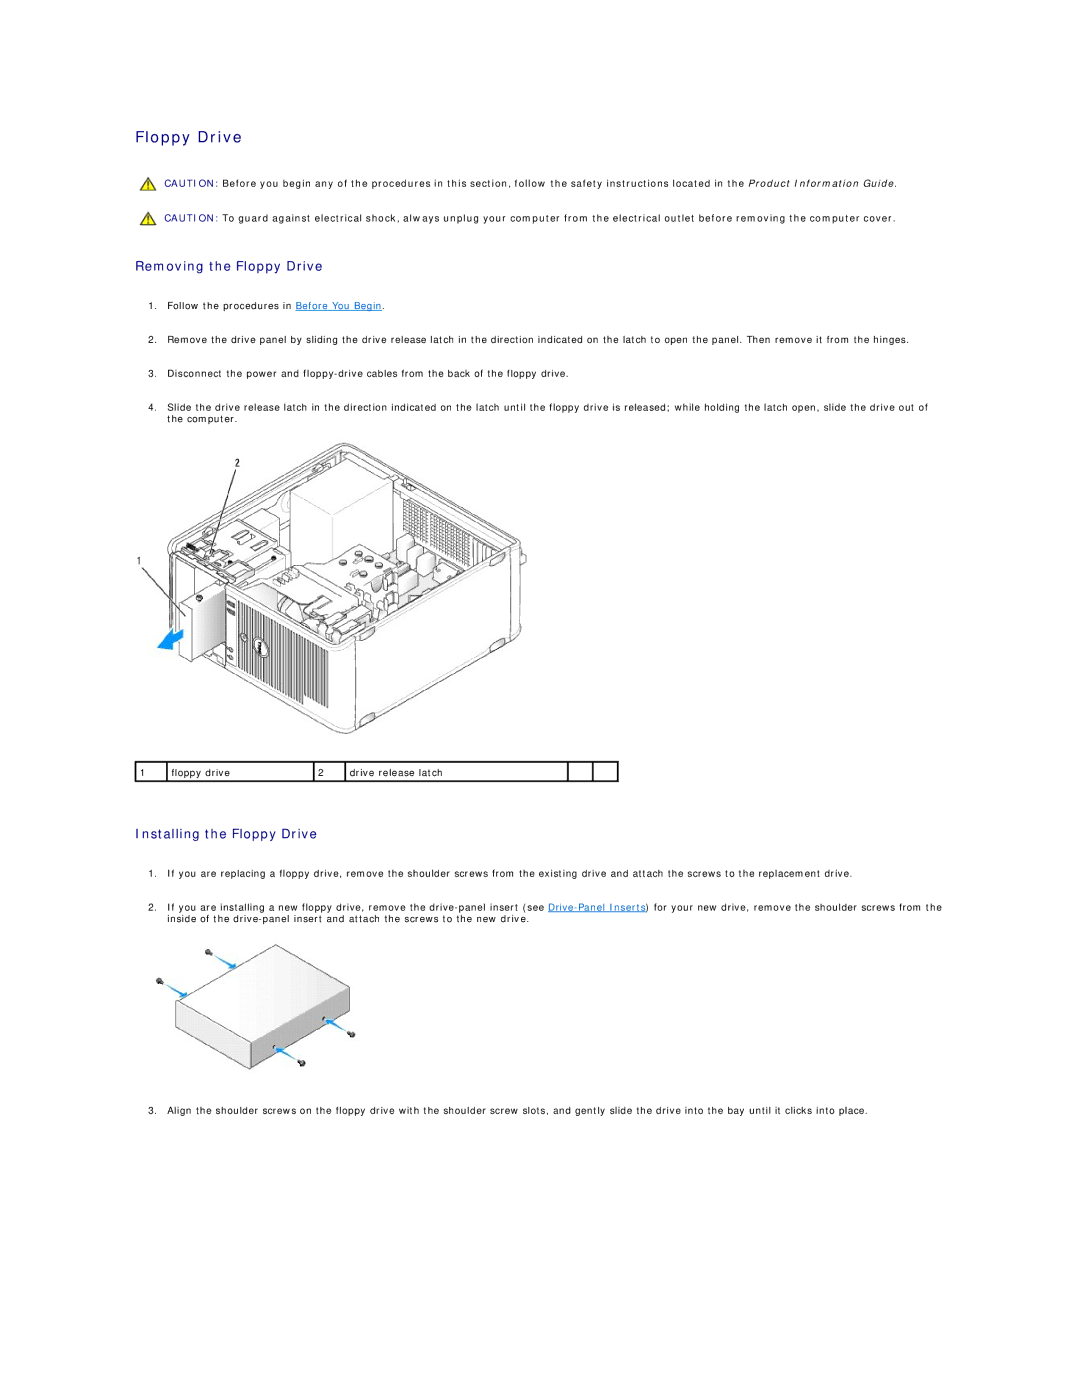
740-DT, 740-MT, DCCY, 740, DCSM specifications
The Dell PowerEdge 740 is a versatile and powerful server designed for small to medium-sized businesses that require efficient performance and reliability. It stands out in its class by offering a blend of scalability, energy efficiency, and advanced technology to meet the demanding needs of modern enterprises.One of the key features of the Dell PowerEdge 740 is its dual-socket architecture, which supports Intel Xeon processors. This allows for significant computing power, enabling users to run multiple applications simultaneously without compromising performance. With support for up to 24 processor cores, it can handle heavy workloads efficiently, making it an excellent choice for virtualization, database management, and other resource-intensive tasks.
The server supports up to 256 GB of DDR4 RAM, providing the speed and capacity necessary for high-performance computing. This high memory allowance is particularly useful for users running virtual machines or data-intensive applications that require fast access to data.
Storage is another crucial aspect of the Dell PowerEdge 740. The server offers flexible storage configurations, allowing users to choose from various drive types including traditional Hard Disk Drives (HDDs) and Solid-State Drives (SSDs). With support for up to 16 SFF drives, it caters to a range of storage needs, from basic file sharing to complex database applications. Additionally, Dell's integrated RAID technology ensures data integrity and protection against drive failures.
The design of the PowerEdge 740 is also noteworthy, featuring a compact rack configuration, making it suitable for environments with limited space. Its efficient cooling design helps maintain optimal operating temperatures even under heavy loads and ensures lower power consumption, contributing to overall energy efficiency.
Management and monitoring capabilities are enhanced through Dell's OpenManage technology, which simplifies server management tasks. This technology provides users with tools to easily manage system health, application availability, and performance, facilitating proactive management and reducing downtime.
Security is prioritized in the Dell PowerEdge 740 through features like TPM (Trusted Platform Module) and Secure Boot, which help protect sensitive data and systems from unauthorized access. These security features, combined with regular updates and support from Dell, make it a robust choice for businesses looking to safeguard their information.
Overall, the Dell PowerEdge 740 combines powerful performance, flexible storage options, and advanced management capabilities, making it an ideal server solution for businesses seeking reliability and efficiency in their IT infrastructure. Whether used for virtualization, data storage, or application support, the Dell PowerEdge 740 meets the diverse needs of today's dynamic business environments.