4.Open the computer cover.
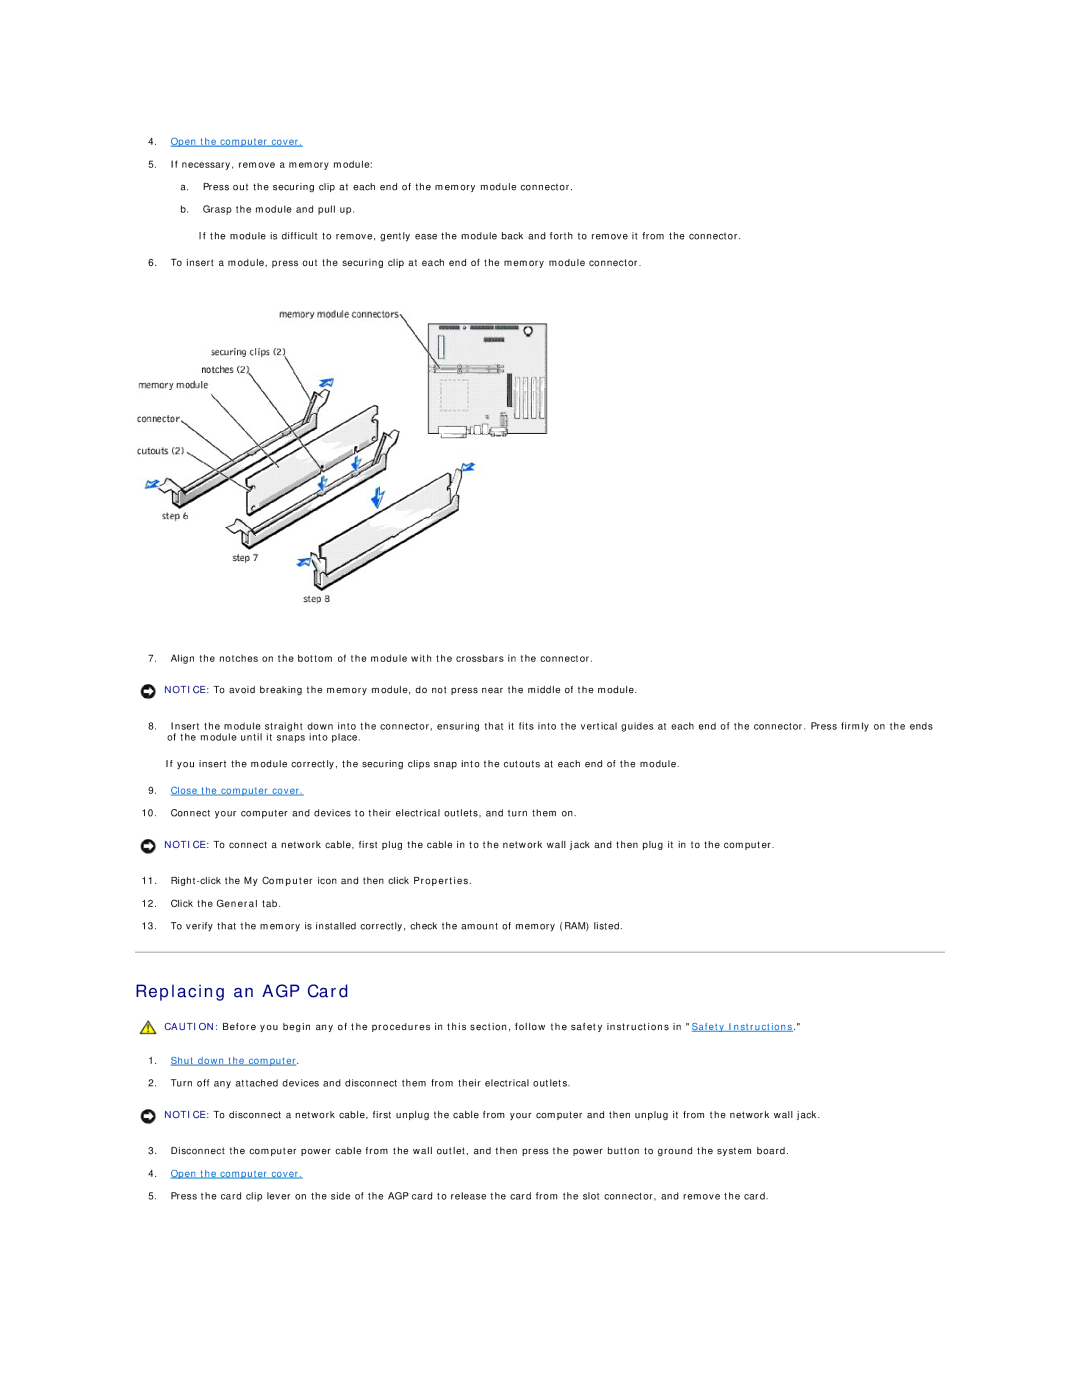
5.If necessary, remove a memory module:
a.Press out the securing clip at each end of the memory module connector.
b.Grasp the module and pull up.
If the module is difficult to remove, gently ease the module back and forth to remove it from the connector.
6.To insert a module, press out the securing clip at each end of the memory module connector.
7.Align the notches on the bottom of the module with the crossbars in the connector.
NOTICE: To avoid breaking the memory module, do not press near the middle of the module.
8.Insert the module straight down into the connector, ensuring that it fits into the vertical guides at each end of the connector. Press firmly on the ends of the module until it snaps into place.
If you insert the module correctly, the securing clips snap into the cutouts at each end of the module.
9.Close the computer cover.
10.Connect your computer and devices to their electrical outlets, and turn them on.
NOTICE: To connect a network cable, first plug the cable in to the network wall jack and then plug it in to the computer.
11.
12.Click the General tab.
13.To verify that the memory is installed correctly, check the amount of memory (RAM) listed.
Replacing an AGP Card
CAUTION: Before you begin any of the procedures in this section, follow the safety instructions in "Safety Instructions."
1.Shut down the computer.
2.Turn off any attached devices and disconnect them from their electrical outlets.
NOTICE: To disconnect a network cable, first unplug the cable from your computer and then unplug it from the network wall jack.
3.Disconnect the computer power cable from the wall outlet, and then press the power button to ground the system board.
4.Open the computer cover.
5.Press the card clip lever on the side of the AGP card to release the card from the slot connector, and remove the card.