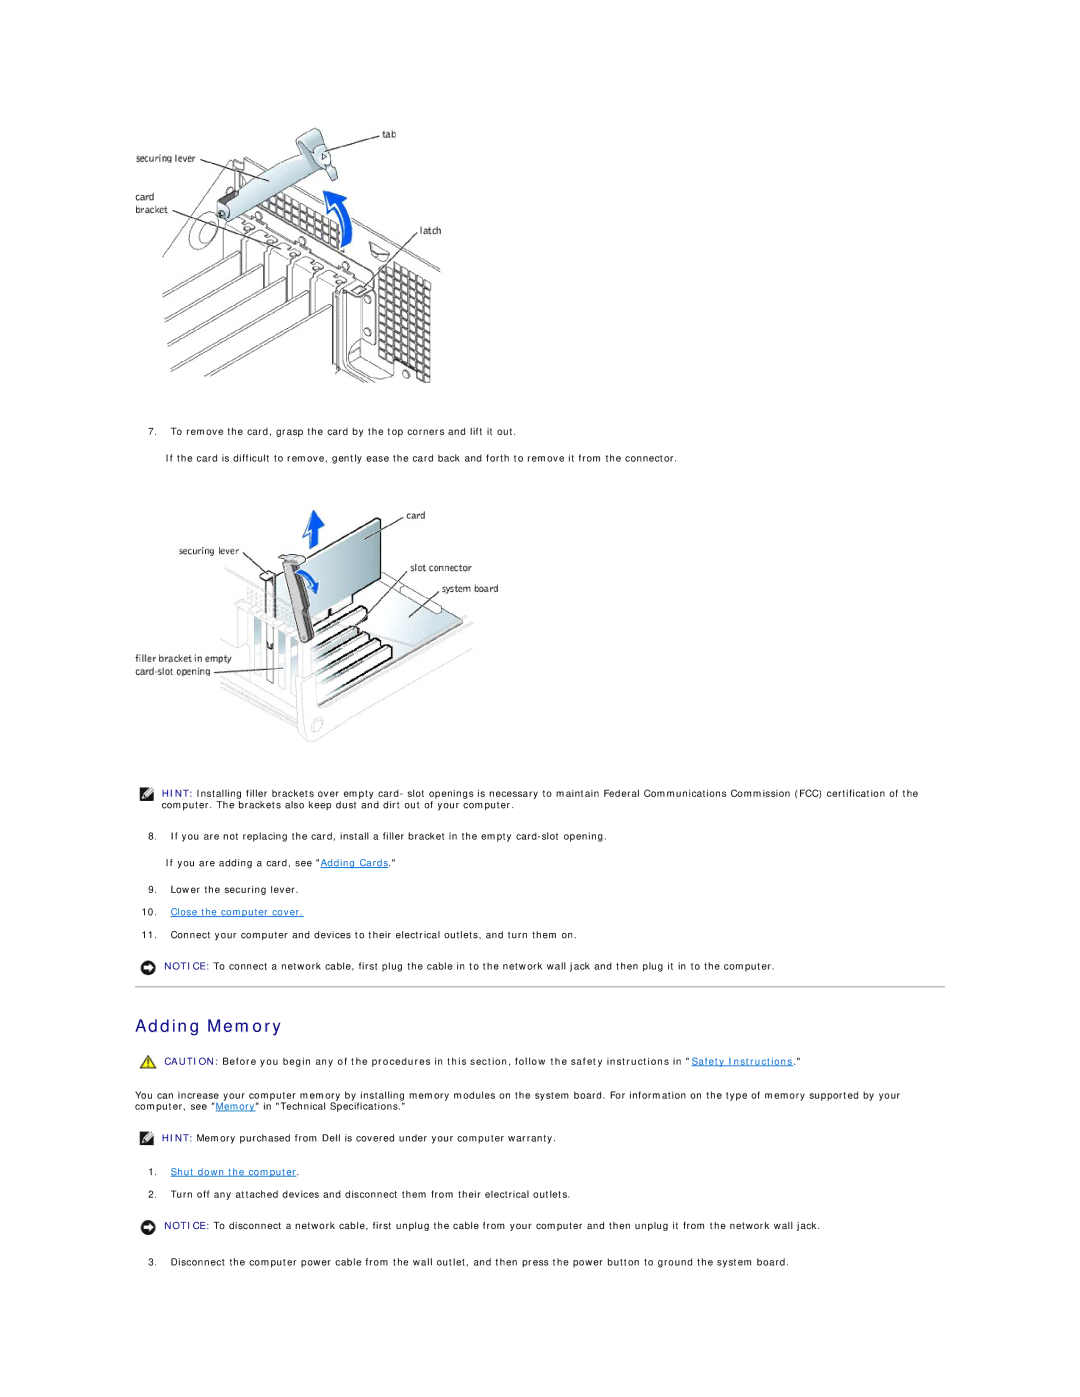
7.To remove the card, grasp the card by the top corners and lift it out.
If the card is difficult to remove, gently ease the card back and forth to remove it from the connector.
HINT: Installing filler brackets over empty card- slot openings is necessary to maintain Federal Communications Commission (FCC) certification of the computer. The brackets also keep dust and dirt out of your computer.
8.If you are not replacing the card, install a filler bracket in the empty
If you are adding a card, see "Adding Cards."
9.Lower the securing lever.
10.Close the computer cover.
11.Connect your computer and devices to their electrical outlets, and turn them on.
NOTICE: To connect a network cable, first plug the cable in to the network wall jack and then plug it in to the computer.
Adding Memory
CAUTION: Before you begin any of the procedures in this section, follow the safety instructions in "Safety Instructions."
You can increase your computer memory by installing memory modules on the system board. For information on the type of memory supported by your computer, see "Memory" in "Technical Specifications."
HINT: Memory purchased from Dell is covered under your computer warranty.
1.Shut down the computer.
2.Turn off any attached devices and disconnect them from their electrical outlets.
NOTICE: To disconnect a network cable, first unplug the cable from your computer and then unplug it from the network wall jack.
3.Disconnect the computer power cable from the wall outlet, and then press the power button to ground the system board.