Installation (continued)
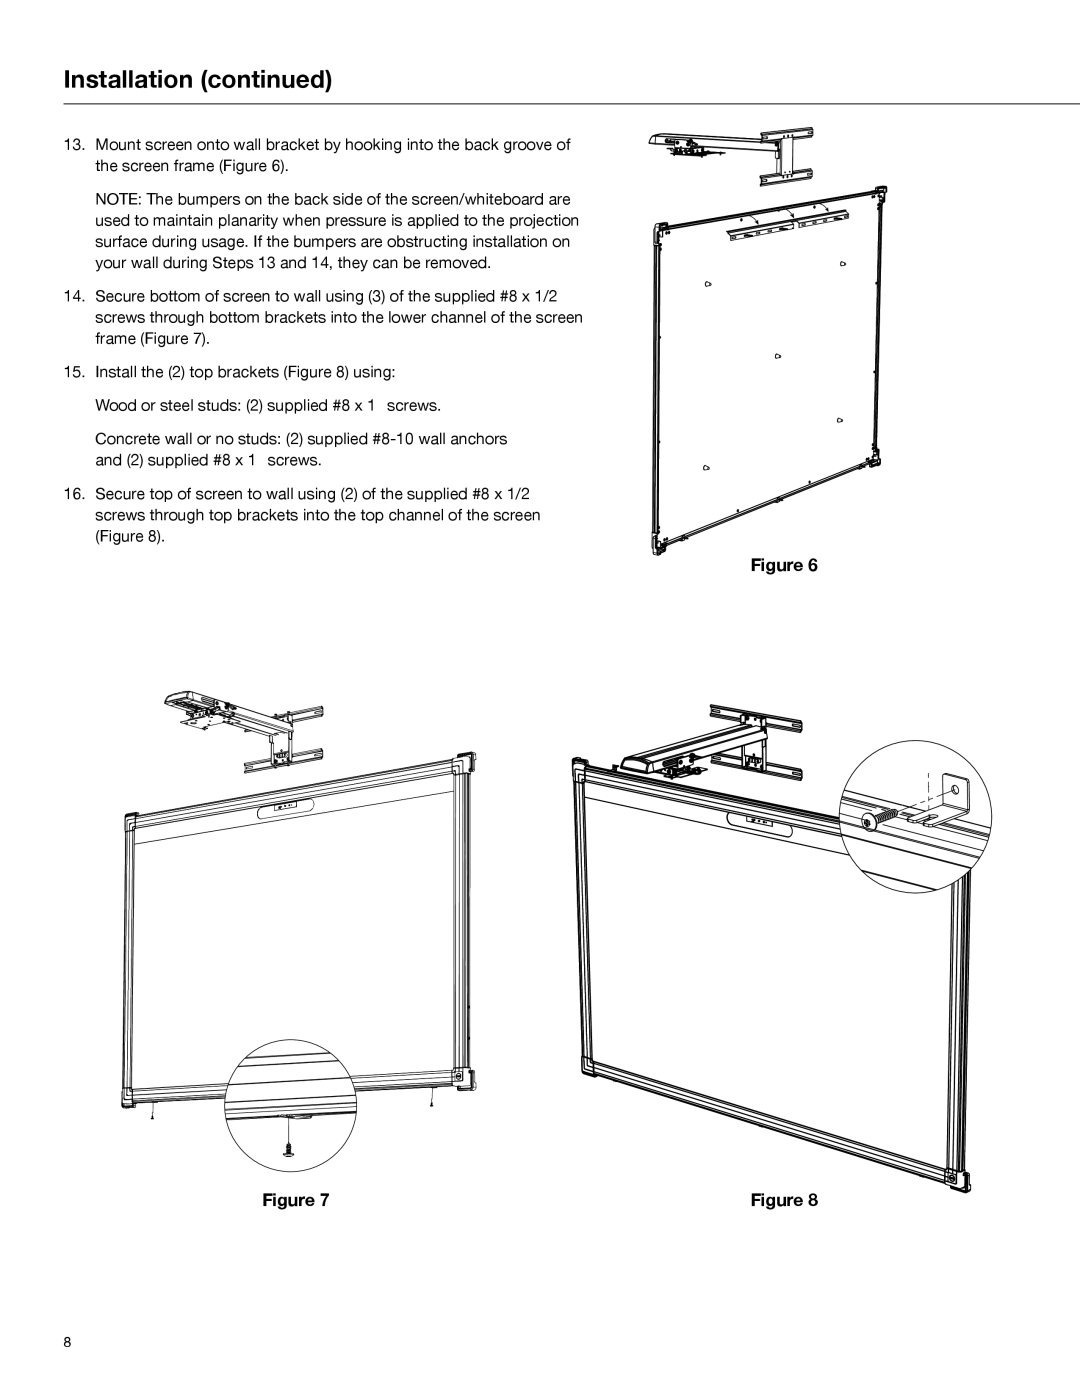
13. Mount screen onto wall bracket by hooking into the back groove of the screen frame (Figure 6).
NOTE: The bumpers on the back side of the screen/whiteboard are used to maintain planarity when pressure is applied to the projection surface during usage. If the bumpers are obstructing installation on your wall during Steps 13 and 14, they can be removed.
14. Secure bottom of screen to wall using (3) of the supplied #8 x 1/2” screws through bottom brackets into the lower channel of the screen frame (Figure 7).
15. Install the (2) top brackets (Figure 8) using: Wood or steel studs: (2) supplied #8 x 1” screws.
Concrete wall or no studs: (2) supplied
16. Secure top of screen to wall using (2) of the supplied #8 x 1/2” screws through top brackets into the top channel of the screen (Figure 8).
Figure 6
![]()
![]()
![]()
![]()
![]()
![]()
![]()
![]()
![]() E
E
Figure 7 | Figure 8 |
8