LG Electronics OSW100 How to attach to masonry walls, How to Install the Top Wall Mount

Models: OSW100

1 12
Download 12 pages 38.37 Kb
Page 6
Image 6
3How to attach to masonry walls

3How to attach to masonry walls

Please follow the below direction.
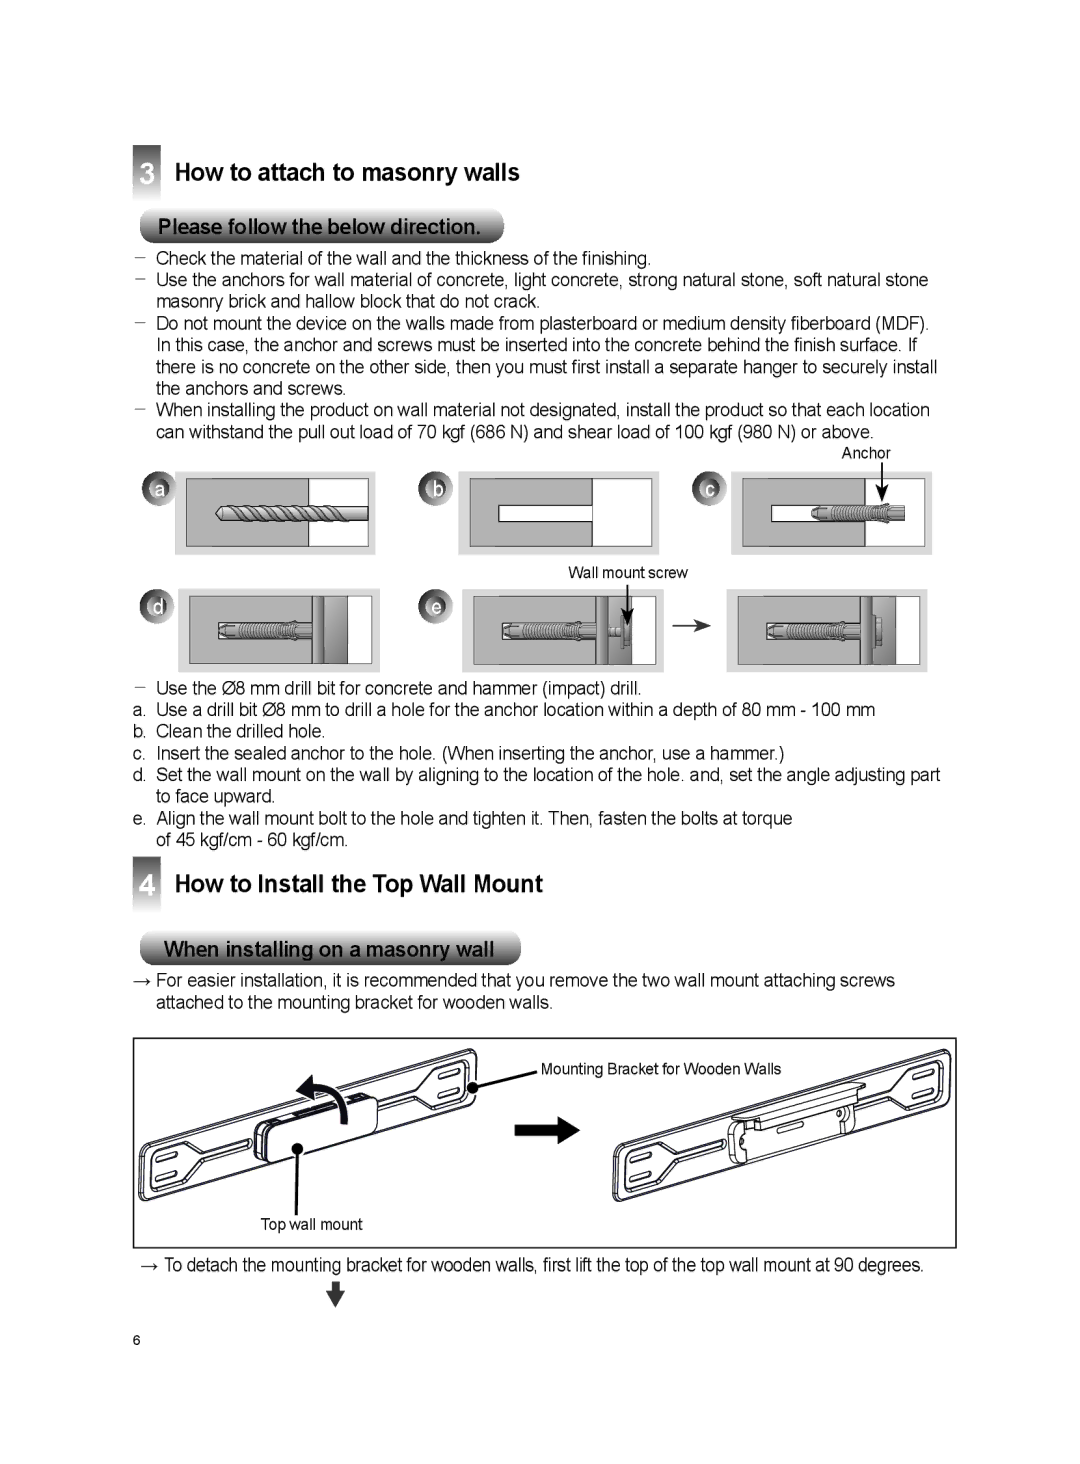
-- Check the material of the wall and the thickness of the finishing.

-- Use the anchors for wall material of concrete, light concrete, strong natural stone, soft natural stone masonry brick and hallow block that do not crack.

-- Do not mount the device on the walls made from plasterboard or medium density fiberboard (MDF). In this case, the anchor and screws must be inserted into the concrete behind the finish surface. If there is no concrete on the other side, then you must first install a separate hanger to securely install the anchors and screws.

-- When installing the product on wall material not designated, install the product so that each location can withstand the pull out load of 70 kgf (686 N) and shear load of 100 kgf (980 N) or above.

Anchor

a

d

b

e

c

Wall mount screw

-- Use the Ø8 mm drill bit for concrete and hammer (impact) drill.

a.Use a drill bit Ø8 mm to drill a hole for the anchor location within a depth of 80 mm - 100 mm

b.Clean the drilled hole.

c.Insert the sealed anchor to the hole. (When inserting the anchor, use a hammer.)

d.Set the wall mount on the wall by aligning to the location of the hole. and, set the angle adjusting part to face upward.

e.Align the wall mount bolt to the hole and tighten it. Then, fasten the bolts at torque of 45 kgf/cm - 60 kgf/cm.

4How to Install the Top Wall Mount

When installing on a masonry wall

→→For easier installation, it is recommended that you remove the two wall mount attaching screws attached to the mounting bracket for wooden walls.

Mounting Bracket for Wooden Walls

Top wall mount

→→To detach the mounting bracket for wooden walls, first lift the top of the top wall mount at 90 degrees.

6

Page 6
Image 6
LG Electronics OSW100 How to attach to masonry walls, How to Install the Top Wall Mount, Please follow the below direction