![]()
![]()
![]() A
A![]()
![]()
![]()
![]()
![]()
![]()
![]()
![]()
![]()
![]()
![]()
![]()
![]() A
A![]()
![]()
![]()
![]()
![]()
Remove the wall mount fixing screws.
→→Rotate the two screws next to A counterclockwise to remove the screws and the mounting bracket for wooden walls from the top wall mount.
→→Place the top wall mount onto the area of the wall where you want to install it, and then mark the fixing point for the fixing screws and remove the top wall mount.
→→Attach the top wall mount to the wall by referring to the illustration below.
→→Check if the wall mount is level by using a leveler.
ENGLISH
A![]()
![]()
![]()
A![]()
Wall mount screw
→→Fix one wall mount fixing screw into the top left hole next to A and another screw into the top right hole next to A as shown in the illustration.
→→At this time, use a + driver (Manual or motorized) or 8 mm wrench to tighten the screw so that the wall, wall bracket and screw are completely pressed against one another.
→→After attaching the screws, put down the top of the top wall mount.
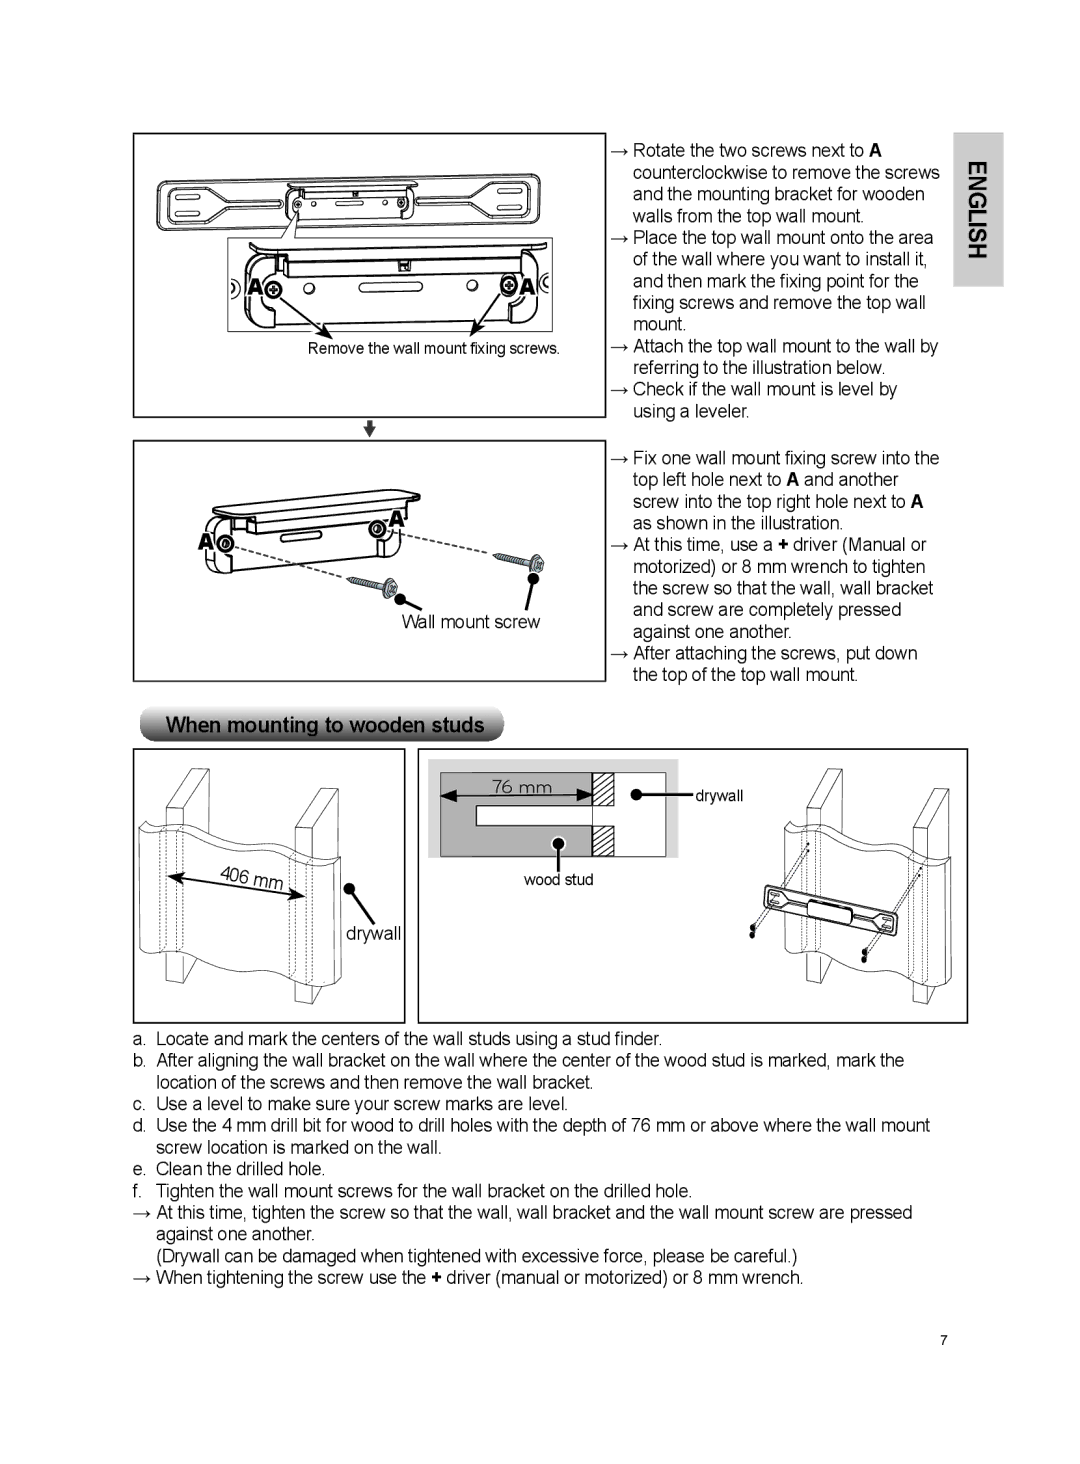
When mounting to wooden studs
drywall |
76 mm | drywall |
| |
wood stud |
|
a.Locate and mark the centers of the wall studs using a stud finder.
b.After aligning the wall bracket on the wall where the center of the wood stud is marked, mark the location of the screws and then remove the wall bracket.
c.Use a level to make sure your screw marks are level.
d.Use the 4 mm drill bit for wood to drill holes with the depth of 76 mm or above where the wall mount screw location is marked on the wall.
e.Clean the drilled hole.
f.Tighten the wall mount screws for the wall bracket on the drilled hole.
→→At this time, tighten the screw so that the wall, wall bracket and the wall mount screw are pressed against one another.
(Drywall can be damaged when tightened with excessive force, please be careful.) →→When tightening the screw use the + driver (manual or motorized) or 8 mm wrench.
7