BEFORE INSTALLATION
*Do not use the product for purposes other than mounting a display on the wall.
*When installing/using the wall mount, be cautious of product damage and avoid accidents.
*If you have not fully read and understood the installation manual, do not install the product and contact the dealer to have a specialized installer install the product for you.
*This product is designed to be mounted to walls that use standard intervals between the studs.
*Install the screw to attach the wall mount so that it can be assembled at the center from both ends of the studs. Use of a stud finder, a separate device, is recommended.
*When installing the wall mount on a concrete wall or on any other wall capable of holding the strength specified in the manual, you can detach the standard gap bracket for stud wall mounting and then follow the instructions for attaching the wall mount to make the installation easier.
*Install the product only on a vertical wall.
The manufacturer is not responsible for issue from installing the product on an angled wall or on the ceiling.
*Check that the accessories provided with the product are all included before installing. LG Electronics is not liable for any damage or loss of accessories after the package has been opened.
*Keep the included accessories out of reach of babies or children as it can cause safety issues including suffocation from swallowing the parts.
*Make sure screws are tight against the wall, but do not overtighten.
Applying excessive force to screws may damage to the wall, affect the product performance, or cause the product to become damaged.
*Be careful not to install a TV that exceeds the weight restrictions of the wall mount.
*Be careful with the tools used during installation to prevent accidents or damage.
 INSTALLATION METHOD
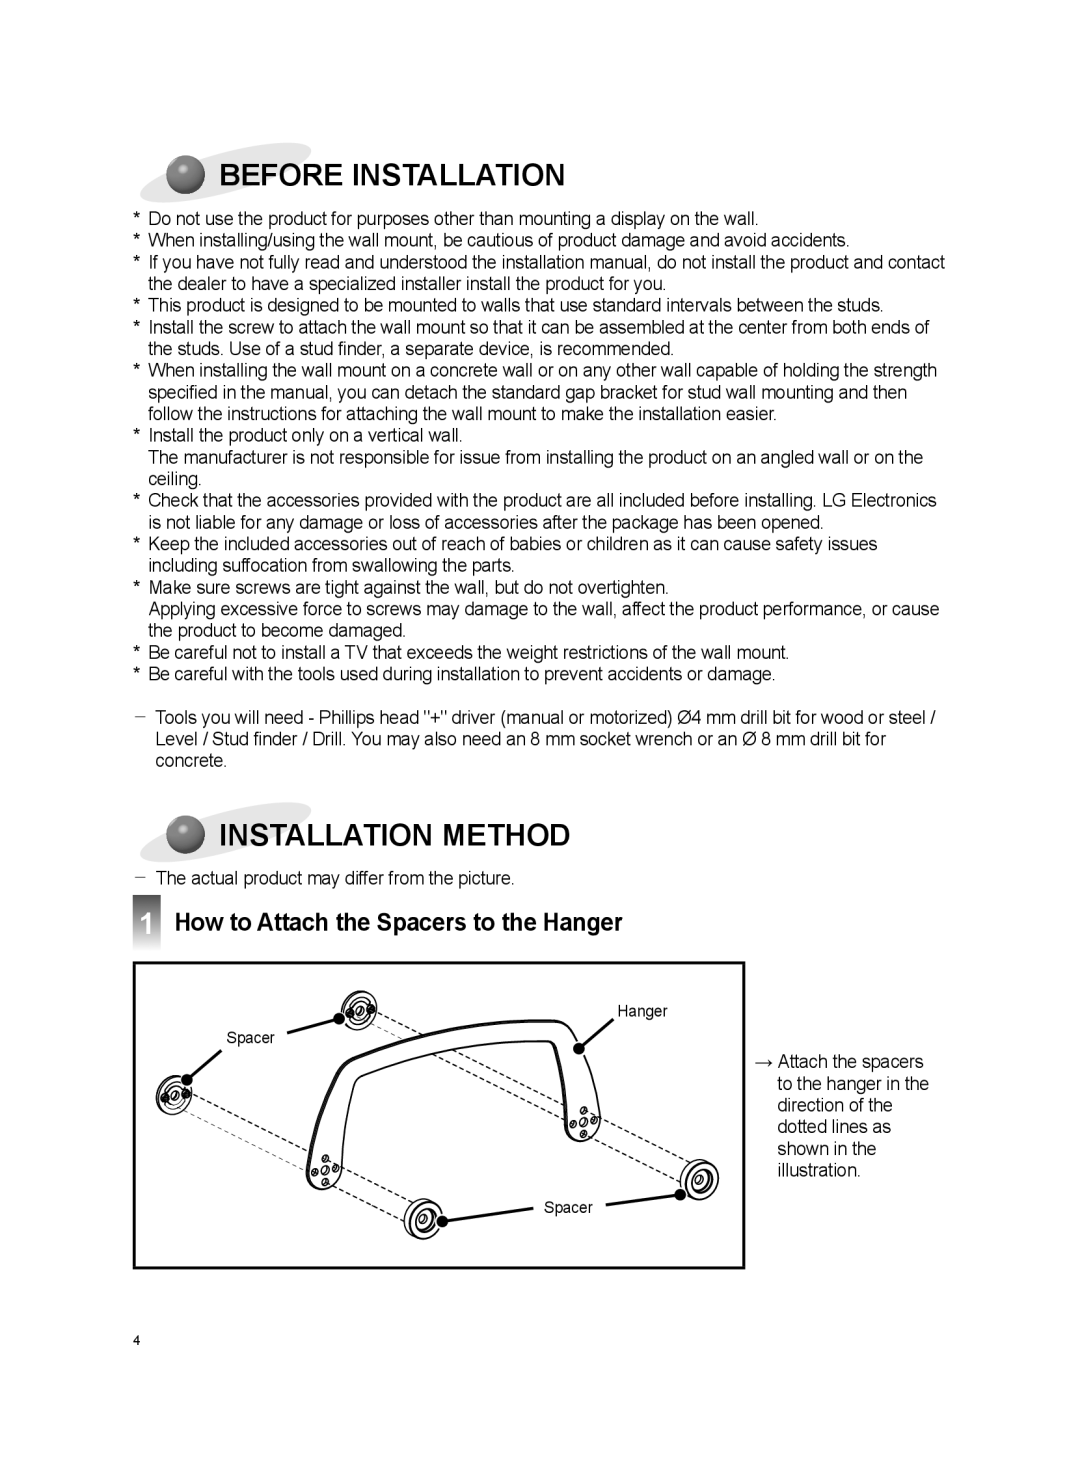
1 | How to Attach the Spacers to the Hanger |
| Hanger |
| Spacer |
| →→Attach the spacers |
| to the hanger in the |
| direction of the |
| dotted lines as |
| shown in the |
| illustration. |
| Spacer |
4 |
|