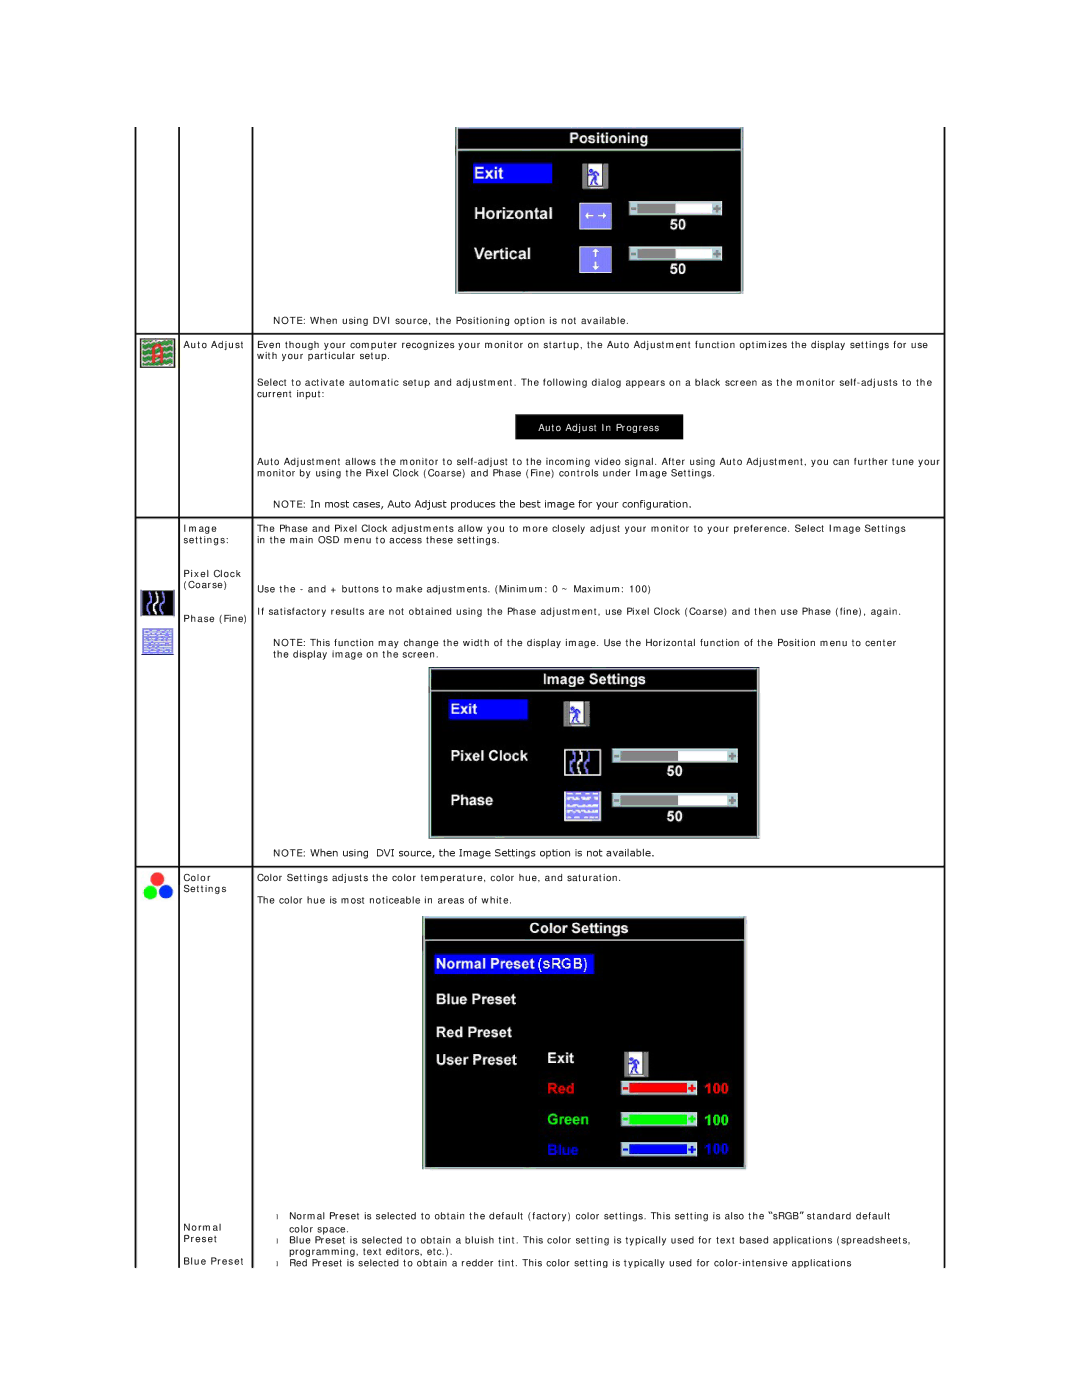
| NOTE: When using DVI source, the Positioning option is not available. | ||
|
|
|
|
Auto Adjust | Even though your computer recognizes your monitor on startup, the Auto Adjustment function optimizes the display settings for use | ||
| with your particular setup. | ||
| Select to activate automatic setup and adjustment. The following dialog appears on a black screen as the monitor | ||
| current input: | ||
|
|
| |
|
| Auto Adjust In Progress |
|
|
|
|
|
| Auto Adjustment allows the monitor to | ||
| monitor by using the Pixel Clock (Coarse) and Phase (Fine) controls under Image Settings. | ||
| NOTE: In most cases, Auto Adjust produces the best image for your configuration. | ||
|
| ||
Image | The Phase and Pixel Clock adjustments allow you to more closely adjust your monitor to your preference. Select Image Settings | ||
settings: | in the main OSD menu to access these settings. | ||
Pixel Clock |
|
|
|
(Coarse) | Use the - and + buttons to make adjustments. (Minimum: 0 ~ Maximum: 100) | ||
| |||
Phase (Fine) | If satisfactory results are not obtained using the Phase adjustment, use Pixel Clock (Coarse) and then use Phase (fine), again. | ||
| NOTE: This function may change the width of the display image. Use the Horizontal function of the Position menu to center | ||
| the display image on the screen. | ||
| NOTE: When using DVI source, the Image Settings option is not available. |
|
|
Color | Color Settings adjusts the color temperature, color hue, and saturation. |
Settings | The color hue is most noticeable in areas of white. |
|
Normal
Preset
Blue Preset
•Normal Preset is selected to obtain the default (factory) color settings. This setting is also the “sRGB” standard default color space.
•Blue Preset is selected to obtain a bluish tint. This color setting is typically used for text based applications (spreadsheets, programming, text editors, etc.).
•Red Preset is selected to obtain a redder tint. This color setting is typically used for