Manuals
/
Dell
/
Computer Equipment
/
Personal Computer
Dell
XPS 8700, X87001253BLK
manual
Front USB panel Screw USB panel cables
Models:
XPS 8700
X87001253BLK
1
55
86
86
Download
86 pages
28.61 Kb
52
53
54
55
56
57
58
59
Password
Wireless mini-card connector
System Setup
Flashing the Bios
Removing the Coin-Cell Battery
Procedure
Clearing Cmos Settings
Safety
Power cable
Changing Boot Sequence
Page 55
Image 55
1
2
3
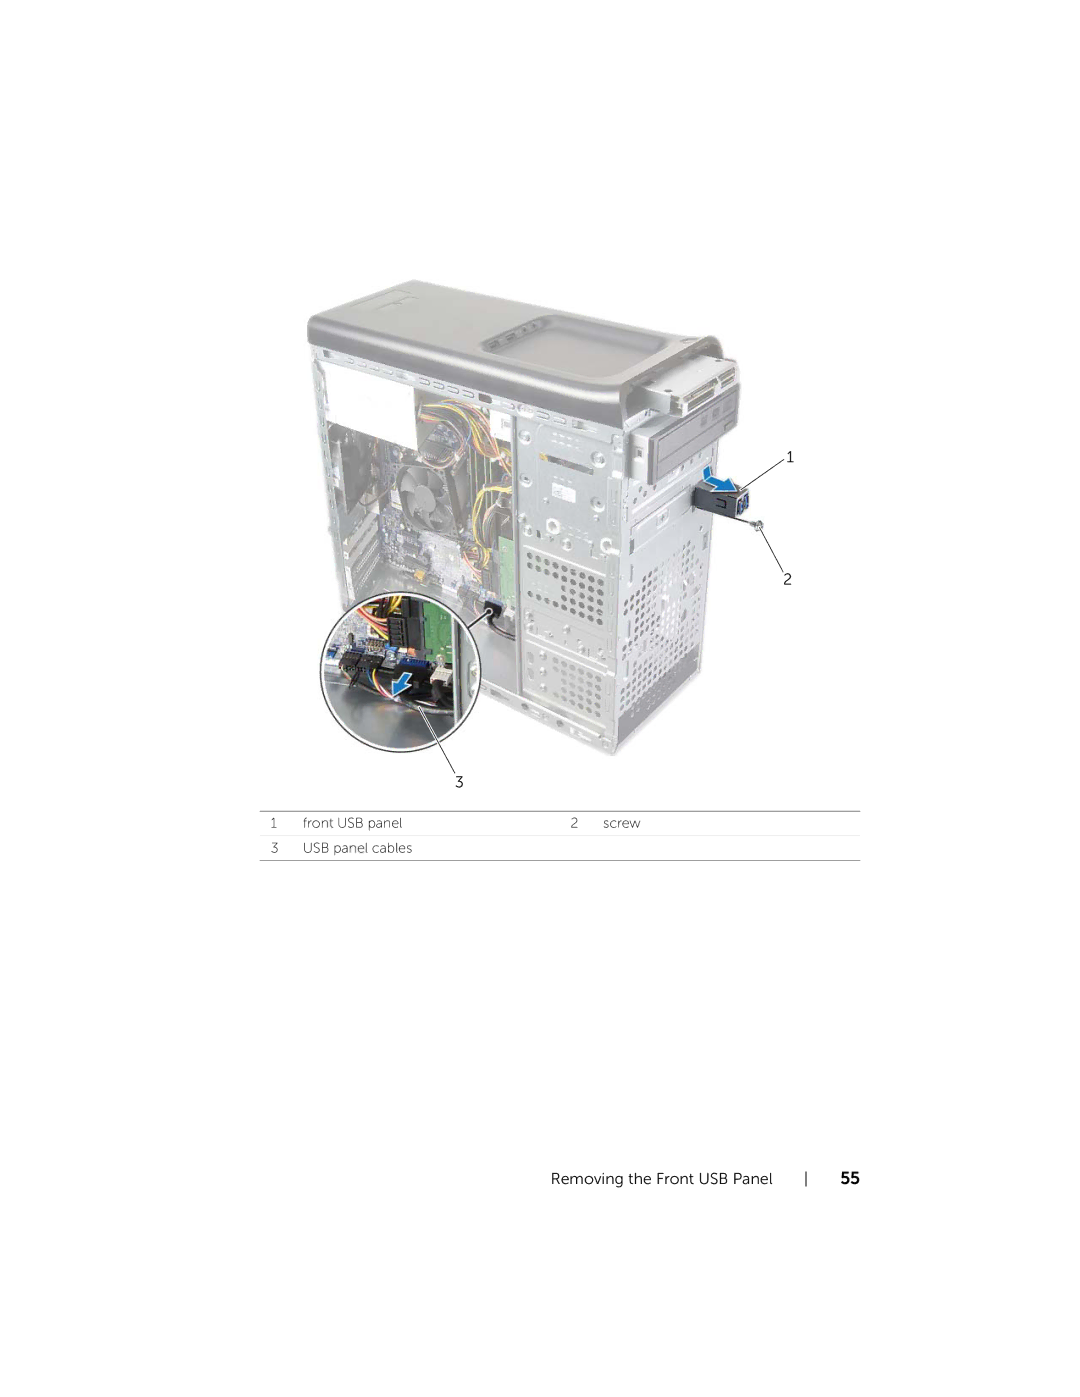
1 front USB panel
2 screw
3
USB panel cables
Removing the Front USB Panel
55
Page 54
Page 56
Page 55
Image 55
Page 54
Page 56
Contents
XPS
Dell Inc
Contents
Removing the Graphics-Card
Replacing the Primary Hard-Drive
Removing the Media-Card Reader
Removing the Processor Fan and Heat-Sink
Entering the Service Tag in system setup
Turn Off Your Computer and Connected Devices
Before You Begin
Recommended Tools
Safety Instructions
After Working Inside Your Computer
Inside View of Your Computer
Technical Overview
System-Board Components
Fpanel
Removing the Computer Cover
Procedure
Postrequisites
Replacing the Computer Cover
Prerequisites
Removing the Memory Modules
Replacing the Memory Modules
Cutouts Memory-module connector Tab Notch Memory module
Postrequisites
Removing the Front Bezel
Procedure
Replacing the Front Bezel
Removing the Graphics-Card Bracket optional
Replacing the Graphics-Card Bracket optional
Removing the Graphics Card
Power cable
Securing tab Graphics card
Replacing the Graphics Card
Removing the Wireless Mini-Card
Wireless mini-card connector
Replacing the Wireless Mini-Card
Removing the mSATA Drive
Replacing the mSATA Drive
Removing the Primary Hard-Drive
Power cable Data cable Primary hard-drive Screws
Replacing the Primary Hard-Drive
Removing the Hard-Drive Cage
Replacing the Hard-Drive Cage
Removing the Secondary Hard-Drive optional
Replacing the Secondary Hard-Drive optional
Installing a third Hard-Drive optional
Third hard-drive
Postrequisites
Removing the Optical Drive
Replacing the Optical Drive
Removing the Top Cover
Replacing the Top Cover
Removing the Media-Card Reader
Replacing the Media-Card Reader
Removing the Top I/O Panel
Removing the Top I/O Panel
Replacing the Top I/O Panel
Removing the Front USB Panel
Front USB panel Screw USB panel cables
Replacing the Front USB Panel
Removing the Power Button Module
Power button module cable Power button module tabs
Replacing the Power Button Module
Removing the Chassis Fan
Replacing the Chassis Fan
Removing the Processor Fan and Heat-Sink
Processor fan cable
Replacing the Processor Fan and Heat-Sink
Removing the Processor
Release lever Securing tab Processor cover Socket
Replacing the Processor
Procedure
Removing the Coin-Cell Battery
Replacing the Coin-Cell Battery
Removing the Power-Supply Unit
Replacing the Power-Supply Unit
Removing the System Board
Screws System board
Replacing the System Board
Entering the Service Tag in system setup
Entering System Setup
System Setup
Overview
System Setup Screens
Sata
MSATA Device Device Type
Onboard Audio Controller
LAN/WLAN
Changing Boot Sequence for the Current Boot
Changing Boot Sequence
Clearing Forgotten Passwords
Clearing Cmos Settings
Flashing the Bios
To learn about Windows
More Information
Top
Page
Image
Contents