
DEDW60SI specifications
The DeLonghi DEDW60SI is an advanced dishwasher designed for modern kitchens, renowned for its sleek design and high efficiency. Bringing together innovation and practicality, this appliance is a testament to DeLonghi's commitment to quality and performance.One of the standout features of the DEDW60SI is its energy efficiency. The dishwasher boasts an impressive energy rating, ensuring that you can clean your dishes without worrying about excessive power consumption. This not only saves you money on your energy bills but also makes it a more environmentally friendly choice.
In terms of capacity, the DEDW60SI is designed to accommodate up to 12 place settings, making it ideal for small to medium-sized families. The interior is thoughtfully arranged with adjustable racks and foldable tines, allowing for versatile loading options. This flexibility means that whether you need to wash larger pots or delicate glassware, the DEDW60SI can handle it with ease.
The DeLonghi DEDW60SI features multiple washing programs, which cater to various cleaning needs. These include eco-friendly settings designed to save water and energy, as well as intensive cycles for heavily soiled dishes. The quick wash program provides an efficient solution for when time is of the essence, ensuring that you have clean dishes ready in no time.
Sound performance is another key characteristic of the DEDW60SI. Operating at a low noise level, it allows users to run the dishwasher at any time without disrupting household activities. This is particularly beneficial for open-plan living spaces where noise can be more noticeable.
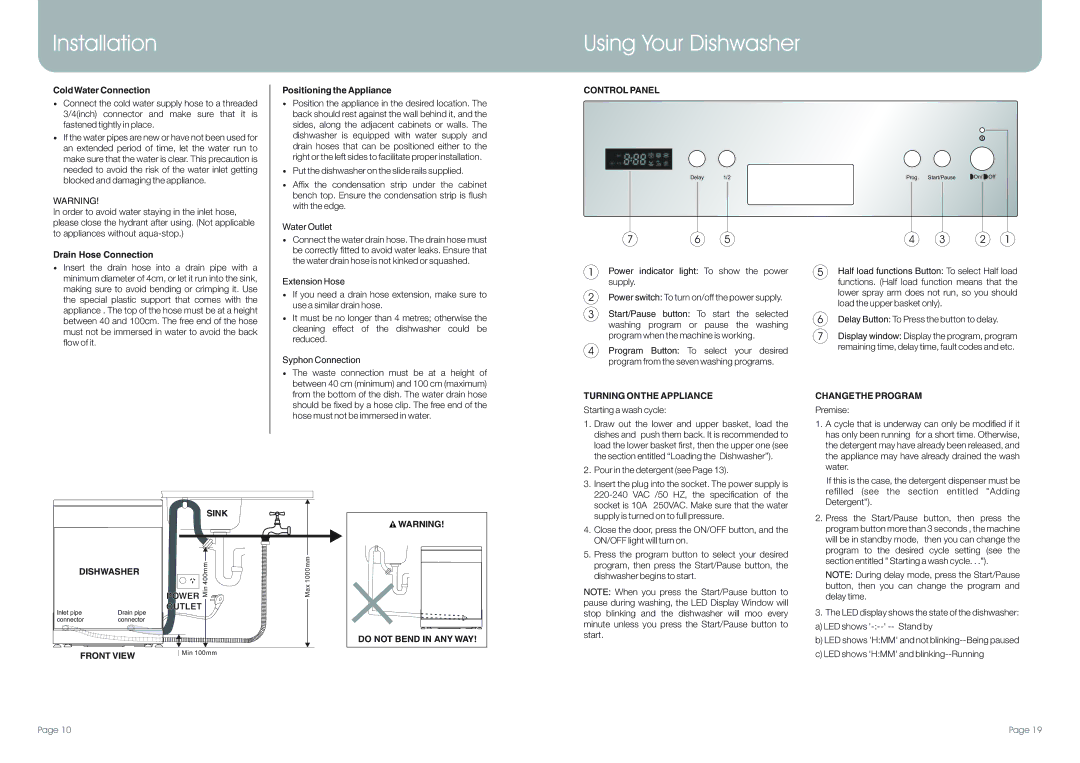
The DEDW60SI also integrates modern technologies for enhanced user convenience. The digital control panel is easy to operate, providing clear indications of the chosen programs and remaining cycle time. Furthermore, the aquastop system offers peace of mind by preventing water leakage, ensuring safety and protection for your home.
In conclusion, the DeLonghi DEDW60SI dishwasher combines efficiency, versatility, and high-performance features, making it an excellent choice for those looking to optimize their kitchen chores. With its thoughtful design and advanced technologies, it stands out as a reliable and efficient appliance that meets the demands of contemporary living.