ASSEMBLY
INSTALL BLADE TENSIONING KNOB
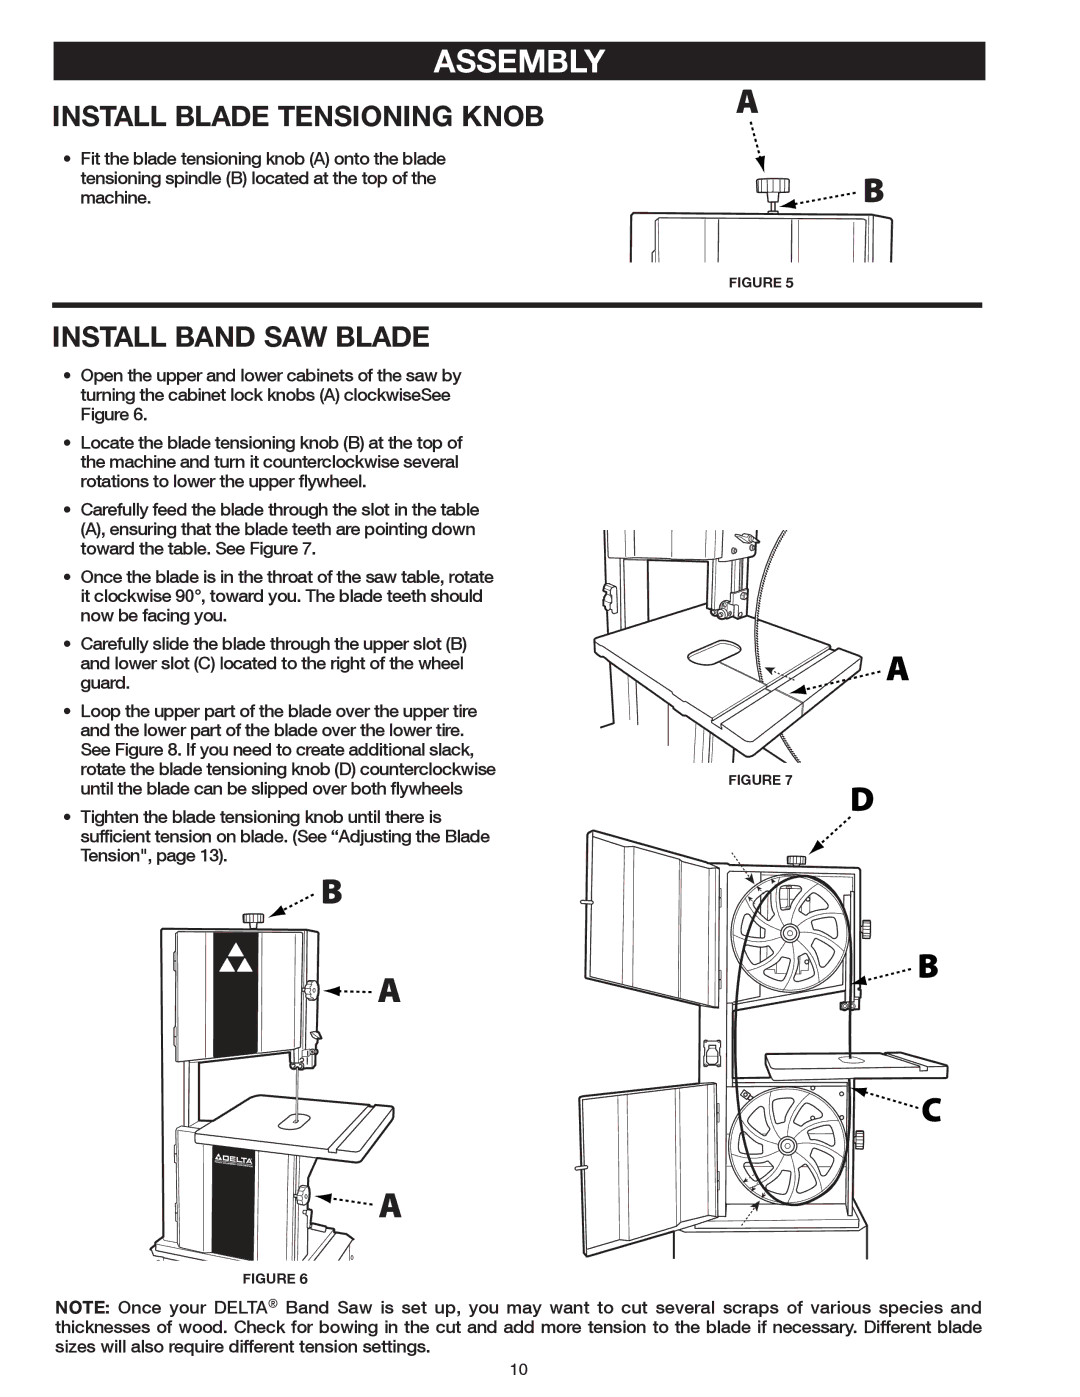
•Fit the blade tensioning knob (A) onto the blade tensioning spindle (B) located at the top of the
machine.
Figure 5
INSTALL BAND SAW BLADE
•Open the upper and lower cabinets of the saw by turning the cabinet lock knobs (A) clockwiseSee Figure 6.
•Locate the blade tensioning knob (B) at the top of the machine and turn it counterclockwise several rotations to lower the upper flywheel.
•Carefully feed the blade through the slot in the table (A), ensuring that the blade teeth are pointing down
toward the table. See Figure 7.
•Once the blade is in the throat of the saw table, rotate
it clockwise 90°, toward you. The blade teeth should now be facing you.
•Carefully slide the blade through the upper slot (B)
and lower slot (C) located to the right of the wheel guard.
• Loop the upper part of the blade over the upper tire |
| |
and the lower part of the blade over the lower tire. |
| |
See Figure 8. If you need to create additional slack, |
| |
rotate the blade tensioning knob (D) counterclockwise | Figure 7 | |
until the blade can be slipped over both flywheels | ||
|
•Tighten the blade tensioning knob until there is sufficient tension on blade. (See “Adjusting the Blade
Tension", page 13).
Figure 6
NOTE: Once your DELTA® Band Saw is set up, you may want to cut several scraps of various species and thicknesses of wood. Check for bowing in the cut and add more tension to the blade if necessary. Different blade sizes will also require different tension settings.
10