ALIGNING PULLEYS, ASSEMBLING BELT AND ADJUSTING BELT TENSION
DISCONNECT MACHINE FROM POWER SOURCE
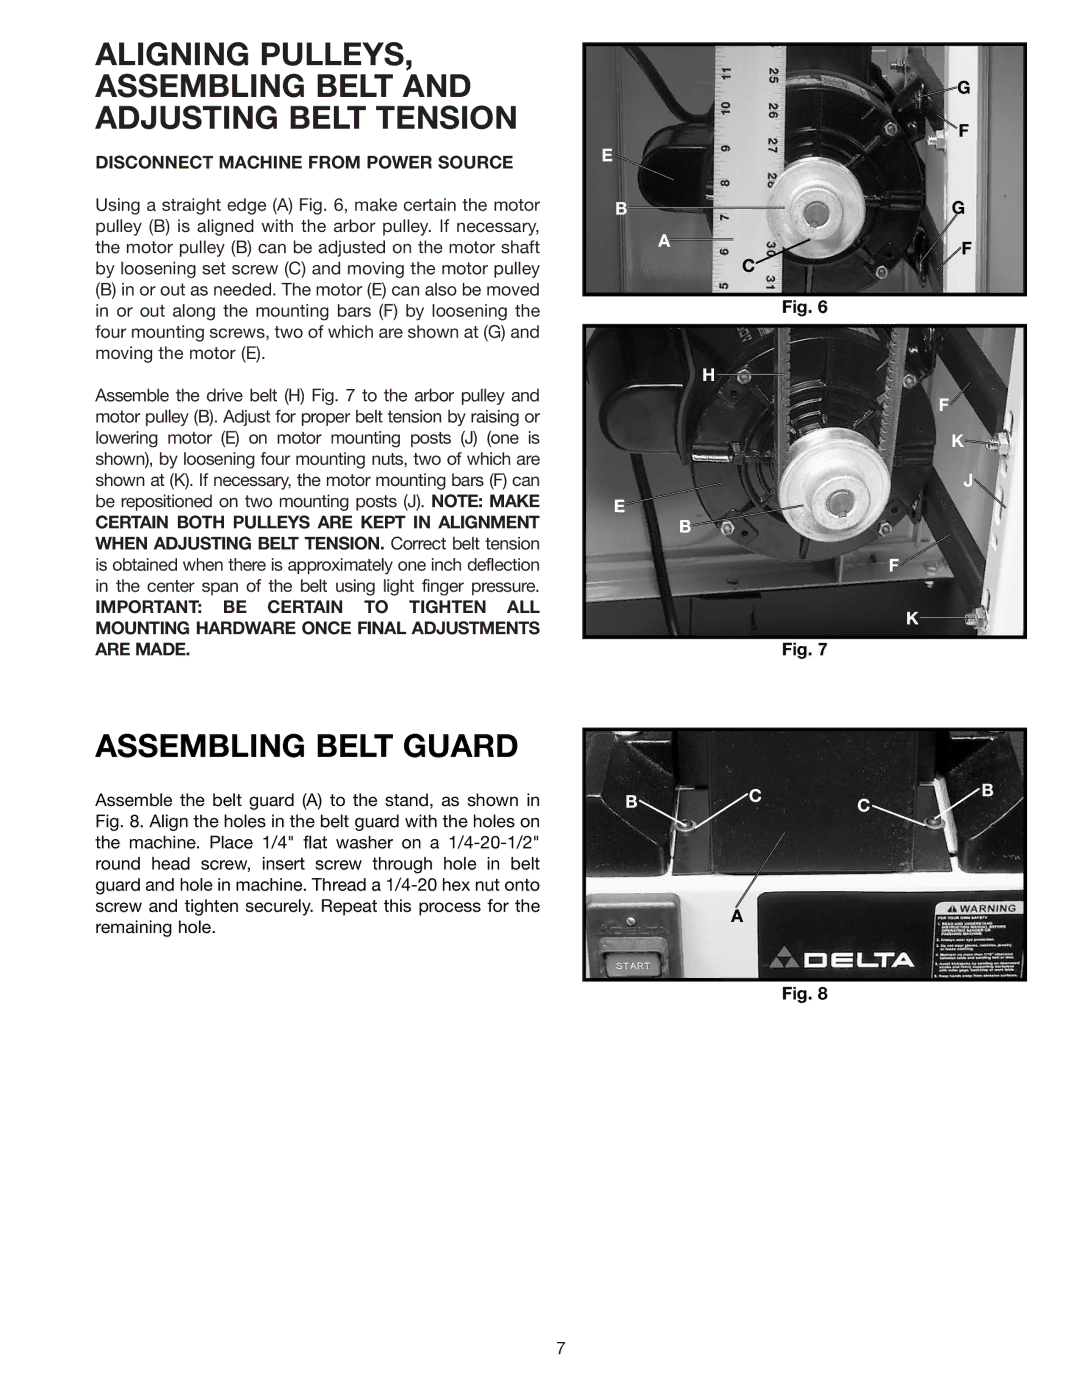
Using a straight edge (A) Fig. 6, make certain the motor pulley (B) is aligned with the arbor pulley. If necessary, the motor pulley (B) can be adjusted on the motor shaft by loosening set screw (C) and moving the motor pulley
(B)in or out as needed. The motor (E) can also be moved in or out along the mounting bars (F) by loosening the four mounting screws, two of which are shown at (G) and moving the motor (E).
Assemble the drive belt (H) Fig. 7 to the arbor pulley and motor pulley (B). Adjust for proper belt tension by raising or lowering motor (E) on motor mounting posts (J) (one is shown), by loosening four mounting nuts, two of which are shown at (K). If necessary, the motor mounting bars (F) can be repositioned on two mounting posts (J). NOTE: MAKE
CERTAIN BOTH PULLEYS ARE KEPT IN ALIGNMENT WHEN ADJUSTING BELT TENSION. Correct belt tension is obtained when there is approximately one inch deflection in the center span of the belt using light finger pressure.
IMPORTANT: BE CERTAIN TO TIGHTEN ALL MOUNTING HARDWARE ONCE FINAL ADJUSTMENTS ARE MADE.
|
| G |
|
| F |
E |
|
|
B |
| G |
| A | F |
|
| |
|
| C |
|
| Fig. 6 |
|
| H |
|
| F |
K![]()
J
E
B
F![]()
K
Fig. 7
ASSEMBLING BELT GUARD
Assemble the belt guard (A) to the stand, as shown in Fig. 8. Align the holes in the belt guard with the holes on the machine. Place 1/4" flat washer on a
B ![]() C C
C C ![]() B
B
A
Fig. 8
7