E ![]()
![]()
F
B
Fig. 22
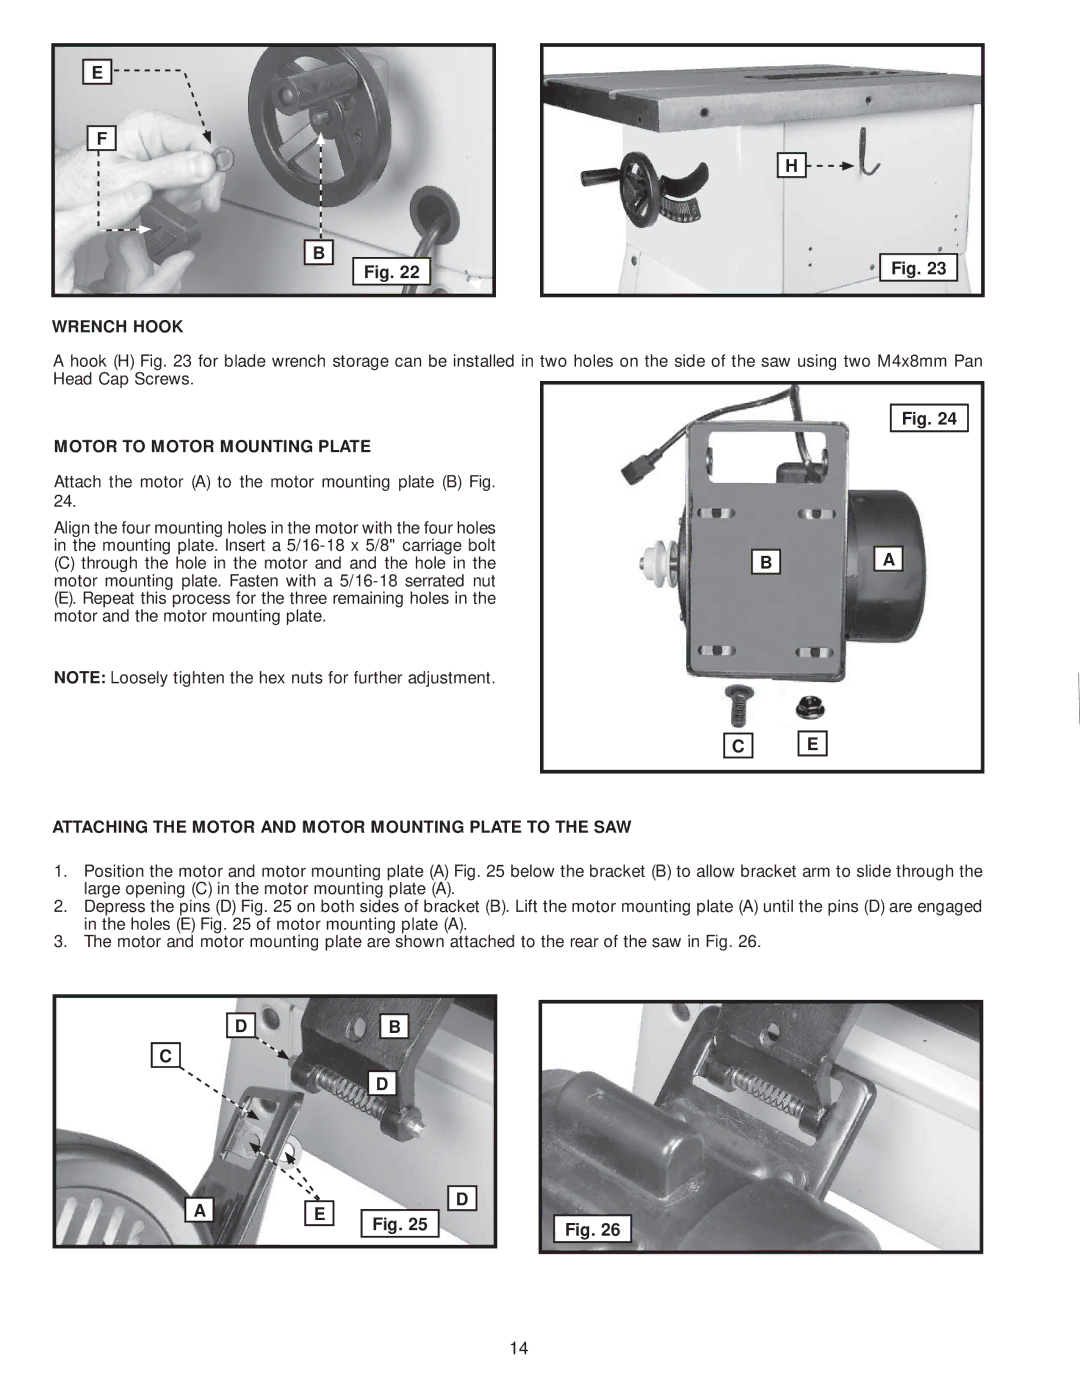
WRENCH HOOK
H ![]()
![]()
Fig. 23
A hook (H) Fig. 23 for blade wrench storage can be installed in two holes on the side of the saw using two M4x8mm Pan Head Cap Screws.
Fig. 24
MOTOR TO MOTOR MOUNTING PLATE |
|
|
|
Attach the motor (A) to the motor mounting plate (B) Fig. |
|
|
|
24. |
|
|
|
Align the four mounting holes in the motor with the four holes |
|
|
|
in the mounting plate. Insert a |
|
|
|
(C) through the hole in the motor and and the hole in the | B |
| A |
motor mounting plate. Fasten with a |
|
|
|
|
|
| |
(E). Repeat this process for the three remaining holes in the |
|
|
|
motor and the motor mounting plate. |
|
|
|
NOTE: Loosely tighten the hex nuts for further adjustment. |
|
|
|
C
E
ATTACHING THE MOTOR AND MOTOR MOUNTING PLATE TO THE SAW
1.Position the motor and motor mounting plate (A) Fig. 25 below the bracket (B) to allow bracket arm to slide through the large opening (C) in the motor mounting plate (A).
2.Depress the pins (D) Fig. 25 on both sides of bracket (B). Lift the motor mounting plate (A) until the pins (D) are engaged in the holes (E) Fig. 25 of motor mounting plate (A).
3.The motor and motor mounting plate are shown attached to the rear of the saw in Fig. 26.
D
C
B
D
A
E
D
Fig. 25
Fig. 26
14