TOOL REST POSITION
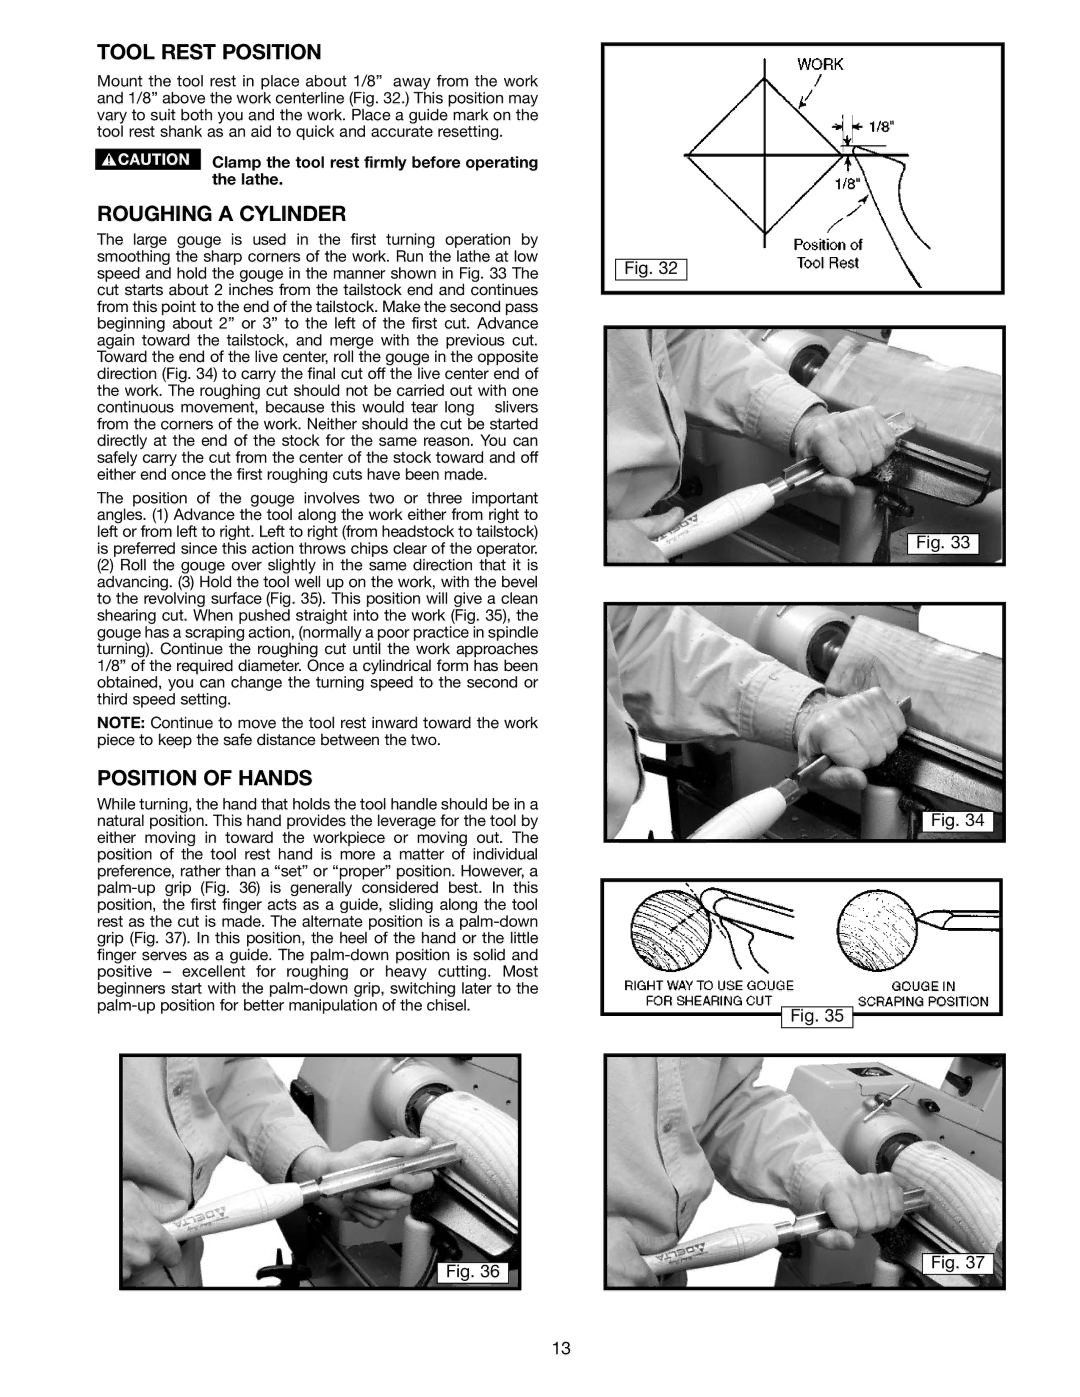
Mount the tool rest in place about 1/8” away from the work and 1/8” above the work centerline (Fig. 32.) This position may vary to suit both you and the work. Place a guide mark on the tool rest shank as an aid to quick and accurate resetting.
Clamp the tool rest firmly before operating the lathe.
ROUGHING A CYLINDER
The large gouge is used in the first turning operation by smoothing the sharp corners of the work. Run the lathe at low speed and hold the gouge in the manner shown in Fig. 33 The cut starts about 2 inches from the tailstock end and continues from this point to the end of the tailstock. Make the second pass beginning about 2” or 3” to the left of the first cut. Advance again toward the tailstock, and merge with the previous cut. Toward the end of the live center, roll the gouge in the opposite direction (Fig. 34) to carry the final cut off the live center end of the work. The roughing cut should not be carried out with one continuous movement, because this would tear long slivers from the corners of the work. Neither should the cut be started directly at the end of the stock for the same reason. You can safely carry the cut from the center of the stock toward and off either end once the first roughing cuts have been made.
The position of the gouge involves two or three important angles. (1) Advance the tool along the work either from right to left or from left to right. Left to right (from headstock to tailstock) is preferred since this action throws chips clear of the operator.
(2)Roll the gouge over slightly in the same direction that it is advancing. (3) Hold the tool well up on the work, with the bevel to the revolving surface (Fig. 35). This position will give a clean shearing cut. When pushed straight into the work (Fig. 35), the gouge has a scraping action, (normally a poor practice in spindle turning). Continue the roughing cut until the work approaches 1/8” of the required diameter. Once a cylindrical form has been obtained, you can change the turning speed to the second or third speed setting.
NOTE: Continue to move the tool rest inward toward the work piece to keep the safe distance between the two.
POSITION OF HANDS
While turning, the hand that holds the tool handle should be in a natural position. This hand provides the leverage for the tool by either moving in toward the workpiece or moving out. The position of the tool rest hand is more a matter of individual preference, rather than a “set” or “proper” position. However, a
Fig. 36
Fig. 32
Fig. 33
Fig. 34
Fig. 35
Fig. 37
13