
AVR-3300 specifications
The Denon AVR-3300 is a powerful audio/video receiver that has garnered a reputation for its rich sound quality, robust features, and impressive performance. Positioned in the mid-range of Denon's esteemed lineup, the AVR-3300 stands out for home theater enthusiasts seeking an exceptional cinematic experience.At the heart of the AVR-3300 is Denon’s commitment to high-quality audio reproduction. It supports Dolby Digital, DTS, and Pro Logic surround sound formats, providing a multi-dimensional audio experience that envelops the listener. The receiver features a 7.1 channel amplification system, delivering each channel with substantial power and clarity, making it ideal for expansive home theater setups.
One of the key technological advancements incorporated into the AVR-3300 is the implementation of Denon's Advanced AL24 processing. This technology enhances the digital signal, providing higher resolution sound and improved detail retrieval. Alongside this, the receiver is equipped with a 24-bit/192 kHz DAC that ensures sound fidelity across all audio formats, whether streaming from digital sources or playing traditional formats.
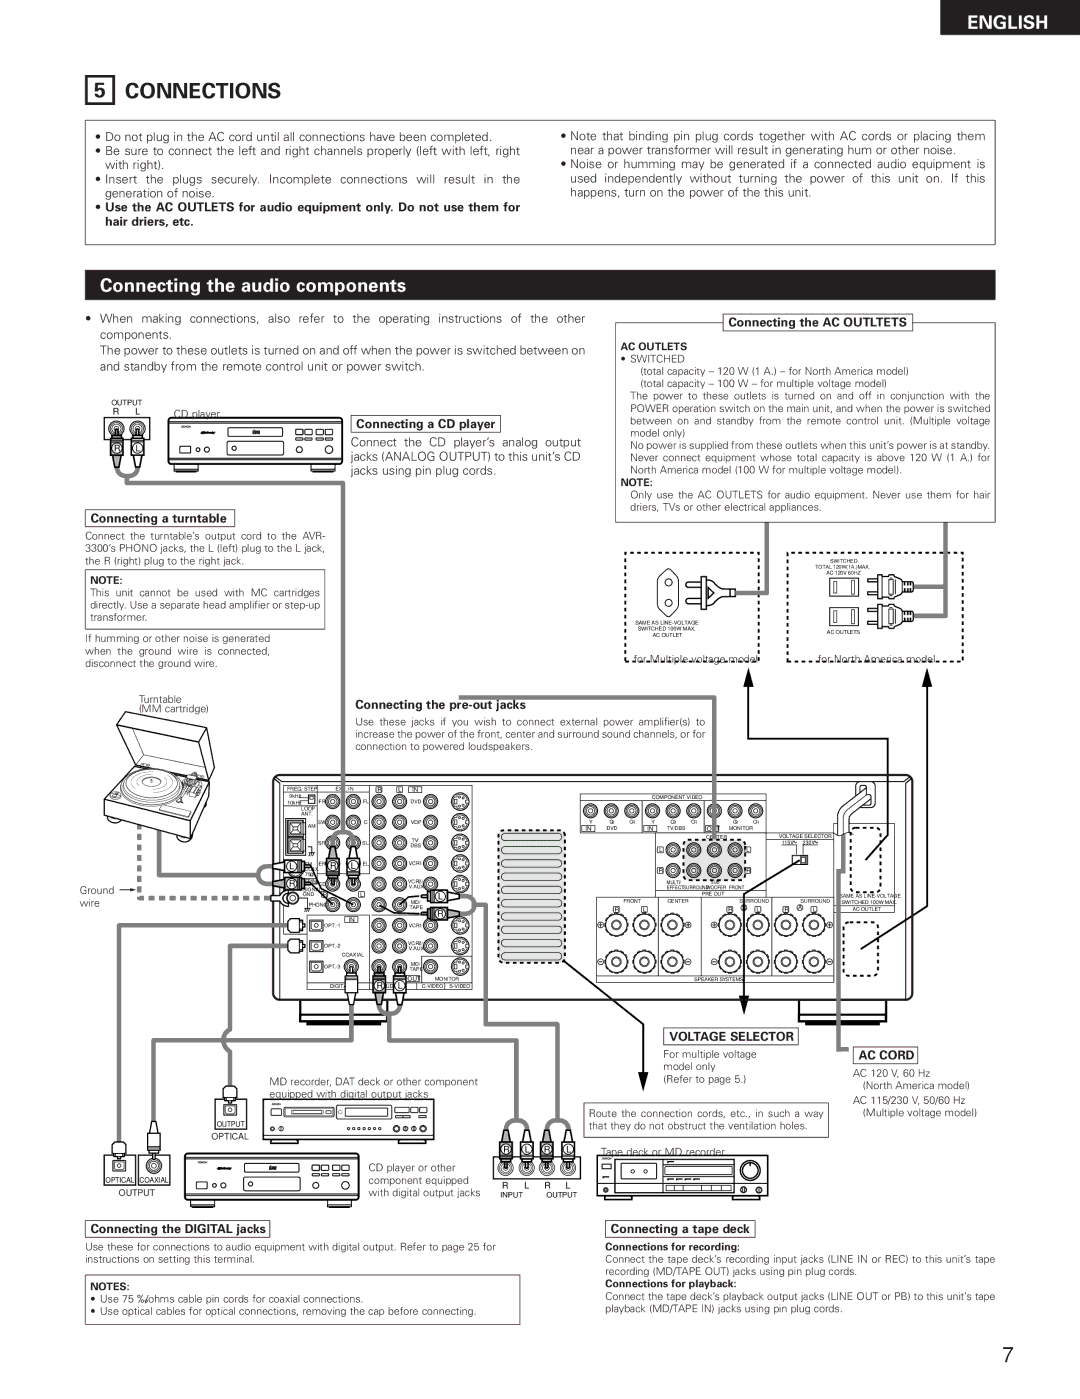
The AVR-3300 also features a variety of connection options, accommodating various devices and ensuring versatility. With multiple HDMI inputs, component video connections, and digital audio inputs, users can connect their Blu-ray players, gaming consoles, and streaming devices with ease. Additionally, the receiver includes a dedicated phono input for vinyl enthusiasts, allowing for direct connection to turntables.
An important characteristic of the AVR-3300 is its user-friendly interface and setup process. Denon has included an on-screen graphical user interface that simplifies navigation and adjustment of settings. The receiver also features Audyssey MultEQ technology, which automatically calibrates the sound environment by analyzing the room acoustics and adjusting speaker settings accordingly. This ensures optimal audio performance tailored to the specifics of the user’s space.
In terms of build quality, the Denon AVR-3300 is designed to be both durable and aesthetically pleasing. It sports a sleek front panel with a contemporary design, making it a stylish addition to any home entertainment system.
Overall, the Denon AVR-3300 offers a remarkable combination of sound quality, advanced technology, and user-friendly features. With its robust performance and versatile connectivity options, it remains a highly regarded choice for those looking to enhance their home theater experience.