ENGLISH
Connections
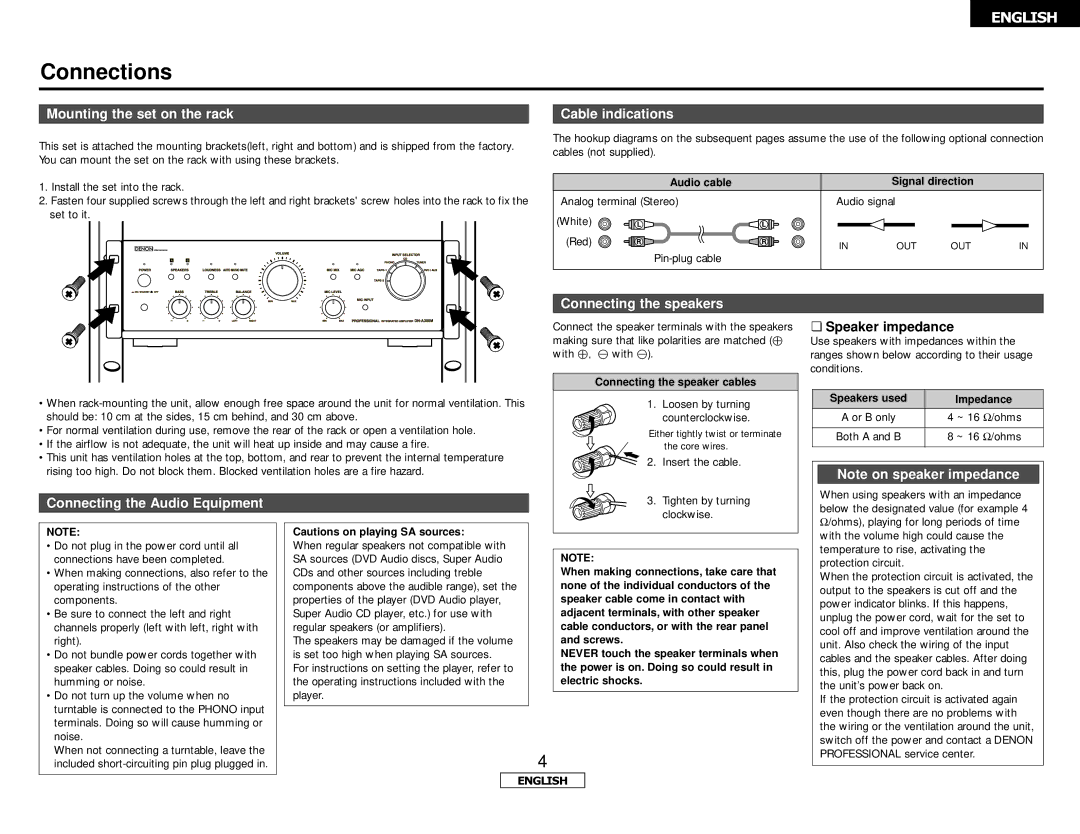
Mounting the set on the rack |
| Cable indications |
This set is attached the mounting brackets(left, right and bottom) and is shipped from the factory. You can mount the set on the rack with using these brackets.
1.Install the set into the rack.
2.Fasten four supplied screws through the left and right brackets' screw holes into the rack to fix the set to it.
The hookup diagrams on the subsequent pages assume the use of the following optional connection cables (not supplied).
Audio cable |
| Signal direction |
| |
Analog terminal (Stereo) | Audio signal |
|
| |
(White) |
|
|
|
|
(Red) | IN | OUT | OUT | IN |
| ||||
|
|
|
| |
•When
•For normal ventilation during use, remove the rear of the rack or open a ventilation hole.
•If the airflow is not adequate, the unit will heat up inside and may cause a fire.
•This unit has ventilation holes at the top, bottom, and rear to prevent the internal temperature rising too high. Do not block them. Blocked ventilation holes are a fire hazard.
Connecting the speakers
Connect the speaker terminals with the speakers making sure that like polarities are matched (
with | with ). |
|
| Connecting the speaker cables | |
| 1. | Loosen by turning |
|
| counterclockwise. |
| Either tightly twist or terminate | |
|
| the core wires. |
| 2. | Insert the cable. |
 Speaker impedance
Use speakers with impedances within the ranges shown below according to their usage conditions.
Speakers used | Impedance |
A or B only | 4 ~ 16 Ω/ohms |
|
|
Both A and B | 8 ~ 16 Ω/ohms |
|
|
Note on speaker impedance
Connecting the Audio Equipment
NOTE:
•Do not plug in the power cord until all connections have been completed.
•When making connections, also refer to the operating instructions of the other components.
•Be sure to connect the left and right channels properly (left with left, right with right).
•Do not bundle power cords together with speaker cables. Doing so could result in humming or noise.
•Do not turn up the volume when no turntable is connected to the PHONO input terminals. Doing so will cause humming or noise.
When not connecting a turntable, leave the included
Cautions on playing SA sources:
When regular speakers not compatible with SA sources (DVD Audio discs, Super Audio CDs and other sources including treble components above the audible range), set the properties of the player (DVD Audio player, Super Audio CD player, etc.) for use with regular speakers (or amplifiers).
The speakers may be damaged if the volume is set too high when playing SA sources.
For instructions on setting the player, refer to the operating instructions included with the player.
3. Tighten by turning |
clockwise. |
NOTE:
When making connections, take care that none of the individual conductors of the speaker cable come in contact with adjacent terminals, with other speaker cable conductors, or with the rear panel and screws.
NEVER touch the speaker terminals when the power is on. Doing so could result in electric shocks.
4
When using speakers with an impedance below the designated value (for example 4 Ω/ohms), playing for long periods of time with the volume high could cause the temperature to rise, activating the protection circuit.
When the protection circuit is activated, the output to the speakers is cut off and the power indicator blinks. If this happens, unplug the power cord, wait for the set to cool off and improve ventilation around the unit. Also check the wiring of the input cables and the speaker cables. After doing this, plug the power cord back in and turn the unit’s power back on.
If the protection circuit is activated again even though there are no problems with the wiring or the ventilation around the unit, switch off the power and contact a DENON PROFESSIONAL service center.
ENGLISH