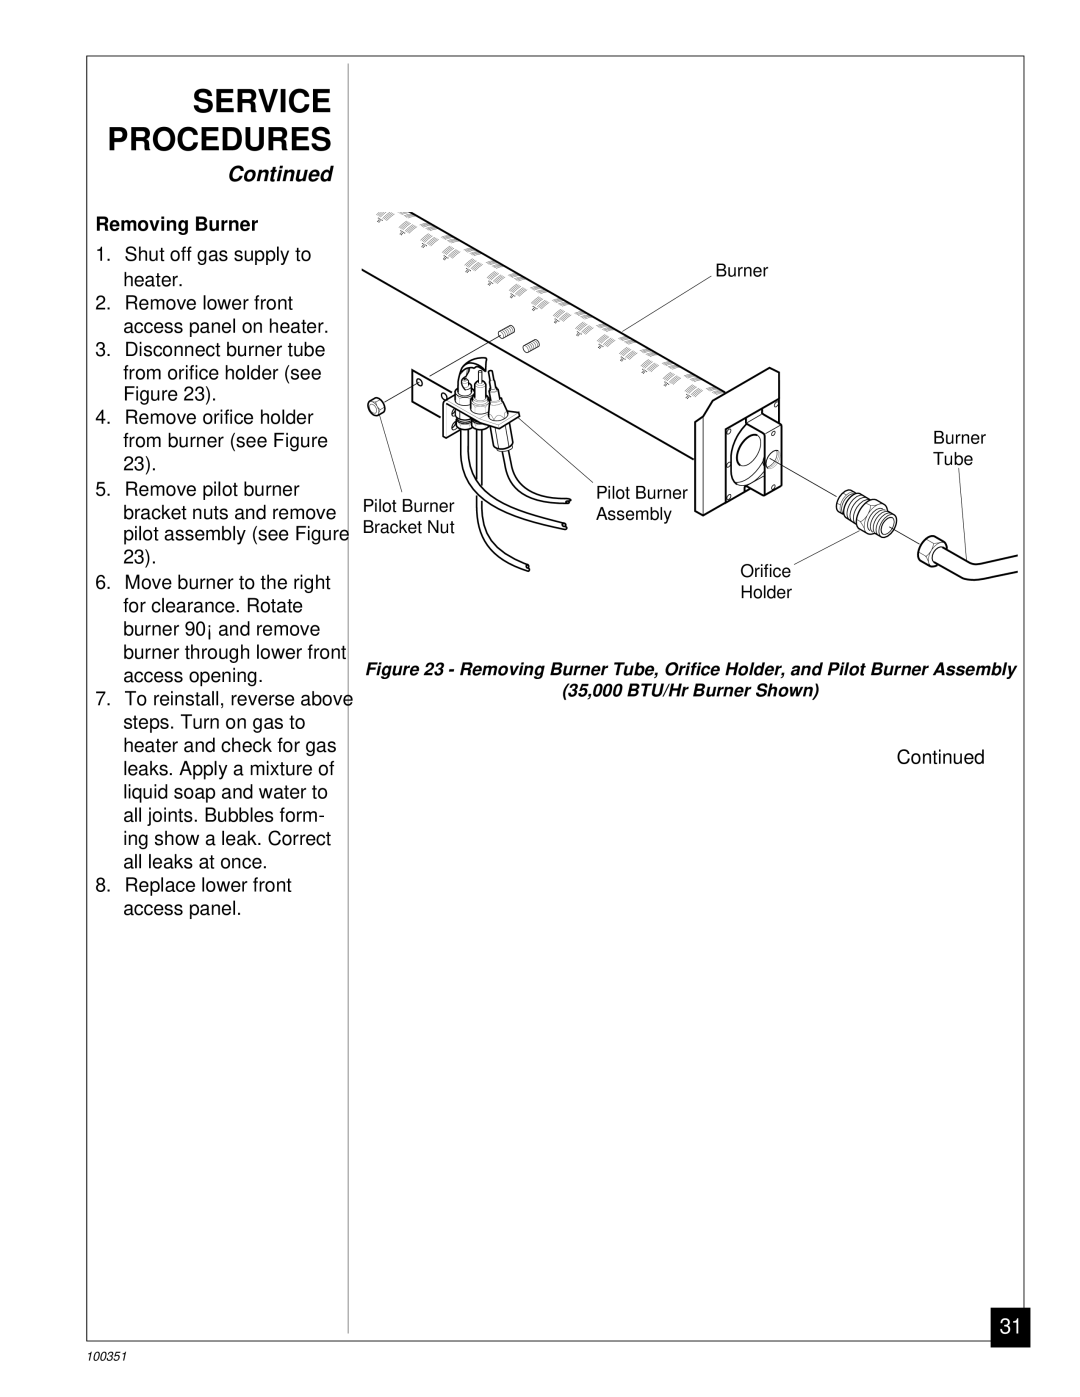
CGB50N, CGB35N specifications
Desa CGB35N and CGB50N are high-efficiency gas burners designed for various residential and commercial heating applications. These models stand out for their advanced technology, reliability, and user-friendly features.The CGB35N is a compact, wall-mounted gas burner designed for efficient space heating solutions. With a thermal output of up to 35 kW, it is ideal for smaller homes or commercial spaces that require effective heating without excessive energy consumption. The burner is equipped with a modulating output, which allows it to adjust its power based on heating demands, leading to significant energy savings and consistent comfort levels.
In contrast, the CGB50N provides a higher thermal output of 50 kW, making it suitable for larger spaces or applications requiring additional heating capacity. Both models are designed to operate quietly and efficiently, ensuring a comfortable environment while maintaining low operational noise levels.
One of the key features of both the CGB35N and CGB50N is their high-efficiency condensing technology. This technology captures and utilizes the heat from the exhaust gases that would typically be wasted in traditional heating systems, resulting in improved energy efficiency and reduced carbon emissions. The appliances boast low NOx emissions, adhering to stringent environmental regulations, making them an eco-friendly choice for conscientious consumers.
Installation and maintenance of both units are straightforward, thanks to their compact design and accessible components. They come equipped with an intelligent control system that monitors performance in real-time, ensuring optimal operation and enabling users to easily adjust settings via a digital interface. This user-centric design enhances the overall experience and allows for quick troubleshooting when necessary.
Additionally, both models support integration with smart home systems, allowing users to control heating remotely and set schedules tailored to their lifestyle. This feature not only improves convenience but also further optimizes energy usage.
In summary, the Desa CGB35N and CGB50N gas burners combine high efficiency, advanced technology, and user-friendly features to provide reliable heating solutions for diverse applications. Their outstanding performance, environmental consciousness, and smart capabilities make them ideal choices for modern heating needs.

