![]()
![]()
![]()
![]() ® EVGL850N
® EVGL850N
VENTED TYPE DECORATIVE APPLIANCE
INSTALLATION
Continued
GAS BURNER SUPPLY HOOK-UP
1.Disconnect the burner form the burner mounting flange by removing two screws (see Figure 18).
2.Disconnect the pilot from the burner by removing three screws holding the pi- lot mounting bracket (see Figure 18).
3.Rotate the back of the burner forward and lift out of the firebox. Note: Do not damage pilot and gas line.
4.Remove the bottom refractory by lift- ing and sliding out the front (see Fig- ure 19). Note: Do not kink or damage the flex line connector.
5.Remove the hearth pan with controls intact by removing two screws at ei- ther side of the pan.
6.Follow steps 1,2,3,4, and 5 in reverse order to reinstall burner assembly.
LOG & EMBER PLACEMENT
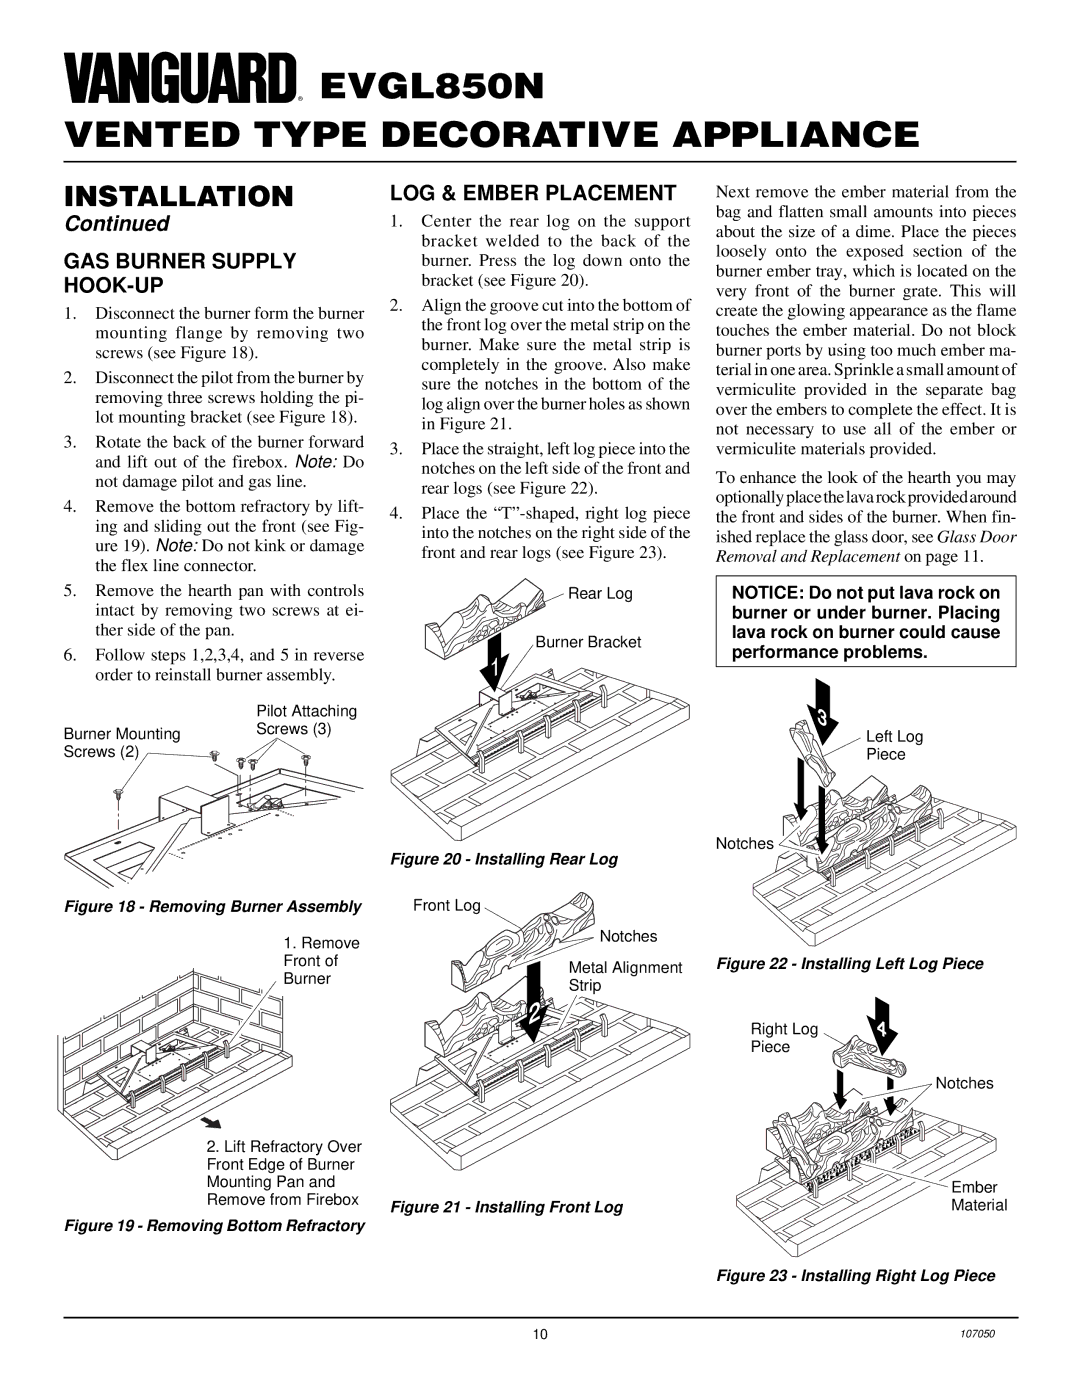
1.Center the rear log on the support bracket welded to the back of the burner. Press the log down onto the bracket (see Figure 20).
2.Align the groove cut into the bottom of the front log over the metal strip on the burner. Make sure the metal strip is completely in the groove. Also make sure the notches in the bottom of the log align over the burner holes as shown in Figure 21.
3.Place the straight, left log piece into the notches on the left side of the front and rear logs (see Figure 22).
4.Place the
Rear Log
Burner Bracket
1
Next remove the ember material from the bag and flatten small amounts into pieces about the size of a dime. Place the pieces loosely onto the exposed section of the burner ember tray, which is located on the very front of the burner grate. This will create the glowing appearance as the flame touches the ember material. Do not block burner ports by using too much ember ma- terial in one area. Sprinkle a small amount of vermiculite provided in the separate bag over the embers to complete the effect. It is not necessary to use all of the ember or vermiculite materials provided.
To enhance the look of the hearth you may optionally place the lava rock provided around the front and sides of the burner. When fin- ished replace the glass door, see Glass Door Removal and Replacement on page 11.
NOTICE: Do not put lava rock on burner or under burner. Placing lava rock on burner could cause performance problems.
Pilot Attaching
Burner Mounting Screws (3)
Screws (2)
Figure 18 - Removing Burner Assembly
1. Remove
Front of
Burner
Figure 20 - Installing Rear Log
Front Log
Notches
Metal Alignment
Strip
![]() 2
2
3
Left Log
Piece
Notches ![]()
![]()
![]()
![]()
Figure 22 - Installing Left Log Piece
Right Log | 4 |
Piece |
|
Notches
2. Lift Refractory Over |
|
Front Edge of Burner |
|
Mounting Pan and |
|
Remove from Firebox | Figure 21 - Installing Front Log |
| |
Figure 19 - Removing Bottom Refractory |
|
Ember |
Material |
Figure 23 - Installing Right Log Piece
10 | 107050 |