OWNER’S MANUAL
INSTALLATION
Continued
COMBUSTION AIR KIT MODEL AKGL (OPTIONAL)
The outside air kit may be installed on the right side of the fireplace only. The vent can be installed through the outside wall or a ventilated crawl space. The handle to oper- ate the damper door for the outside air inlet will be located behind the burner valve access door when the kit is installed (see Figure 24). Pull the handle to open or push to close.
![]() CAUTION: Air inlet ducts are not to terminate in attic space.
CAUTION: Air inlet ducts are not to terminate in attic space.
Air Kit Handle
Figure 24 - Air Kit Handle Location
APPLIANCE ENCLOSURE
Before finishing the enclosure around the appliance, inspect all joints around the outer surround. Any gaps between the nailing flanges and the framing should be sealed with noncombustible insulation or caulking.
If the appliance is mounted on a raised platform, it must be a continuous surface and not on blocks without a solid surface. This will prevent the entry of cold air by means of conduction through the total bot- tom of the appliance. (see Figure 25).
Side |
|
|
| Side | |||
Framing |
|
|
| Framing | |||
| |||||||
|
|
|
|
|
|
|
|
|
|
|
|
|
|
|
|
|
|
|
|
|
|
|
|
Caulk Here | Pack Insulation |
Figure 25 - Sealing Between Appliance and Framing
GLASS DOOR REMOVAL AND REPLACEMENT
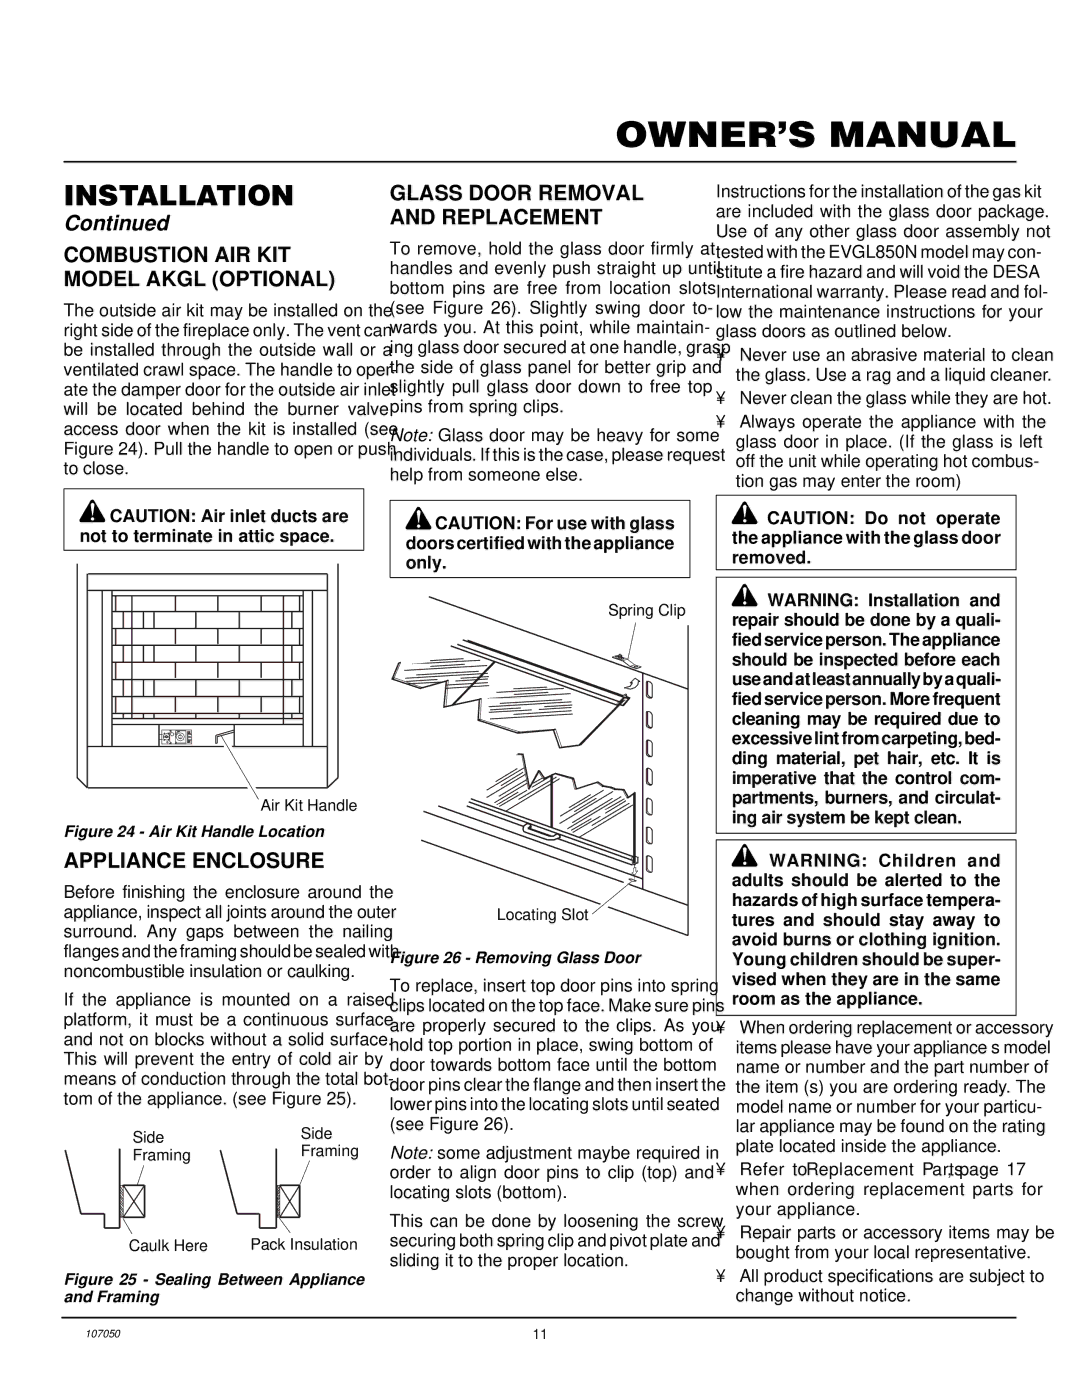
To remove, hold the glass door firmly at handles and evenly push straight up until bottom pins are free from location slots (see Figure 26). Slightly swing door to- wards you. At this point, while maintain- ing glass door secured at one handle, grasp the side of glass panel for better grip and slightly pull glass door down to free top pins from spring clips.
Note: Glass door may be heavy for some individuals. If this is the case, please request help from someone else.
![]() CAUTION: For use with glass doors certified with the appliance only.
CAUTION: For use with glass doors certified with the appliance only.
Spring Clip
Locating Slot ![]()
Figure 26 - Removing Glass Door
To replace, insert top door pins into spring clips located on the top face. Make sure pins are properly secured to the clips. As you hold top portion in place, swing bottom of door towards bottom face until the bottom door pins clear the flange and then insert the lower pins into the locating slots until seated (see Figure 26).
Note: some adjustment maybe required in order to align door pins to clip (top) and locating slots (bottom).
This can be done by loosening the screw securing both spring clip and pivot plate and sliding it to the proper location.
Instructions for the installation of the gas kit are included with the glass door package. Use of any other glass door assembly not tested with the EVGL850N model may con- stitute a fire hazard and will void the DESA International warranty. Please read and fol- low the maintenance instructions for your glass doors as outlined below.
•Never use an abrasive material to clean the glass. Use a rag and a liquid cleaner.
•Never clean the glass while they are hot.
•Always operate the appliance with the glass door in place. (If the glass is left off the unit while operating hot combus- tion gas may enter the room)
![]() CAUTION: Do not operate the appliance with the glass door removed.
CAUTION: Do not operate the appliance with the glass door removed.
![]() WARNING: Installation and repair should be done by a quali- fied service person. The appliance should be inspected before each use and at least annually by a quali- fied service person. More frequent cleaning may be required due to excessive lint from carpeting, bed- ding material, pet hair, etc. It is imperative that the control com- partments, burners, and circulat- ing air system be kept clean.
WARNING: Installation and repair should be done by a quali- fied service person. The appliance should be inspected before each use and at least annually by a quali- fied service person. More frequent cleaning may be required due to excessive lint from carpeting, bed- ding material, pet hair, etc. It is imperative that the control com- partments, burners, and circulat- ing air system be kept clean.
![]() WARNING: Children and adults should be alerted to the hazards of high surface tempera- tures and should stay away to avoid burns or clothing ignition. Young children should be super- vised when they are in the same room as the appliance.
WARNING: Children and adults should be alerted to the hazards of high surface tempera- tures and should stay away to avoid burns or clothing ignition. Young children should be super- vised when they are in the same room as the appliance.
•When ordering replacement or accessory items please have your appliance’s model name or number and the part number of the item (s) you are ordering ready. The model name or number for your particu- lar appliance may be found on the rating plate located inside the appliance.
•Refer to Replacement Parts, page 17 when ordering replacement parts for your appliance.
•Repair parts or accessory items may be bought from your local representative.
•All product specifications are subject to change without notice.
107050 | 11 |
