10
INSTALLATION
Checking Gas Connections (Cont.) Installing Rod and Screen
INSTALLATION
Continued
Pressure Testing Heater Gas Connections
1.Open equipment shutoff valve (see Figure 9, page 9).
2.Open main gas valve located on or near gas meter for natural gas or open propane.LP supply tank valve.
3.Make sure control knob of heater is in the OFF position.
4.Check all joints from equipment shutoff valve to control valve (see Figure 10 or 11). Apply noncorrosive leak detection fluid to gas joints. Bubbles forming show a leak.
5.Correct all leaks at once.
6.Light heater (see Operating Heater, page 11). Check all other internal joints for leaks.
7.Turn off heater (see To Turn Off Gas to Appliance, page 11).
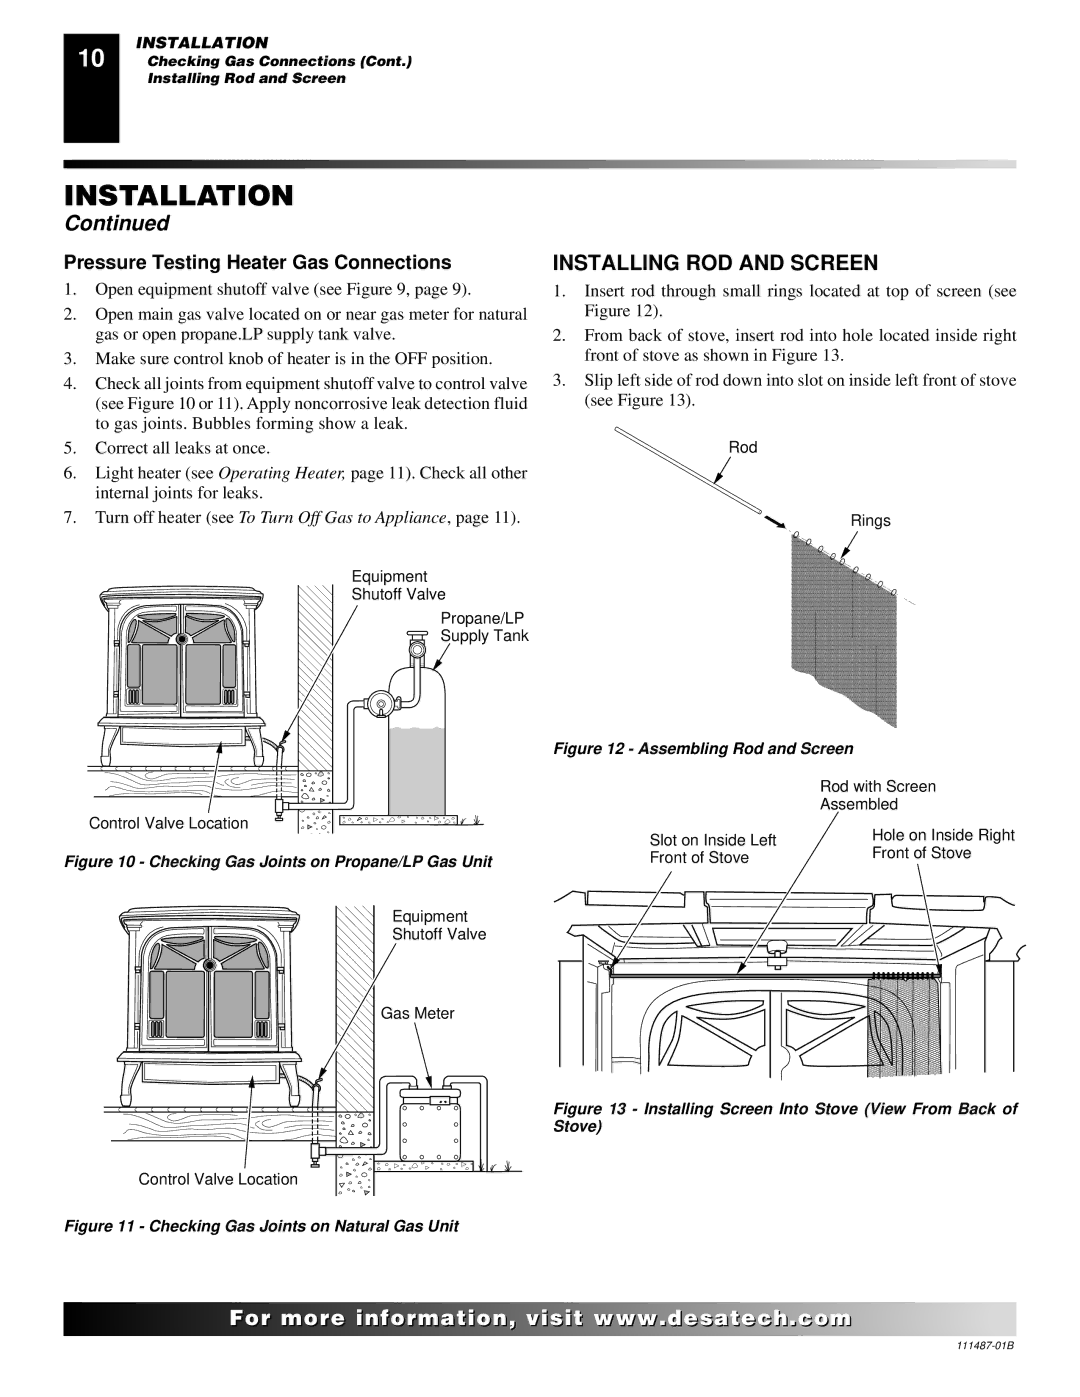
INSTALLING ROD AND SCREEN
1.Insert rod through small rings located at top of screen (see Figure 12).
2.From back of stove, insert rod into hole located inside right front of stove as shown in Figure 13.
3.Slip left side of rod down into slot on inside left front of stove (see Figure 13).
Rod
Rings
Equipment |
|
| |
Shutoff Valve |
|
| |
Propane/LP |
|
| |
Supply Tank |
|
| |
| Figure 12 - Assembling Rod and Screen | ||
|
| Rod with Screen | |
|
| Assembled | |
Control Valve Location | Slot on Inside Left | Hole on Inside Right | |
| |||
| Front of Stove | ||
Figure 10 - Checking Gas Joints on Propane/LP Gas Unit | Front of Stove | ||
| |||
Equipment |
|
| |
Shutoff Valve |
|
| |
Gas Meter |
|
| |
| Figure 13 - Installing Screen Into Stove (View From Back of | ||
| Stove) |
| |
Control Valve Location |
|
| |
Figure 11 - Checking Gas Joints on Natural Gas Unit |
|
| |
![]()
![]()
![]()
![]()
![]() For
For![]()
![]()
![]()
![]()
![]()
![]()
![]()
![]()
![]()
![]()
![]()
![]()
![]() .
.![]()
![]()
![]()
![]() .com
.com![]()
![]()
![]()
![]()
![]()