INSTALLING
Continued
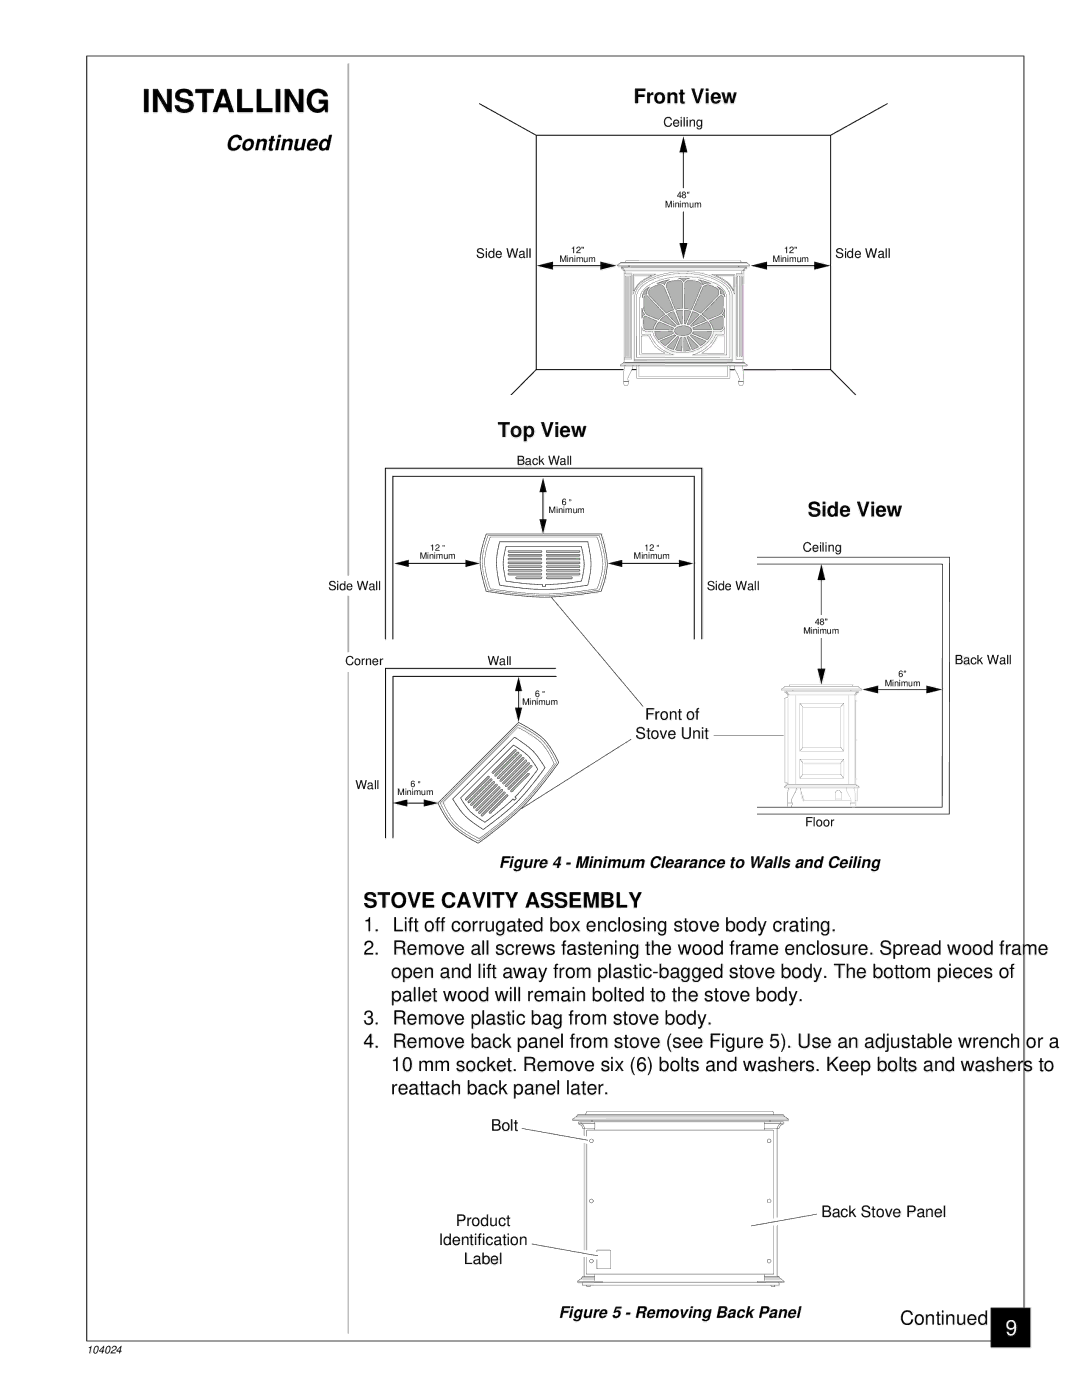
Front View
Ceiling
48"
Minimum
Side Wall | 12" |
| 12" | Side Wall | |
Minimum |
|
| Minimum | ||
|
|
| |||
Top View
Back Wall
Side Wall
Corner
| 6 " |
| Minimum |
12 " | 12 " |
Minimum | Minimum |
| Wall |
| 6 " |
| Minimum |
Side View
Ceiling
Side Wall
48"
Minimum
Back Wall
6"
Minimum
Wall
Front of
Stove Unit
6"
Minimum
Floor
Figure 4 - Minimum Clearance to Walls and Ceiling
STOVE CAVITY ASSEMBLY
1.Lift off corrugated box enclosing stove body crating.
2.Remove all screws fastening the wood frame enclosure. Spread wood frame open and lift away from
3.Remove plastic bag from stove body.
4.Remove back panel from stove (see Figure 5). Use an adjustable wrench or a 10 mm socket. Remove six (6) bolts and washers. Keep bolts and washers to reattach back panel later.
Bolt
Product
Identification
Label
![]() Back Stove Panel
Back Stove Panel
Figure 5 - Removing Back Panel | Continued |
104024
9