INSTALLING
Continued
14
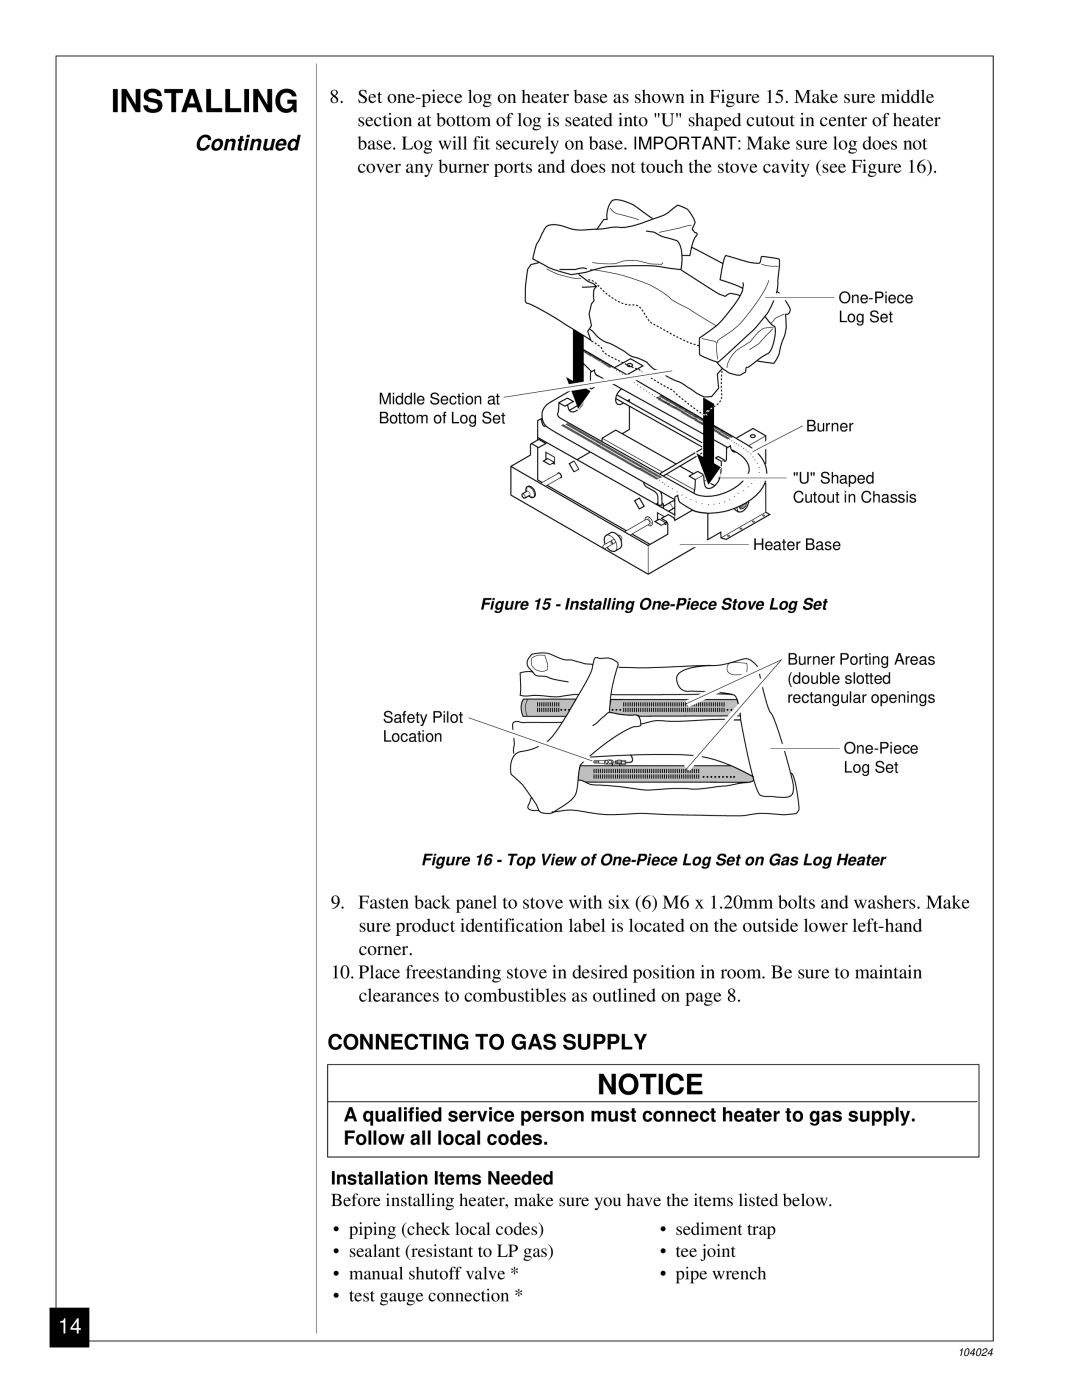
8.Set
| |
| Log Set |
Middle Section at |
|
Bottom of Log Set | Burner |
| |
| "U" Shaped |
| Cutout in Chassis |
| Heater Base |
Figure 15 - Installing One-Piece Stove Log Set
Burner Porting Areas (double slotted rectangular openings
Safety Pilot
Location
Figure 16 - Top View of One-Piece Log Set on Gas Log Heater
9.Fasten back panel to stove with six (6) M6 x 1.20mm bolts and washers. Make sure product identification label is located on the outside lower
10.Place freestanding stove in desired position in room. Be sure to maintain clearances to combustibles as outlined on page 8.
CONNECTING TO GAS SUPPLY
NOTICE
A qualified service person must connect heater to gas supply. Follow all local codes.
Installation Items Needed
Before installing heater, make sure you have the items listed below.
• | piping (check local codes) | • | sediment trap |
• | sealant (resistant to LP gas) | • | tee joint |
• | manual shutoff valve * | • | pipe wrench |
• | test gauge connection * |
|
|
104024
