Venting Installation
instructions
Continued
7.Twist-lock the vent cap onto the last section of vent pipe.
Note: If the vent pipe passes through any occupied areas above the first floor, including storage spaces and closets, you must enclose pipe. You may frame and sheetrock the enclosure with standard construction material. Make sure and meet the minimum allowable clearances to combustibles. Do not fill any of the required air spaces with insulation.
If area above is an attic or insulated area, install firestop above framed hole.
If area above is a living space, install firestop below framed hole.
Figure 20 - Installing Firestop
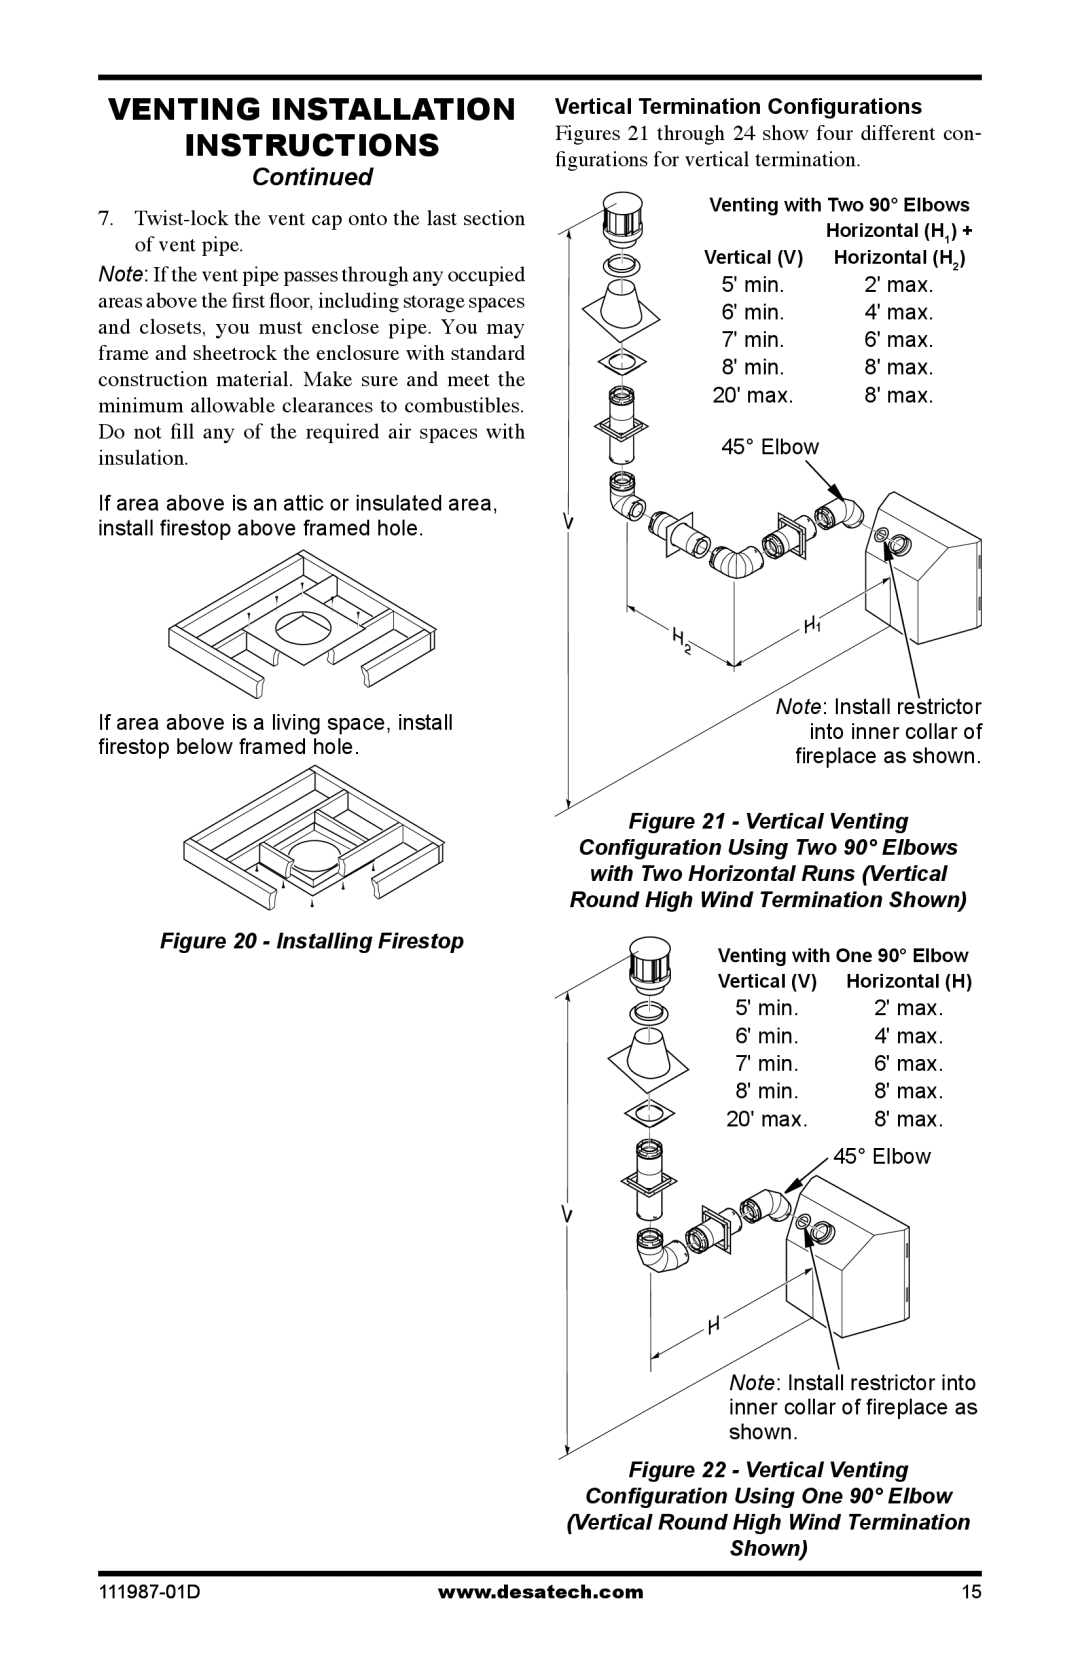
Vertical Termination Configurations Figures 21 through 24 show four different con- figurations for vertical termination.
Venting with Two 90° Elbows
Horizontal (H1) +
Vertical (V) Horizontal (H2)
5' min. | 2' max. |
6' min. | 4' max. |
7' min. | 6' max. |
8' min. | 8' max. |
20' max. | 8' max. |
45° Elbow |
|
Note: Install restrictor into inner collar of fireplace as shown.
Figure 21 - Vertical Venting
Configuration Using Two 90° Elbows
with Two Horizontal Runs (Vertical
Round High Wind Termination Shown)
Venting with One 90° Elbow
Vertical (V) | Horizontal (H) |
5' min. | 2' max. |
6' min. | 4' max. |
7' min. | 6' max. |
8' min. | 8' max. |
20' max. | 8' max. |
| 45° Elbow |
Note: Install restrictor into inner collar of fireplace as shown.
Figure 22 - Vertical Venting
Configuration Using One 90° Elbow
(Vertical Round High Wind Termination
Shown)
www.desatech.com | 15 |