| Venting Installation |
| |
| instructions | Minimum Pipe | |
| Continued | ||
| Overlap 11/4" | ||
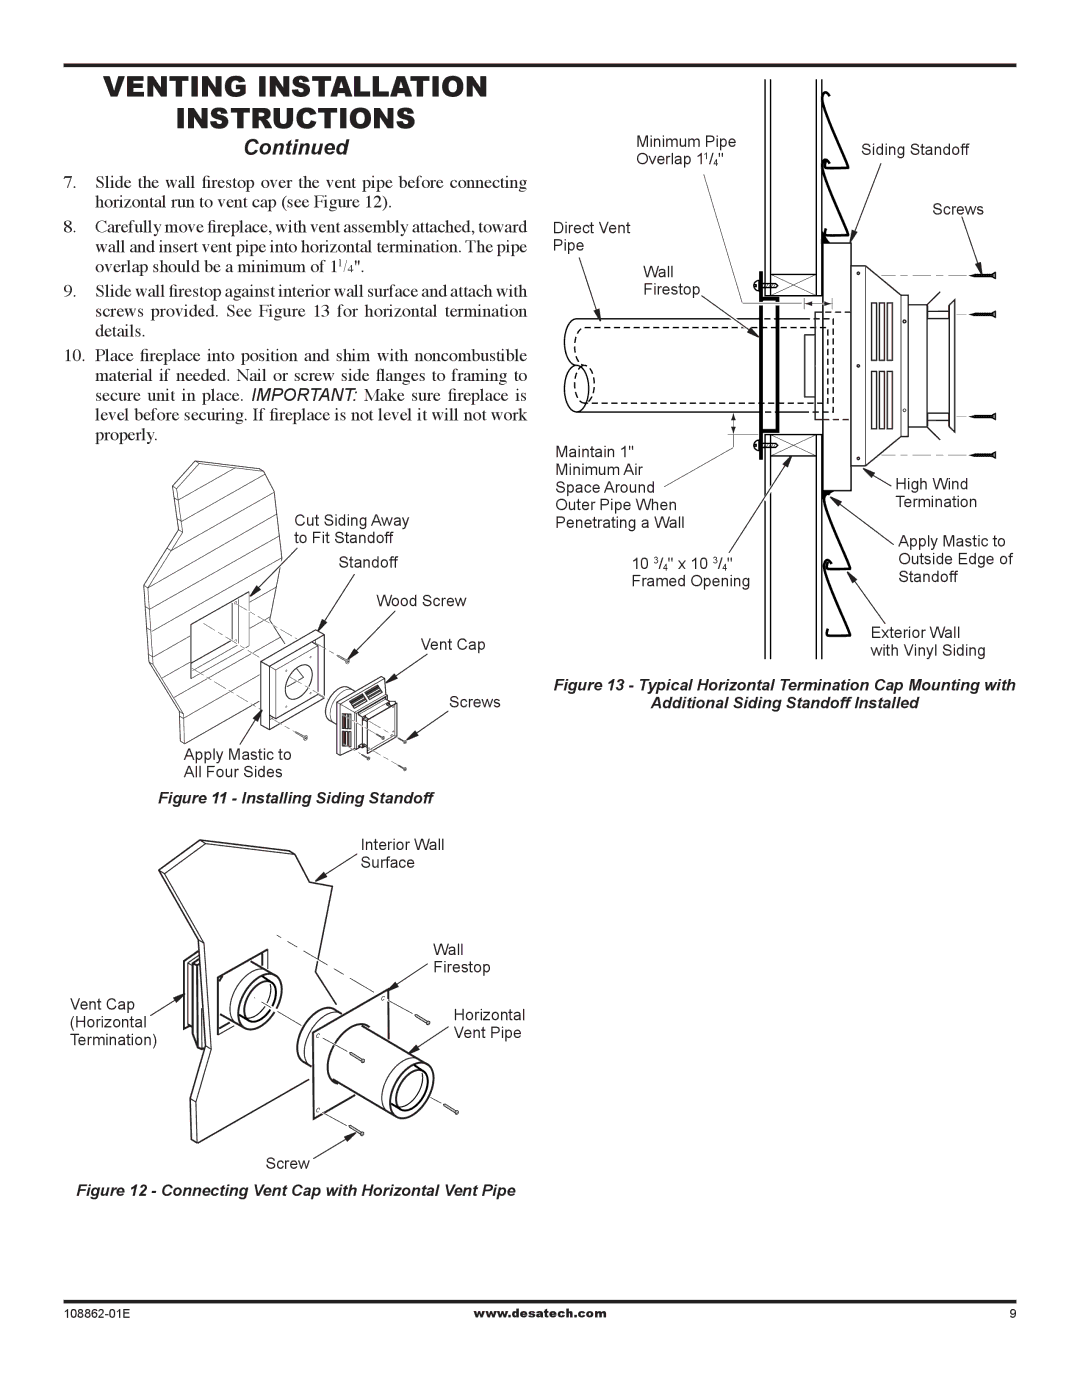
7. | Slide the wall firestop over the vent pipe before connecting | ||
| |||
| horizontal run to vent cap (see Figure 12). |
| |
8. | Carefully move fireplace, with vent assembly attached, toward | Direct Vent | |
| wall and insert vent pipe into horizontal termination. The pipe | Pipe | |
9. | overlap should be a minimum of 11/4". | Wall | |
Slide wall firestop against interior wall surface and attach with | Firestop | ||
| screws provided. See Figure 13 for horizontal termination |
| |
| details. |
| |
10. | Place fireplace into position and shim with noncombustible |
| |
| material if needed. Nail or screw side flanges to framing to |
| |
| secure unit in place. IMPORTANT: Make sure fireplace is |
| |
| level before securing. If fireplace is not level it will not work |
| |
| properly. | Maintain 1" | |
|
| ||
|
| Minimum Air | |
|
| Space Around | |
| Cut Siding Away | Outer Pipe When | |
| Penetrating a Wall | ||
| to Fit Standoff |
| |
| Standoff | 10 3/4" x 10 3/4" | |
|
| Framed Opening | |
| Wood Screw |
| |
| Vent Cap |
|
Siding Standoff
Screws
![]() High Wind
High Wind
Termination
Apply Mastic to
Outside Edge of
Standoff
Exterior Wall with Vinyl Siding
Screws | Figure 13 - Typical Horizontal Termination Cap Mounting with |
Additional Siding Standoff Installed |
Apply Mastic to
All Four Sides
Figure 11 - Installing Siding Standoff
Interior Wall
![]() Surface
Surface
Wall
![]() Firestop
Firestop
Vent Cap | Horizontal | |
(Horizontal | ||
Vent Pipe | ||
Termination) | ||
|
Screw
Figure 12 - Connecting Vent Cap with Horizontal Vent Pipe
www.desatech.com |